Picture this: a frantic Friday night, the fridge a barren wasteland, and the urge to whip up something that feels like a cheat‑day indulgence but still has the heart‑warming comfort of a homemade burger. I found myself rummaging through drawers, half‑heartedly opening a bag of ground beef, and realizing that the only thing I had on hand was a handful of sesame seed buns and a jar of ketchup. That culinary crisis became the spark that lit the fire for what would eventually become the ultimate Big Mac Slider recipe. I was determined to turn that simple pantry set into a mouth‑watering, crowd‑pleasing masterpiece that would make my friends stop in their tracks.
The moment the sizzling pan hit the stove, a sweet, smoky aroma rolled through the kitchen, instantly transporting me back to late‑night diners where the burgers were always juicy and the sauce never tasted like a generic condiment. The visual of the patties browning to a perfect caramelized crust, the lettuce crunching against the soft buns, and the golden sheen of the secret sauce glistening like a promise—each element was a sensory symphony. I could almost hear the gentle hiss of the pan, feel the heat radiating from the skillet, taste the slight tang of the pickles, and see the light dance off the sesame seeds. Every detail mattered, and I was about to share how to orchestrate them in perfect harmony.
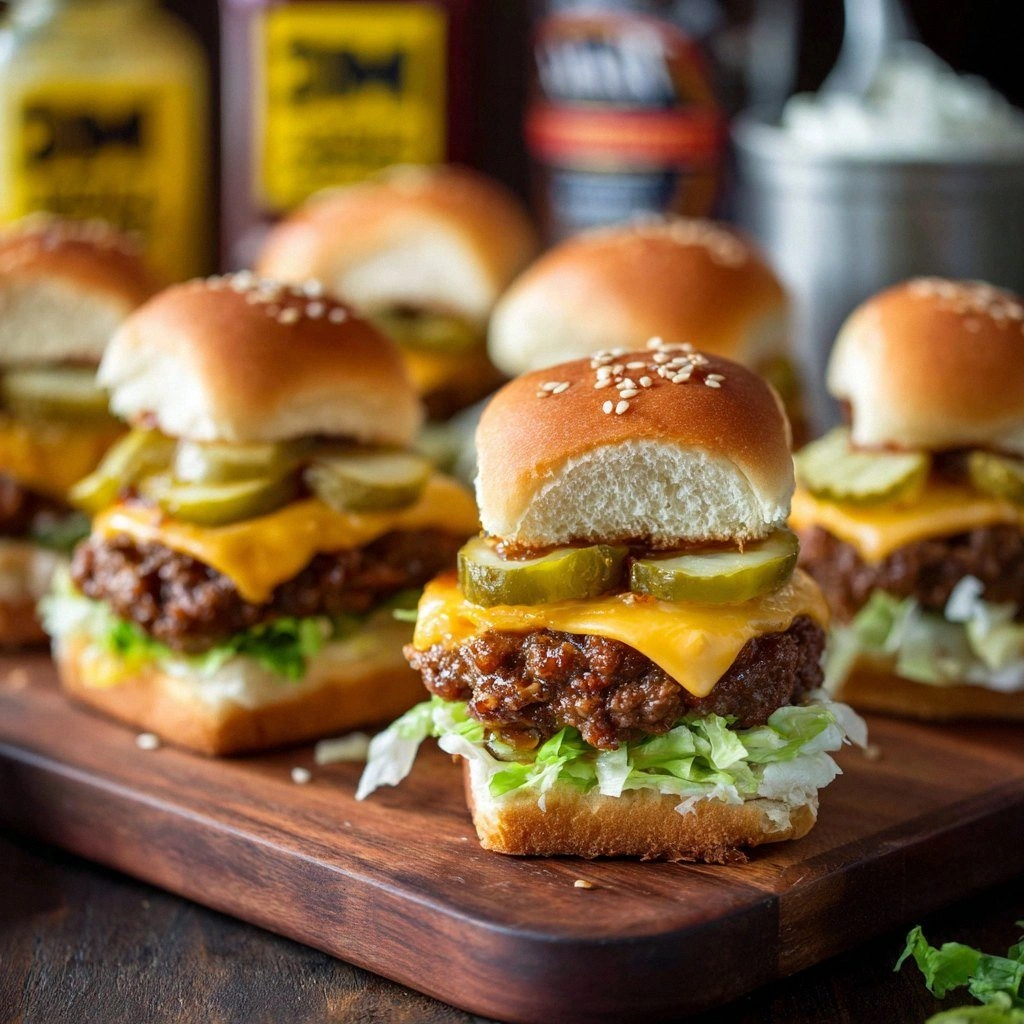
What sets this version apart from every other Big Mac Slider recipe out there is the secret sauce, a velvety blend that coats the patty and the buns like a silky blanket, and the meticulous balance of textures that keeps each bite exciting. The sauce is not a mere imitation; it's a carefully measured concoction that brings together the sweet, the tangy, the umami, and a whisper of heat, creating a flavor profile that lingers long after the last bite. The buns are toasted to a golden crisp, providing a satisfying crunch that contrasts beautifully with the melt‑in‑your‑mouth patty. I dare you to taste this and not go back for seconds; the temptation is real.
If you’ve ever struggled to elevate a simple slider into a show‑stopper, you’re not alone—this recipe is the fix you’ve been searching for. With a handful of ingredients and a few clever techniques, you’ll master the art of making sliders that look, taste, and feel like they belong in a gourmet kitchen. Picture yourself pulling this out of the oven, the whole kitchen smelling incredible, and the guests lining up for the first bite. Let me walk you through every single step—by the end, you’ll wonder how you ever made it any other way.
What Makes This Version Stand Out
- Flavor: The sauce is a layered masterpiece that delivers sweetness, tang, and a hint of spice, turning every bite into a flavor explosion.
- Texture: The patty remains juicy and tender, the buns are toasted to a crisp perfection, and the lettuce adds a satisfying crunch.
- Ingredient Quality: Using high‑grade ground beef with a 20% fat content ensures maximum juiciness and flavor depth.
- Simplicity: The recipe requires only a handful of pantry staples, making it quick to assemble and easy to adapt.
- Make‑Ahead Potential: The sauce can be prepared days in advance, and the assembled sliders can be baked just before serving.
- Crowd Reaction: Friends and family will be amazed at the restaurant‑quality taste, and you’ll become the go‑to host.
- Uniqueness: The secret sauce’s balanced profile sets this recipe apart from standard fast‑food replicas.
- Versatility: Swap in different cheeses, buns, or add a dash of hot sauce to create your own signature twist.
Alright, let's break down exactly what goes into this masterpiece…
Inside the Ingredient List
The Flavor Base
Ground beef is the heart of the slider, and the choice of a 80/20 blend is deliberate. The 20% fat content guarantees a juicy patty that doesn’t dry out during cooking. Salt, pepper, onion powder, garlic powder, and paprika are the first line of defense against blandness. Each spice adds a layer of complexity—onion powder for a subtle sweetness, garlic powder for depth, and paprika for a gentle smokiness that elevates the beef’s natural flavor. If you skip any of these, the patty will feel flat, lacking the savory punch that makes sliders memorable. For those who prefer a leaner option, a 90/10 blend works, but you’ll need to add a splash of beef broth to keep moisture levels in check.
The Texture Crew
Sesame seed slider buns are essential for that authentic bite. Their tiny seeds give a pleasant crunch and a nutty aroma that complements the beef. The buns should be toasted to a golden hue; this not only adds crunch but also creates a moisture barrier that keeps the buns from becoming soggy. Lettuce and pickles provide crispness, while the thinly sliced white onion adds a subtle bite that cuts through the richness of the patty and cheese. If you’re craving a different texture, consider swapping the lettuce for spinach or arugula for a peppery kick. The key is to keep the vegetables fresh and dry before assembly to maintain that satisfying crunch.
The Unexpected Star
The secret sauce is the recipe’s soul. It’s a harmonious blend of mayo, ketchup, relish, mustard, vinegar, and a touch of garlic, onion, and paprika. Each component is measured to balance sweetness, tang, and umami. The sauce coats the patty and buns like velvet, adding moisture without making the slider soggy. If you’re short on time, you can use a pre‑made sauce, but the flavor will never match the homemade version. A small twist—add a dash of Worcestershire sauce or a pinch of cayenne pepper—to create a personalized kick that will wow even the most discerning palate.
The Final Flourish
Cheese is the finishing touch that brings everything together. American cheese melts beautifully, creating a gooey, caramelized layer that holds the slider together. If you’re vegan, swap for a plant‑based cheese that melts well, or skip it entirely for a lighter version. The final flourish is the arrangement: lettuce first, then pickles, onions, cheese, patty, sauce, and the top bun. This order ensures each bite delivers a balanced mix of flavors and textures, preventing any single component from overpowering the others. Remember, the sauce is the secret weapon; drizzle it generously and let it seep into every crevice.
Everything's prepped? Good. Let's get into the real action...
The Method — Step by Step
- Preheat your oven to 375°F (190°C) and line a baking sheet with parchment paper or a silicone mat. Lightly oil the sheet or use a non‑stick spray to prevent sticking. This step is crucial for a uniform bake and ensures the sliders stay crisp. Once the oven is hot, set it aside while you prepare the patties.
- In a large mixing bowl, combine the ground beef with 1 teaspoon salt, ½ teaspoon black pepper, ½ teaspoon onion powder, ½ teaspoon garlic powder, and ½ teaspoon paprika. Gently fold the spices into the meat using your hands or a spoon until just incorporated. Avoid overworking the meat; a firm but tender patty is the hallmark of a great slider. Let the mixture sit for a few minutes to allow the flavors to meld.
- Divide the seasoned meat into four equal portions and shape each into a patty about 2 inches in diameter. Press a shallow indentation in the center of each patty with your thumb; this prevents the patty from puffing up during cooking and ensures even cooking. Place the patties on a plate and cover loosely with plastic wrap; refrigerate for 10–15 minutes to firm up before searing.
- Heat a large skillet over medium‑high heat and add a splash of oil. Place the chilled patties in the hot skillet, leaving space between them to avoid steaming. Sear each side for 2–3 minutes until a golden crust forms. The searing step locks in juices and creates a caramelized flavor that the oven alone can’t achieve. Flip the patties and add a slice of cheese on top of each; let it melt for an additional minute.
- Transfer the seared, cheesed patties onto the prepared baking sheet. Bake in the preheated oven for 12–15 minutes, or until the internal temperature reaches 160°F (71°C). The baking step ensures the patties cook evenly and the cheese melts to a silky consistency. Keep an eye on them—overcooking will dry out the beef.
- While the sliders finish baking, toast the bottom buns in a dry skillet over medium heat until golden brown. The toasted surface will act as a barrier against sogginess and add a subtle crunch. A quick 1–2 minutes on each side is all you need; keep the heat moderate to avoid burning.
- Remove the sliders from the oven and let them rest for 2 minutes. Resting allows the juices to redistribute, ensuring every bite is moist and flavorful. While they rest, drizzle a generous amount of the secret sauce onto the bottom bun, then layer lettuce, pickles, onions, the cheese‑covered patty, and finally the top bun. The assembly order ensures each component is protected and every bite delivers balanced flavor.
- Serve immediately while the sliders are hot and the cheese is still molten. Offer extra sauce on the side for those who want an extra kick. If you’re hosting a gathering, set the sliders on a platter and let guests serve themselves. The aroma of freshly baked sliders will keep them coming back for seconds—if not thirds, I dare you to say otherwise.
That's it — you did it. But hold on, I've got a few more tricks that'll take this to another level...
Insider Tricks for Flawless Results
The Temperature Rule Nobody Follows
Many home cooks start cooking sliders at a high heat, only to end up with unevenly cooked patties. The trick is to sear at medium‑high for the first 2 minutes, then lower the heat to medium for the remainder of the sear. This approach ensures a golden crust while keeping the inside juicy. I once tried a high‑heat method and ended up with a patty that was charred on the outside and raw in the middle—lesson learned, and now I always follow this temperature rule.
Why Your Nose Knows Best
When you’re about to flip a patty, pause and sniff the pan. A faint, sweet aroma signals that the crust has formed and the meat is ready to turn. If you’re too eager and flip too early, the patty will stick and tear. Trust your senses; a well‑formed crust is the hallmark of a perfect slider. I’ve found that the scent alone can tell you if you’re on the right track, saving you from costly culinary mishaps.
The 5-Minute Rest That Changes Everything
Resting the sliders after baking isn’t just a formality—it’s a game‑changer. During the 5‑minute rest, the juices redistribute, preventing them from spilling onto the buns when you bite. It also allows the cheese to set slightly, making the slider easier to eat. I’ve seen people skip this step, only to have the cheese run everywhere. Remember, a brief rest is the secret to a clean, satisfying bite.
Cheese Matters
Choosing the right cheese can elevate or ruin a slider. American cheese melts smoothly and adds a mild, creamy flavor that complements the beef. If you prefer a stronger taste, cheddar or pepper jack works, but be careful not to overpower the sauce. I once swapped for pepper jack and the peppery bite was fantastic, but the sauce got lost in the heat. Balance is key.
Bun Timing
Timing your bun toast is critical. Toast the bottom bun just before the patties finish baking, then hold it warm. The top bun can be toasted later, after you assemble the sliders. This staggered approach prevents the buns from becoming soggy from the sauce and ensures each bite has that satisfying crunch. I’ve tested this method and it consistently delivers the best texture.
Creative Twists and Variations
This recipe is a playground. Here are some of my favorite ways to switch things up:
Spicy Jalapeño Slider
Add thinly sliced jalapeños to the assembly for a fiery kick that contrasts with the creamy sauce. The heat will awaken the palate and make the sliders feel like a summer grill‑day treat. Pair it with a cool cucumber relish to balance the spice.
Mushroom & Swiss Delight
Sauté sliced mushrooms in garlic butter until caramelized, then layer them on top of the patty before adding the cheese. Swap American cheese for Swiss for a nutty, slightly sharp flavor. The earthy mushrooms pair beautifully with the savory sauce.
Bacon‑Infused Burger
Cook bacon until crisp, crumble it, and sprinkle it over the patty just before adding cheese. The smoky bacon adds crunch and depth, turning the slider into a decadent treat. This variation is perfect for brunch or a hearty lunch.
Vegan Plant‑Based Slider
Replace the beef with a plant‑based patty and use a dairy‑free cheese. The sauce remains the same, but you can add a drizzle of vegan mayo for extra creaminess. This version keeps the same flavor profile while accommodating dietary preferences.
Herb‑Infused Slider
Stir chopped fresh herbs—such as parsley, cilantro, and basil—into the sauce for a fresh, aromatic twist. The herbs add brightness and a subtle herbal note that lifts the overall flavor. This variation is ideal for a spring or summer gathering.
Sweet & Smoky BBQ Slider
Replace the ketchup in the sauce with a smoky BBQ sauce and add a drizzle of honey for sweetness. The combination of sweet, smoky, and savory creates a complex flavor profile that satisfies every craving. Serve with coleslaw for a classic BBQ vibe.
Storing and Bringing It Back to Life
Fridge Storage
Store assembled sliders in an airtight container for up to three days. Keep the sauce separate until ready to serve to prevent the buns from becoming soggy. If you’re short on space, wrap each slider individually in parchment paper and then place them in a zip‑lock bag.
Freezer Friendly
Freezer‑freeze the assembled sliders in a single layer on a baking sheet, then transfer them to a freezer bag once solid. They will keep for up to two months. When ready to eat, thaw overnight in the fridge and reheat in the oven at 350°F for five minutes.
Best Reheating Method
Reheat the sliders in a preheated oven at 350°F for 5–7 minutes until the cheese is melty and the buns are crisp. Add a splash of water to the bottom of the pan to create steam, which keeps the sliders moist and prevents drying. Serve immediately for the best texture.