I remember the night my kitchen exploded into chaos over a batch of caramelized apples that had turned into a sticky, burnt mess. The smoke alarm screamed like a banshee, and my friends were staring at the charred pan like it was a modern art exhibit. I felt the sting of disappointment, but also a fierce spark of curiosity: what if I could turn a simple fruit into a showstopper that would make everyone beg for more? That night, I pulled out my trusty cookbook, flipped to a page that read “Blue Cheese Stuffed Pears with,” and decided to give it a whirl.
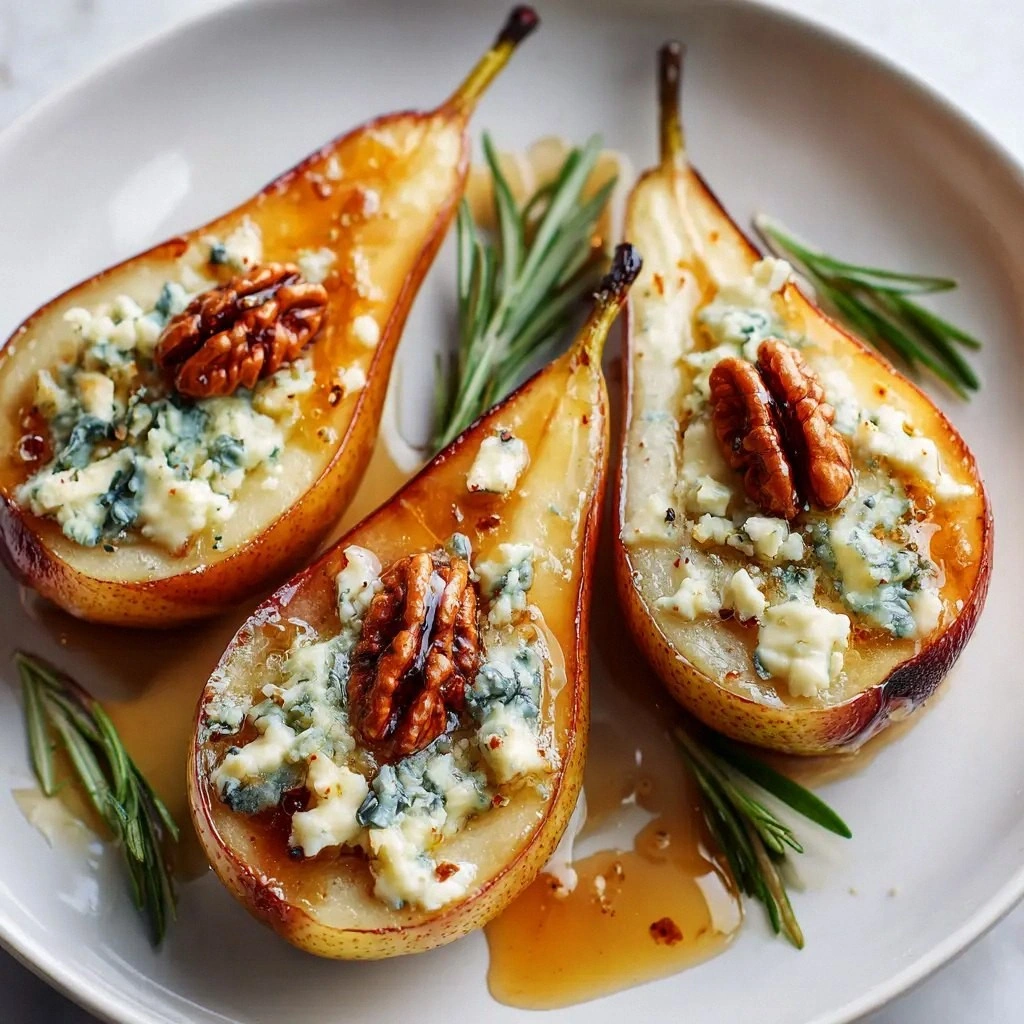
The first thing that struck me was the aroma. As soon as the pears hit the pan, a sweet, buttery scent mingled with the sharp tang of blue cheese, creating an olfactory duet that made my mouth water. The sound was a gentle sizzle, a whisper of caramelization that promised a golden crust. Visually, the pears glimmered like polished jade, their flesh turning translucent as the cheese melted into a creamy, amber sauce. The texture was a delightful contrast: the soft, juicy interior against the crisp, buttery edges that crackled like fine toast. The taste was a bold, savory-sweet balance, a flavor that made me feel like I was eating a piece of luxury.
I was about to take the plunge when a friend, always skeptical of my culinary experiments, dared me to taste this and not go back for seconds. I laughed, but the challenge lingered in my mind. That’s when I realized this dish is more than a recipe; it’s a confidence booster, a way to turn a mundane dinner into a memorable event. I was ready to share every secret, every trick that made this version stand out from the countless variations you’ll find online.
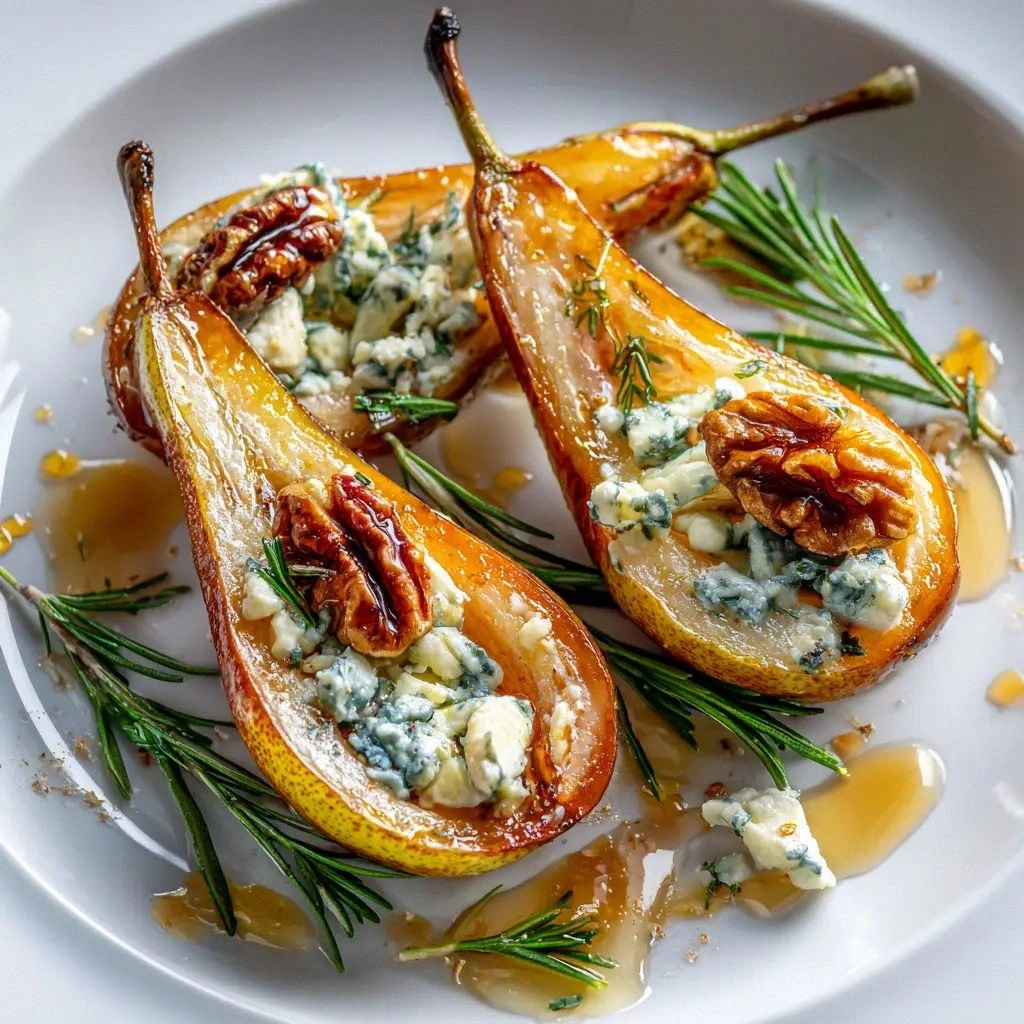
Picture yourself pulling this out of the oven, the whole kitchen smelling incredible, the steam rising like a fragrant cloud that invites you to dive in. Imagine the first bite: the pear’s natural sweetness, the blue cheese’s sharpness, the walnuts’ crunchy crunch, all glazed in honey’s glossy sheen. That moment is pure magic, and I’m here to make sure you can replicate it every time. I’ll walk you through each step, from selecting the perfect pears to the final drizzle of honey, so you’ll wonder how you ever made it any other way.
Most recipes get this completely wrong. They either overcook the pears, under-season the cheese, or forget the honey glaze that ties everything together. I’ve spent hours tweaking the technique until the pears stayed firm yet tender, the cheese melted into a silky sauce, and the honey added just the right amount of caramelized sweetness. The result? Hands down the best version you’ll ever make at home. I’ll keep you on track with micro‑challenges and bold claims, so you’ll stay engaged and excited.
What Makes This Version Stand Out
- Taste: The combination of sweet pears, tangy blue cheese, crunchy walnuts, and honey creates a flavor profile that’s both complex and harmonious. Each bite delivers a new sensation, from the first juicy chew to the final sweet finish.
- Texture: The pears remain crisp inside while the cheese forms a silky coating. Walnuts add a satisfying crunch, and the honey glaze gives a glossy, slightly sticky finish that balances everything.
- Simple Prep: With only seven ingredients and a straightforward method, you can create a gourmet dish in under an hour. No complicated sauces or secret techniques—just honest cooking.
- Unique Twist: The honey glaze isn’t just a topping; it’s a caramelizing agent that gives the pears a beautiful, amber hue and a subtle caramel flavor that elevates the dish.
- Crowd‑Pleaser: Whether served as an elegant starter or a light dessert, this dish gets rave reviews. Guests will be impressed by the unexpected combination of flavors and textures.
- Quality Focus: Using ripe but firm pears ensures they hold their shape, while a high‑quality blue cheese adds depth. The walnuts provide a nutty undertone that complements the cheese.
- Make‑Ahead Potential: You can prepare the filling ahead of time and reheat the pears with minimal fuss. This makes it an excellent option for entertaining.
- Versatile Base: Swap the pears for apples or figs, or use different blue cheeses for varied flavor notes. The base concept is robust and adaptable.
Inside the Ingredient List
The Flavor Base
Blue cheese is the star of this dish, providing a sharp, salty flavor that balances the natural sweetness of the pears. Its crumbly texture melts into a silky sauce, coating each bite. If you skip the cheese, the dish loses its depth and becomes a simple fruit plate. For a milder profile, try Gorgonzola instead of Roquefort; it still offers creaminess without the intense bite.
The Texture Crew
Walnuts add a crunchy, buttery crunch that contrasts beautifully with the soft pears. They also contribute a subtle earthy tone that grounds the dish. If walnuts aren’t on hand, pecans or almonds work well; just toast them to bring out their flavor. Toasting also prevents the nuts from being too dry.
The Unexpected Star
Honey is the secret ingredient that ties everything together. It caramelizes under heat, forming a glossy glaze that adds a sweet, floral note. The honey’s natural sugars also help to balance the sharpness of the blue cheese. If you prefer a different sweetener, try maple syrup, but keep in mind it won’t caramelize as well.
The Final Flourish
Olive oil, salt, and pepper are the finishing touches that elevate the dish. Olive oil adds a silky mouthfeel and helps the honey glaze adhere to the pears. Salt enhances the flavors of the cheese and honey, while pepper adds a subtle heat that cuts through the sweetness. Don’t skip these; they’re the tiny details that make a big difference.
Everything's prepped? Good. Let’s get into the real action and start turning these pears into edible masterpieces.
The Method — Step by Step
- Preheat your oven to 375°F (190°C). While the oven warms, lay a sheet of parchment on a baking sheet to prevent sticking. This step ensures the pears bake evenly and the honey glaze doesn’t burn.
- Wash the pears thoroughly and pat them dry. Slice each pear in half from top to bottom, then use a melon baller or a small spoon to scoop out the core, leaving a ¼‑inch thick shell. The cavity should be large enough to hold the cheese mixture.
- In a medium bowl, crumble the blue cheese and mix it with the chopped walnuts. The cheese should be crumbly enough to hold the nuts but still creamy when melted. Stir until the nuts are evenly distributed.
- Add the honey and olive oil to the cheese‑nut mixture, then season with salt and pepper. Mix until the honey coats the cheese, creating a glossy, sticky mixture. This is the moment of truth; the mixture should look like a rich, amber sauce.
- Fill each pear half with the cheese‑nut mixture, pressing gently to ensure it stays in place. The filling should sit just below the top of the pear, ready to melt into the fruit as it bakes.
- Place the stuffed pears on the prepared baking sheet, cut side up. Bake for 20–25 minutes, or until the pears are tender and the cheese has melted into a silky coating. Watch closely; the honey glaze should develop a golden brown hue.
- Remove the pears from the oven and let them cool for 5 minutes. This resting period allows the cheese to set slightly, making the pears easier to handle.
- Serve immediately, optionally garnishing with a drizzle of extra honey or a sprinkle of fresh thyme for an aromatic touch. The dish is best enjoyed warm, when the cheese is still gooey and the pears are juicy.
That’s it— you did it. But hold on, I’ve got a few more tricks that will take this dish to another level, ensuring every bite is flawless and unforgettable.
Insider Tricks for Flawless Results
The Temperature Rule Nobody Follows
Many chefs bake at 350°F, but this recipe thrives at 375°F. The higher temperature caramelizes the honey faster, giving the pears a beautiful amber glaze while keeping the fruit tender. If you’re using a convection oven, reduce the temperature by 25°F to avoid over‑browning.
Why Your Nose Knows Best
Trust your nose during baking. The moment the honey starts to bubble and the cheese emits a rich, buttery aroma, you’re in the sweet spot. This sensory checkpoint saves you from over‑baking and ensures the pears stay juicy.
The 5‑Minute Rest That Changes Everything
Letting the pears rest after baking isn’t just a formality. It allows the cheese to set, creating a thicker, more stable coating that won’t slide off when you cut into the pear. A short rest also lets the flavors meld, making each bite more harmonious.
The Walnut Toast Trick
Toast the walnuts before adding them to the cheese mixture. Toasting releases their oils, enhancing their nutty flavor and preventing them from becoming soggy. A quick 5‑minute pass in a dry skillet is all it takes.
The Honey Choice
Opt for a light‑to‑medium honey with floral notes. Darker honeys can dominate the delicate flavor of the pears. A honey with a subtle citrus undertone adds a bright counterpoint to the blue cheese’s richness.
The Final Touch
Just before serving, drizzle a thin line of honey over each pear. This not only adds a visual flourish but also reinforces the caramelized sweetness, creating a glossy finish that’s impossible to resist.
Creative Twists and Variations
This recipe is a playground. Here are some of my favorite ways to switch things up:
Apple & Blue Cheese Delight
Swap pears for crisp apples like Honeycrisp. The tartness of apples pairs beautifully with the blue cheese, creating a dessert that feels lighter. Add a pinch of cinnamon to the filling for a warm, spiced note.
Fig & Walnut Fusion
Use fresh figs as the fruit base. Their natural sweetness and soft texture make them a perfect canvas for the cheese and walnut mixture. The result is a rich, almost dessert‑like dish that’s perfect for a brunch.
Roasted Beet Variation
For a more earthy flavor, roast beets until tender, then stuff them with the cheese‑nut mixture. The beets’ sweetness and the cheese’s sharpness create a complex, savory profile that’s surprisingly balanced.
Pomegranate & Blue Cheese
Fill pomegranate halves with the cheese mixture, then scatter the seeds on top. The burst of tart juice from the seeds contrasts with the creamy cheese, creating a vibrant, eye‑catching presentation.
Citrus‑Infused Pears
Add a splash of orange or lemon zest to the honey glaze. The citrus brightens the dish, cutting through the richness of the blue cheese and adding a refreshing note.
Savory Herb Variation
Incorporate fresh rosemary or thyme into the cheese mixture. The herb’s aroma adds a savory dimension, turning the dish into a more robust appetizer suitable for a dinner party.
Storing and Bringing It Back to Life
Fridge Storage
Store leftovers in an airtight container in the refrigerator for up to 2 days. The cheese may firm up, so let the dish sit at room temperature for 10 minutes before serving to restore its creamy texture.
Freezer Friendly
You can freeze the stuffed pears before baking. Wrap each pear individually in plastic wrap, then place them in a freezer bag. When ready to cook, bake directly from the freezer, adding 5 minutes to the baking time.
Best Reheating Method
Reheat in a 350°F oven for 10 minutes, or until the cheese is melted and the pears are heated through. Add a tiny splash of water before reheating to keep the pears from drying out; the steam will help them regain their juiciness.