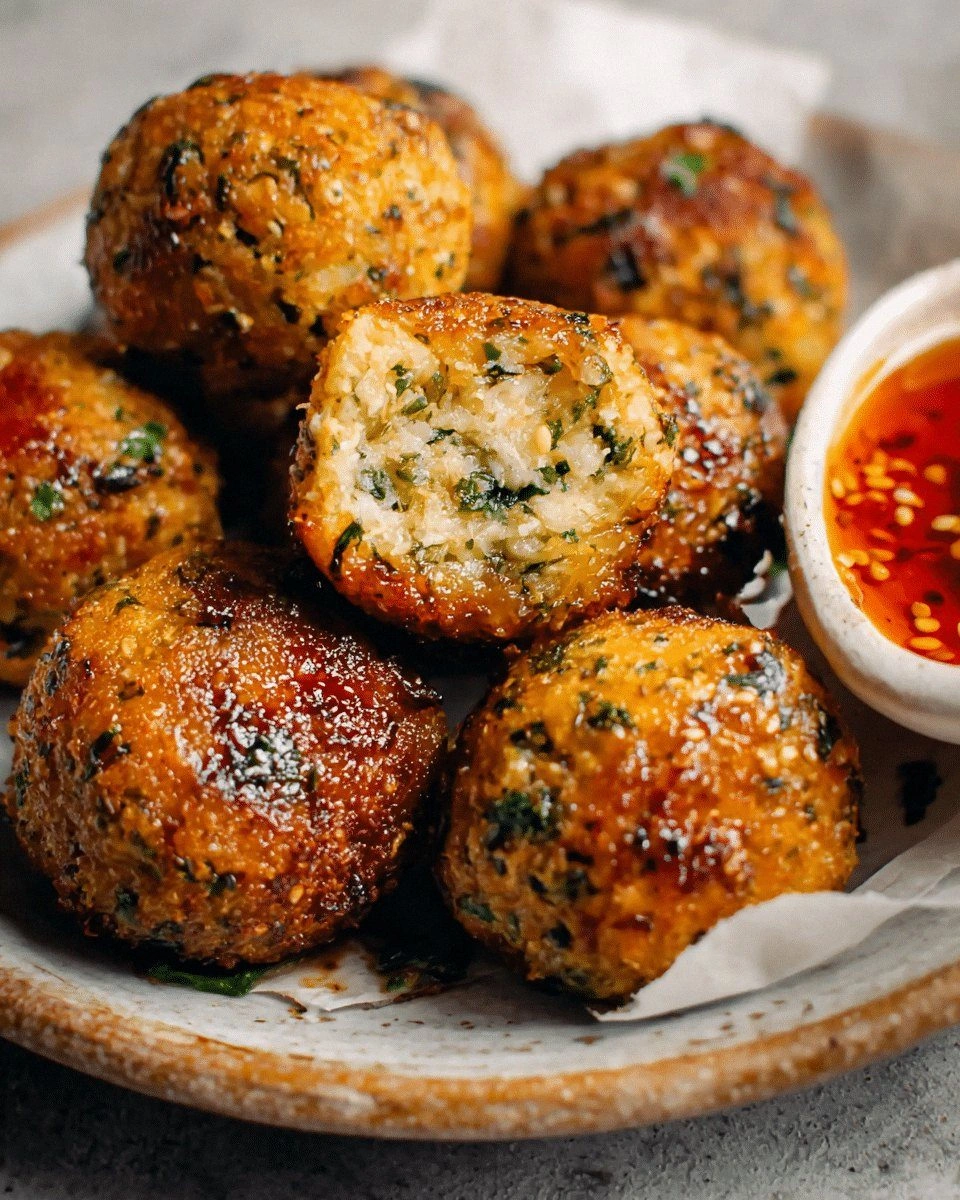
Picture this: a quiet Sunday afternoon, the kitchen lights flickering, and you’re standing in front of a pot of steaming brown rice that smells like a promise. You’ve been craving something that feels both comforting and adventurous, a snack that could double as an appetizer or a midnight munch. I tried to make a simple rice ball, but the first attempt turned out as a soggy, flavorless lump that made me question my culinary destiny. That disaster was the spark that ignited a mission: create the ultimate brown rice ball, wrapped in a sweet chili glaze that sings on the palate.
I opened the pantry, pulled out the ingredients, and started to orchestrate a flavor symphony. The rice should be fluffy, the glaze glossy, and the sesame seeds should add a nutty crunch that snaps like a crisp autumn leaf. The moment the glaze hit the rice, the aroma was intoxicating—sweetness, heat, a hint of umami that made my eyes water in the best possible way. I knew I was onto something extraordinary. I dared you to taste this and not go back for seconds.
What sets this version apart isn’t just the glaze; it’s the meticulous balance of textures and the methodical approach to binding the rice into perfect spheres. Most recipes get this completely wrong, tossing the rice in a bowl and hoping for the best. Here, each step is a deliberate act of culinary craftsmanship. From the precise amount of cornstarch slurry to the final drizzle of toasted sesame oil, every element is engineered for maximum impact. This is hands down the best version you'll ever make at home.
And there’s a twist you might not expect: a splash of rice vinegar. It cuts the sweetness just enough to let the heat of the chili sauce dance on your tongue, creating a flavor profile that feels both familiar and daring. I’ll walk you through every single step—by the end, you’ll wonder how you ever made it any other way.
What Makes This Version Stand Out
- Flavor: The glaze is a harmonious blend of sweet, spicy, and tangy, creating a layered taste that evolves with each bite.
- Texture: The rice is firm yet chewy, with a slight crisp on the outside from the quick searing, while the glaze gives a glossy, almost velvet finish.
- Binding: A cornstarch slurry holds the rice together, preventing the balls from falling apart during cooking.
- Visual Appeal: Toasted sesame seeds scatter across the glaze, giving a nutty crunch that’s almost visible through the glossy surface.
- Make‑ahead Potential: These balls keep well in the fridge for 3 days and freeze for up to a month, making them perfect for batch cooking.
- Versatility: Serve them as an appetizer, a side dish, or a quick snack; they pair beautifully with a cold glass of rice wine or a light beer.
- Ingredient Quality: Using high‑quality soy sauce and fresh ginger ensures a depth of flavor that canned or low‑grade versions simply can’t match.
- Time Efficiency: Prep takes only 15 minutes, while the cooking time is a quick 30 minutes, making it a great option for busy evenings.
Alright, let's break down exactly what goes into this masterpiece...
Inside the Ingredient List
The Flavor Base
The heart of this dish starts with the rice itself. Use 2 cups of cooked, slightly cooled brown rice—this gives the balls structure and a nutty undertone. Add 1 cup of water or low‑sodium broth while cooking to keep the grains fluffy. A pinch of salt (1 tsp) is essential to bring out the natural sweetness of the rice. If you’re feeling adventurous, a splash of rice vinegar (1 tbsp) adds a subtle acidity that brightens the entire dish.
The Texture Crew
To bind the rice, mix 1 tbsp cornstarch with 1 tbsp cold water until smooth. This slurry will thicken the glaze and give the balls a firm, cohesive shape. A touch of sesame oil (1 tbsp) adds a nutty aroma and helps keep the balls from drying out. Toasted sesame seeds (1 tbsp) are sprinkled on top for crunch and a pop of color.
The Unexpected Star
The glaze is where the magic happens. Combine 2 tbsp soy sauce, 2 tbsp honey or maple syrup, 1 tbsp rice vinegar, and 1 tbsp chili garlic sauce (or your favorite sriracha). Whisk until the mixture is smooth and glossy. This sauce coats the rice like velvet, delivering a burst of sweet heat that lingers on the palate.
The Final Flourish
Finishing touches include finely chopped scallions (1), grated ginger (1 tsp), and minced garlic (1 clove). These aromatics elevate the glaze, giving it depth and a fragrant finish. A drizzle of toasted sesame oil (1 tsp) before serving adds a final glossy sheen and a burst of nutty aroma that makes the dish irresistible.
Everything's prepped? Good. Let's get into the real action...
The Method — Step by Step
- Cook the Rice: In a medium saucepan, combine 2 cups of brown rice with 1 cup of water or broth and a pinch of salt. Bring to a boil, then reduce heat to low, cover, and simmer for 45 minutes until the rice is tender and water is absorbed. Let it cool slightly—ideally to room temperature—before proceeding. This step is crucial; overcooked rice will be mushy and won’t hold its shape.
- Prepare the Cornstarch Slurry: In a small bowl, whisk 1 tbsp cornstarch with 1 tbsp cold water until completely dissolved. Set aside. The slurry will help thicken the glaze and bind the rice during frying.
- Make the Glaze: In a saucepan over medium heat, combine 2 tbsp soy sauce, 2 tbsp honey, 1 tbsp rice vinegar, and 1 tbsp chili garlic sauce. Stir continuously until the mixture thickens slightly and becomes glossy, about 5 minutes. Remove from heat and let it cool to room temperature. A good glaze should coat the back of a spoon and cling to the rice.
- Mix Aromatics: Add finely chopped scallion, grated ginger, and minced garlic to the cooled glaze. Stir well. These aromatics infuse the glaze with depth and a fresh, bright note that balances the sweetness.
- Combine Rice and Glaze: In a large bowl, fold the cooked rice into the glaze until every grain is coated. Gently fold in the cornstarch slurry to help bind the mixture. The rice should feel slightly sticky but still hold its shape when pressed.
- Shape the Balls: Wet your hands with a little sesame oil to prevent sticking. Take about 2 tablespoons of the rice mixture and roll it into a smooth ball, about 1.5 inches in diameter. Repeat until all the mixture is used. If the mixture feels too dry, sprinkle a few drops of water; if too wet, add a bit more cornstarch slurry.
- Heat the Oil: In a non-stick skillet, heat 2 tbsp of sesame oil over medium-high heat. To test if the oil is ready, drop a small piece of rice; if it sizzles immediately, the oil is hot enough.
- Fry the Balls: Gently place the rice balls in the skillet, spacing them so they don’t touch. Fry for 2-3 minutes on each side, or until they develop a golden crust. The glaze will caramelize, creating a glossy, slightly sticky coating.
- Finish with Sesame: Once the balls are cooked, transfer them to a paper towel-lined plate to drain excess oil. Drizzle toasted sesame oil over the balls and sprinkle toasted sesame seeds. The seeds add crunch and a nutty aroma that completes the dish.
- Serve Immediately: Present the warm rice balls on a platter with a side of extra glaze or a dipping sauce of your choice. The moment the glaze meets the heat of the fresh rice, the aroma will fill the kitchen—absolute perfection.
That's it — you did it. But hold on, I've got a few more tricks that'll take this to another level...
Insider Tricks for Flawless Results
The Temperature Rule Nobody Follows
Maintaining the right oil temperature is essential. Use a thermometer or the paper towel test: if the rice sizzles instantly, the oil is ready. Too hot, and the glaze burns before the rice cooks; too cool, and the balls become greasy. Keep the heat steady and monitor closely.
Why Your Nose Knows Best
Before you start frying, take a deep breath. The scent of the glaze will tell you if it’s ready. If it smells sweet and slightly caramelized, you’re good. A raw or undercooked glaze will smell more like raw soy or vinegar—don’t rush this step.
The 5-Minute Rest That Changes Everything
After frying, let the balls rest on a rack for 5 minutes. This allows excess oil to drain and the glaze to set, giving you a glossy finish that’s less sticky and more elegant.
Use Fresh Ginger for Extra Depth
Fresh ginger brings brightness and a subtle heat that canned or dried ginger can’t match. If you’re using dried ginger, double the amount to compensate.
Keep the Rice Slightly Warm
If you’re making the rice ahead of time, keep it slightly warm in a low oven (200°F) until you’re ready to mix. Warm rice retains moisture and prevents the balls from drying out during frying.
Creative Twists and Variations
This recipe is a playground. Here are some of my favorite ways to switch things up:
Seafood Surprise
Add diced cooked shrimp or crab to the rice mixture for a briny, protein‑rich version that pairs well with a light citrus dipping sauce.
Vegan Upgrade
Replace honey with maple syrup or agave nectar, and use a plant‑based soy sauce. The result is a completely vegan dish that still delivers on flavor.
Herb Infusion
Stir in chopped cilantro or basil before shaping the balls. The fresh herbs add a bright, green note that contrasts nicely with the sweet glaze.
Spicy Kick
Increase the amount of chili garlic sauce or add a dash of cayenne pepper to the glaze for a heat level that will leave your tongue tingling.
Cheese Crust
After frying, roll the balls in grated Parmesan or shredded mozzarella. The cheese melts into a golden crust, turning the dish into a savory, cheesy delight.
Storing and Bringing It Back to Life
Fridge Storage
Place the cooled rice balls in an airtight container and refrigerate for up to 3 days. The glaze may thicken slightly, but it remains flavorful and juicy.
Freezer Friendly
For longer storage, freeze the rice balls on a parchment‑lined tray for 2 hours, then transfer to a freezer bag. They can be kept for up to 1 month. Reheat directly from frozen in a skillet or microwave.
Best Reheating Method
Add a splash of water to the skillet when reheating frozen balls to create steam. Cover briefly to keep moisture in, then finish with a quick sear to restore the crispy exterior.