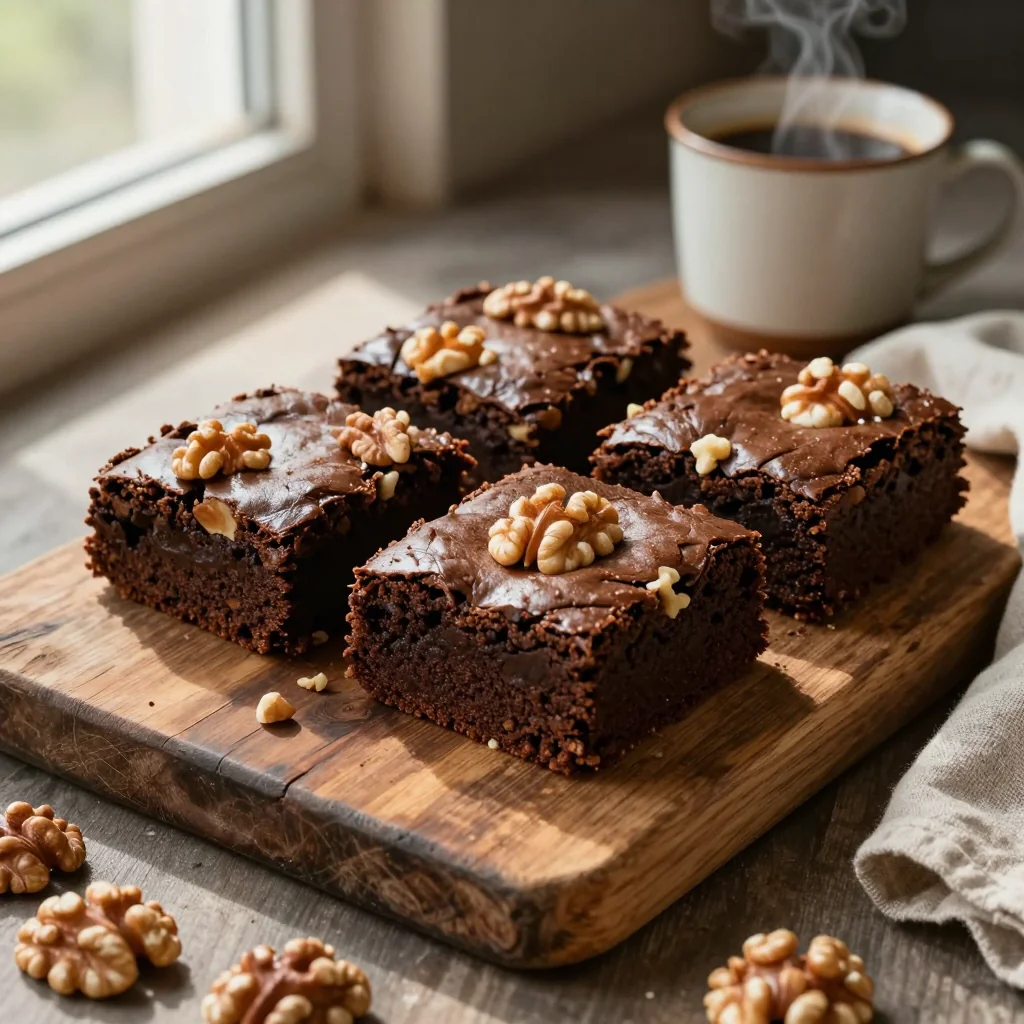
A fudgy, chocolatey brownie studded with crunchy walnuts, perfect for any occasion.
My Walnut Brownie Journey
I still remember the first time I tasted a warm, gooey brownie fresh out of the oven, the scent of melted chocolate wrapping around the kitchen like a comforting hug. It was a rainy Saturday afternoon in my grandparents' house, and the simple act of sharing that sweet treat sparked a lifelong love affair with baking. Years later, while experimenting with different textures, I discovered that toasted walnuts add a delightful crunch that balances the dense, fudgy interior of a classic brownie.
Brownies have roots in American home cooking, emerging in the early 20th century as a quick, portable dessert that could be made with pantry staples. Adding walnuts is a nod to the tradition of incorporating nuts for both flavor and nutrition, a practice that dates back to medieval Europe where nuts were prized for their richness. This recipe marries that heritage with modern convenience, delivering a dessert that feels both nostalgic and contemporary.
In this guide, you’ll learn how to achieve the perfect balance of chewiness and crunch, why each ingredient matters, and how to adapt the recipe for different dietary needs. I’ve refined the method over countless batches, ensuring that every bite offers a glossy top, a moist crumb, and pockets of toasted walnut that melt in your mouth.
I’m thrilled to share this recipe with you, and I hope it becomes a staple in your kitchen as it has in mine. Let’s get baking!
🌟 Why This Recipe Will Captivate You
Brownies with Walnuts combine classic comfort with a sophisticated crunch, making them perfect for both casual snacking and elegant gatherings.
- ✨ Irresistible Texture: The contrast between the fudgy interior and the toasted walnut crunch creates a multi‑dimensional mouthfeel that keeps you reaching for more.
- ✨ Deep Chocolate Flavor: Using high‑quality dark chocolate and a touch of cocoa powder intensifies the cocoa notes without overwhelming bitterness.
- ✨ Simple Ingredient List: All ingredients are pantry‑friendly, requiring no exotic items, which means you can whip up a batch anytime.
- ✨ Versatile Serving Options: Serve them warm with a scoop of vanilla ice cream, drizzle with caramel, or enjoy them plain for a quick energy boost.
- ✨ Nutrient Boost: Walnuts add heart‑healthy omega‑3 fatty acids, protein, and a pleasant nutty aroma that elevates the overall flavor profile.
- ✨ Foolproof Technique: The step‑by‑step instructions, precise timing, and temperature guidelines guarantee consistent results, even for novice bakers.
🥗 Ingredients
📝 Complete Ingredient List
For the Brownie Batter:
For the Walnut Topping:
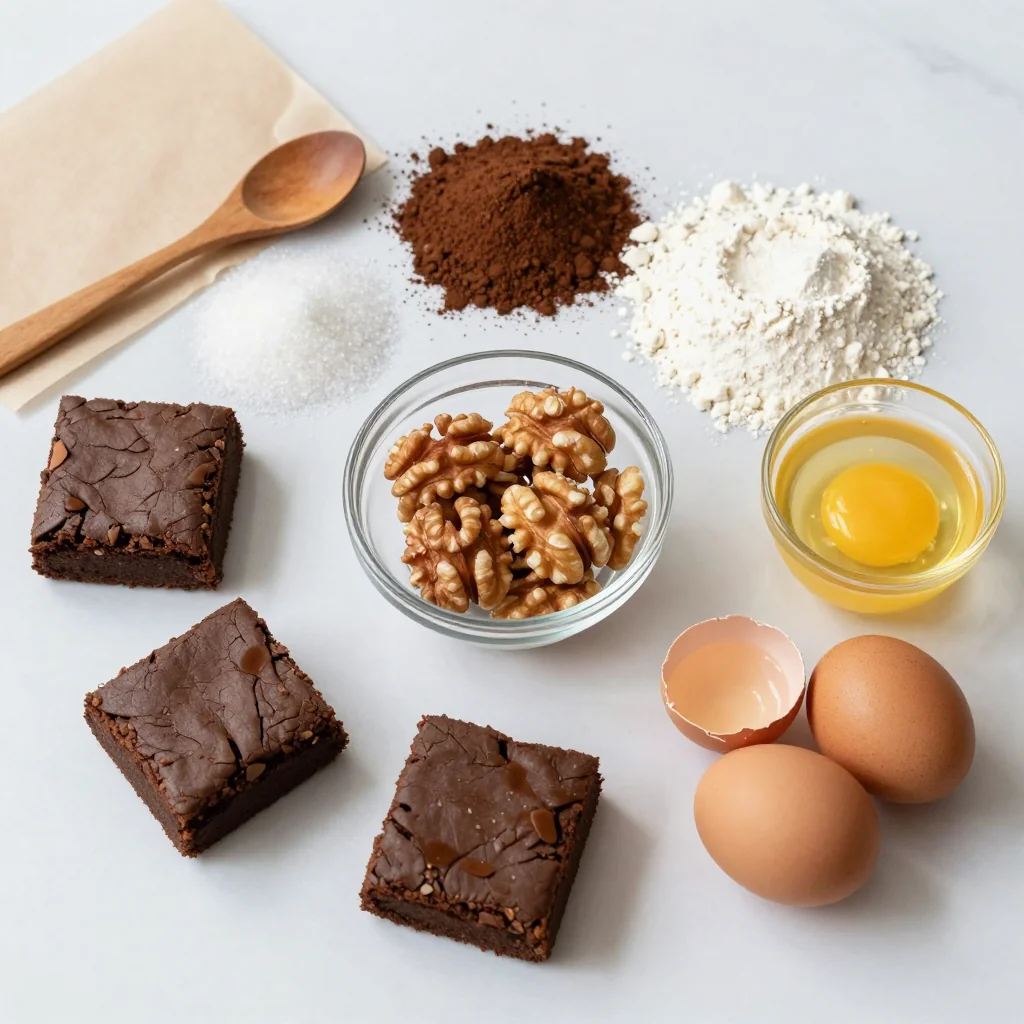
🔍 Focus on Key Ingredients
Dark Chocolate (70% Cocoa)
Dark chocolate provides the backbone of flavor in these brownies. The higher cocoa percentage delivers a deep, slightly bitter note that balances the sweetness of the sugar. Choose a chocolate with a smooth texture and minimal additives; a good quality bar will melt evenly and create a glossy crust.
Unsalted Butter
Butter contributes richness and helps create that coveted fudgy crumb. Using unsalted butter gives you full control over the salt level, ensuring the final taste is perfectly balanced. Melt the butter gently to avoid scorching, which could impart a burnt flavor.
Walnuts
Walnuts add a buttery crunch and a subtle earthy aroma. Their healthy fats and omega‑3 fatty acids also boost the nutritional profile. Toast them lightly before mixing to release their natural oils and enhance the nutty taste.
🔄 Quick Substitutions
| If you don’t have... | Use instead... |
|---|---|
| Dark chocolate | Bittersweet chocolate (60‑70% cocoa) |
| All‑purpose flour | Gluten‑free flour blend (1:1) |
| Walnuts | Pecans or almonds, chopped |
👨🍳 Step‑by‑Step Instructions
Follow these detailed steps to create perfectly fudgy brownies with a crunchy walnut topping. Each phase is designed to maximize flavor and texture.
📋 Phase 1: Preparation & Mise en Place
Gather all ingredients, pre‑heat the oven, and line a baking pan.
Preheat the oven and prepare the pan
Set your oven to 180°C (350°F) and allow it to fully preheat. While the oven warms, line a 20 × 30 cm (8 × 12 in) baking pan with parchment paper, allowing the paper to overhang the edges for easy removal later. Lightly grease the parchment with a thin layer of butter to prevent sticking.
Toast the walnuts
Place the chopped walnuts in a dry skillet over medium heat. Stir constantly for 3‑4 minutes until they turn golden and release a fragrant aroma. Transfer them to a plate and set aside to cool.
🔥 Phase 2: Mixing & Baking
Combine wet and dry components, fold in walnuts, and bake.
Melting chocolate and butter
In a heat‑proof bowl, combine the chopped dark chocolate and butter. Melt them together over a simmering pot of water (bain‑marie) or in short bursts in the microwave, stirring every 20 seconds until smooth. Remove from heat and let the mixture cool slightly.
Incorporate sugar, eggs, and vanilla
Whisk the granulated sugar into the melted chocolate‑butter mixture until fully dissolved. Beat in the eggs one at a time, ensuring each egg is completely incorporated before adding the next. Finally, stir in the vanilla extract.
Combine dry ingredients
Sift together the flour, cocoa powder, and salt into a separate bowl. Gently fold the dry mixture into the wet batter using a rubber spatula, being careful not to over‑mix. The batter should be thick, glossy, and slightly glossy.
Prepare the walnut topping
In a small bowl, combine the toasted walnuts, melted butter, and brown sugar. Mix until the walnuts are lightly coated. Sprinkle the mixture evenly over the top of the batter, pressing gently so it adheres.
Bake the brownies
Place the pan in the preheated oven and bake for 25‑30 minutes. The edges should be set and the surface glossy, while a toothpick inserted into the center should come out with a few moist crumbs attached. Avoid over‑baking to maintain fudginess.
✨ Phase 3: Finishing & Serving
Cool, cut, and present your brownies.
Cool before cutting
Allow the brownies to cool completely in the pan on a wire rack. This rest period lets the crumb set, making clean cuts easier. Once cool, lift the parchment paper to release the whole slab.
Cut into squares
Using a sharp knife, cut the slab into 12 even squares (or 16 for smaller portions). For a cleaner cut, wipe the blade with a damp cloth between slices.
Serve and enjoy
Serve the brownies warm with a scoop of vanilla ice cream, a drizzle of caramel sauce, or simply dusted with powdered sugar. They also pair beautifully with a robust espresso or a glass of chilled red wine.
💡 Expert Tips & Tricks
🛒 Choosing the Right Ingredients
Opt for a chocolate bar with at least 70% cocoa solids; it provides depth without excessive bitterness. When buying walnuts, look for kernels that are plump and free of discoloration. Fresh, unsalted butter yields a cleaner flavor, while using European‑style butter (higher butterfat) can make the brownies richer.
🔪 Preparation Techniques
Melt chocolate and butter together gently; a double‑boiler prevents scorching. When folding dry ingredients, use a gentle “cut‑and‑turn” motion to keep the batter airy. Toasting nuts beforehand unlocks their oils and prevents a raw, bitter taste.
🌡️ Mastering the Bake
Oven temperatures can vary; use an oven thermometer to confirm 180°C is accurate. Start checking the brownies at the 20‑minute mark. The ideal indicator of doneness is a slightly cracked top and a moist, fudgy center that leaves a few crumbs on a toothpick.
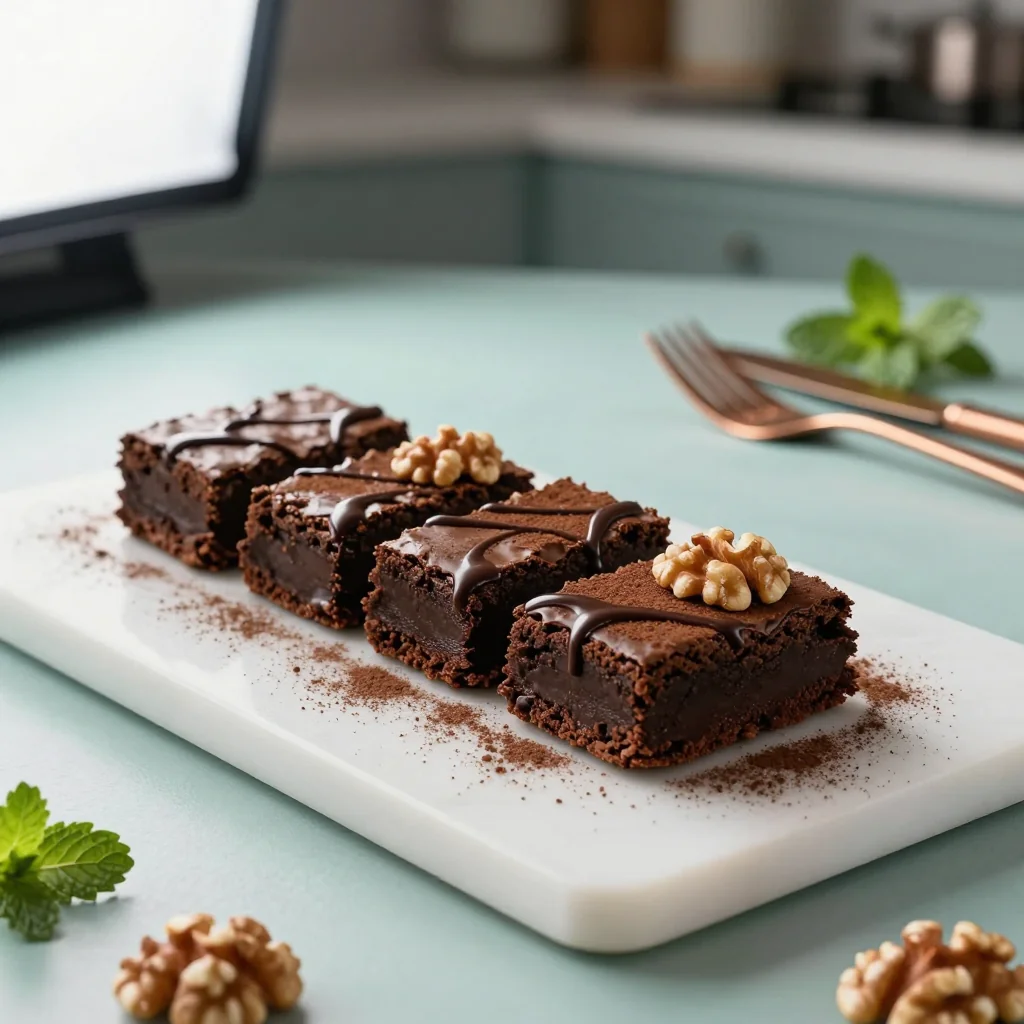
🍽️ Presentation & Service
For a polished look, drizzle a thin line of caramel or dark chocolate across the top after cooling. Dust with a light sprinkle of flaky sea salt to contrast the sweetness. Arrange squares on a rustic wooden board for a cozy, inviting presentation.
🏆 Pro Tips
Elevate your brownies from good to restaurant‑quality with these professional insights.
- 🎯 Use a Digital Scale: Precise weight measurements ensure consistent texture. A variance of even 10 grams in chocolate can affect the final fudginess.
- 🎯 Incorporate a Small Amount of Espresso Powder: Adding ½ tsp of espresso powder intensifies the chocolate flavor without making the brownies taste coffee‑y.
- 🎯 Chill the Batter: Refrigerate the batter for 30 minutes before baking. This firms the butter, resulting in a denser crumb and a glossy crust.
- 🎯 Use Parchment Over Aluminum Foil: Parchment provides a non‑stick surface and prevents the bottom from becoming overly crisp, preserving the fudgy interior.
- 🎯 Finish with a Salted Caramel Drizzle: Drizzle a quick salted caramel sauce (butter, brown sugar, cream, sea salt) while the brownies are still warm for a sweet‑salty contrast.
- 🎯 Serve Warm, Not Hot: Allow the brownies to cool just enough that the interior stays molten but the outer crust is set; this temperature balance maximizes flavor release.
"A great brownie is a balance of science and soul; the chemistry of chocolate meets the heart of home." — Jacques Pépin
🔄 Variations & Adaptations
This recipe is a canvas for creativity. Below are several ways to tailor it to different tastes and dietary needs.
🥬 Vegetarian / Vegan Version
Replace the butter with a plant‑based margarine and use a vegan dark chocolate (dairy‑free). Substitute the eggs with a flax‑egg mixture (1 tbsp ground flaxseed + 3 tbsp water per egg). The walnut topping remains the same, ensuring a satisfying crunch.
- Vegan butter: 150 g
- Flax‑egg (3 tbsp water + 1 tbsp ground flax per egg)
🌶️ Flavor Variations
Play with complementary flavors to keep the brownie experience fresh.
Spicy Chili Chocolate:
Add ¼ tsp cayenne pepper to the dry mix for a subtle heat that pairs beautifully with the chocolate.
Mediterranean Olive & Walnut:
Stir 2 tbsp finely chopped Kalamata olives into the walnut topping for a savory twist.
Asian Matcha Walnut:
Replace half the cocoa powder with 1 tbsp matcha powder and add a drizzle of white chocolate ganache after baking.
⚠️ Dietary Adjustments
Gluten‑Free:
Swap all‑purpose flour for a 1:1 gluten‑free flour blend. Ensure the blend contains xanthan gum for structure.
Lactose‑Free:
Use lactose‑free butter or coconut oil, and choose dairy‑free chocolate.
Low‑Calorie:
Reduce sugar to 150 g, replace half the butter with unsweetened applesauce, and use a dark chocolate with 85% cocoa to maintain richness.
👶 Family / Kids Version
For younger palates, use milk chocolate instead of dark, and omit the pinch of salt. Add a swirl of peanut butter into the batter before baking for a familiar flavor kids love.
📦 Storage & Reheating
🧊 Conservation
In the Refrigerator:
- Duration: 5 days
- Recommended container: Airtight glass or plastic container
- Tip: Place a sheet of parchment between layers to prevent sticking.
In the Freezer:
- Duration: 3 months
- Method: Wrap each slab tightly in plastic wrap, then foil.
- Defrosting: Thaw overnight in the refrigerator before reheating.
💡 For best texture, reheat only the portion you plan to eat; repeated heating can dry out the brownies.
♨️ Reheating
🔥 Oven (Recommended):
- Preheat to 150°C (300°F).
- Cover the slab with aluminum foil to retain moisture.
- Heat for 8‑10 minutes.
- Remove foil and continue for 2‑3 minutes to restore the crust.
⚡ Microwave (Quick):
- Place a single square on a microwave‑safe plate.
- Cover with a microwave‑safe lid or paper towel.
- Heat on medium power for 30‑45 seconds.
- Check and add 10‑second intervals if needed.
🍳 Skillet:
Warm a non‑stick skillet over low heat, add a tiny knob of butter, and place the brownie square for 30‑45 seconds per side, covering the pan to trap steam.
🍷 Perfect Pairings
🥗 Side Dishes
- Fresh Mixed Berries: Their acidity cuts through the richness, refreshing the palate.
- Light Citrus Salad: A salad with orange segments, mint, and a drizzle of honey adds brightness.
- Vanilla Ice Cream: Classic accompaniment that melts into the warm brownie, creating a silky contrast.
🍷 Drinks & Beverages
- Ruby Port: Its sweet, fortified character mirrors the chocolate while its acidity balances the nuts.
- Espresso: The bitter coffee notes highlight the chocolate depth.
- Non‑Alcoholic: Sparkling Water with a Twist of Lemon: Cleanses the palate between bites.
🍰 Meal Complements
Begin with a light arugula and pear salad, follow the brownies with a cheese plate featuring sharp cheddar and blue cheese, and finish with a dollop of mascarpone whipped with a hint of orange zest for a harmonious progression.
❓ Frequently Asked Questions
Q: Can I use milk chocolate instead of dark chocolate?
Yes, you can substitute milk chocolate, but expect a sweeter, less intense flavor and a softer texture. To maintain some depth, add an extra tablespoon of cocoa powder or a pinch of espresso powder.
Q: How do I know when the brownies are done?
The edges should be set and the top glossy. Insert a toothpick into the center; it should emerge with a few moist crumbs, not wet batter. If the toothpick is clean, the brownies are likely over‑baked and may be cakey.
Q: Can I add chocolate chips to the batter?
Absolutely! Fold in ½ cup of semi‑sweet chocolate chips after mixing the batter. This adds pockets of molten chocolate that melt during baking, enhancing the overall chocolate experience.
Q: What if I don’t have a kitchen scale?
While a scale provides the most accurate results, you can use volume measurements: 1 cup (≈200 g) of chocolate, ⅔ cup (≈150 g) butter, 1¼ cup (≈250 g) sugar, ¾ cup (≈100 g) flour, ¼ cup (≈30 g) cocoa. Adjust as needed for consistency.
Q: How can I make the brownies gluten‑free?
Replace the all‑purpose flour with a 1:1 gluten‑free flour blend that contains xanthan gum. The texture will remain tender, though the crumb may be slightly more delicate.
Q: Can I prepare the batter ahead of time?
Yes, you can mix the batter up to 24 hours in advance and store it in an airtight container in the refrigerator. Bring it to room temperature before baking to ensure even cooking.
🎉 Let’s Get Baking!
This walnut‑studded brownie recipe brings together the best of classic comfort and refined technique. From the glossy, crackly top to the moist, fudgy interior and the crunchy walnut surprise, every bite delivers satisfaction. Whether you’re serving them at a casual brunch or a sophisticated dinner party, these brownies are sure to impress.
I invite you to try the recipe, experiment with the variations, and share your results in the comments below. Your feedback helps the community grow, and your photos could be featured on our social channels!
Have you tried this recipe?
Leave a comment and rating below! Share your photos on Instagram with #WalnutBrownieDelight to be showcased.
Brownies with Walnuts
Fudgy chocolate brownies studded with toasted walnuts, perfect for any gathering.
📝 Ingredients
Brownie Batter
Walnut Topping
👨🍳 Instructions
- 1 Preheat oven to 180 °C (350 °F) and line a 20 × 30 cm baking pan with parchment.
- 2 Toast walnuts in a dry skillet until golden, then set aside.
- 3 Melt chocolate and butter together over a bain‑marie; let cool slightly.
- 4 Whisk sugar into the chocolate mixture, then beat in eggs one at a time and add vanilla.
- 5 Sift flour, cocoa powder, and salt; fold gently into the wet batter.
- 6 Mix walnuts with melted butter and brown sugar; sprinkle over batter.
- 7 Bake for 25‑30 minutes until edges are set and a toothpick shows moist crumbs.
- 8 Cool completely in the pan, then lift using parchment.
- 9 Cut into 12 squares, wiping the knife between cuts.
- 10 Serve warm with ice cream, caramel drizzle, or on its own.
🥗 Nutrition per Serving
*Nutritional values are estimates based on standard ingredient data.
📚 You Might Also Like

Chocolate Chip Walnut Cookies

Salted Caramel Brownies

Nutty Chocolate Tart


💬 Comments & Reviews
Leave a Comment
Comments will appear here once readers share their thoughts.