The kitchen was a battlefield that night. My friend dared me to make the best cheeseburger sliders ever, and I thought, “Sure, why not?” I grabbed the ground beef, the cheese, the buns, and a secret sauce that had been hiding in my pantry for months. The smell of sizzling meat filled the air, and the sound of the skillet crackling was like a drumbeat of triumph. By the time the first slider popped out, I could taste the promise of a midnight snack that would never be forgotten.
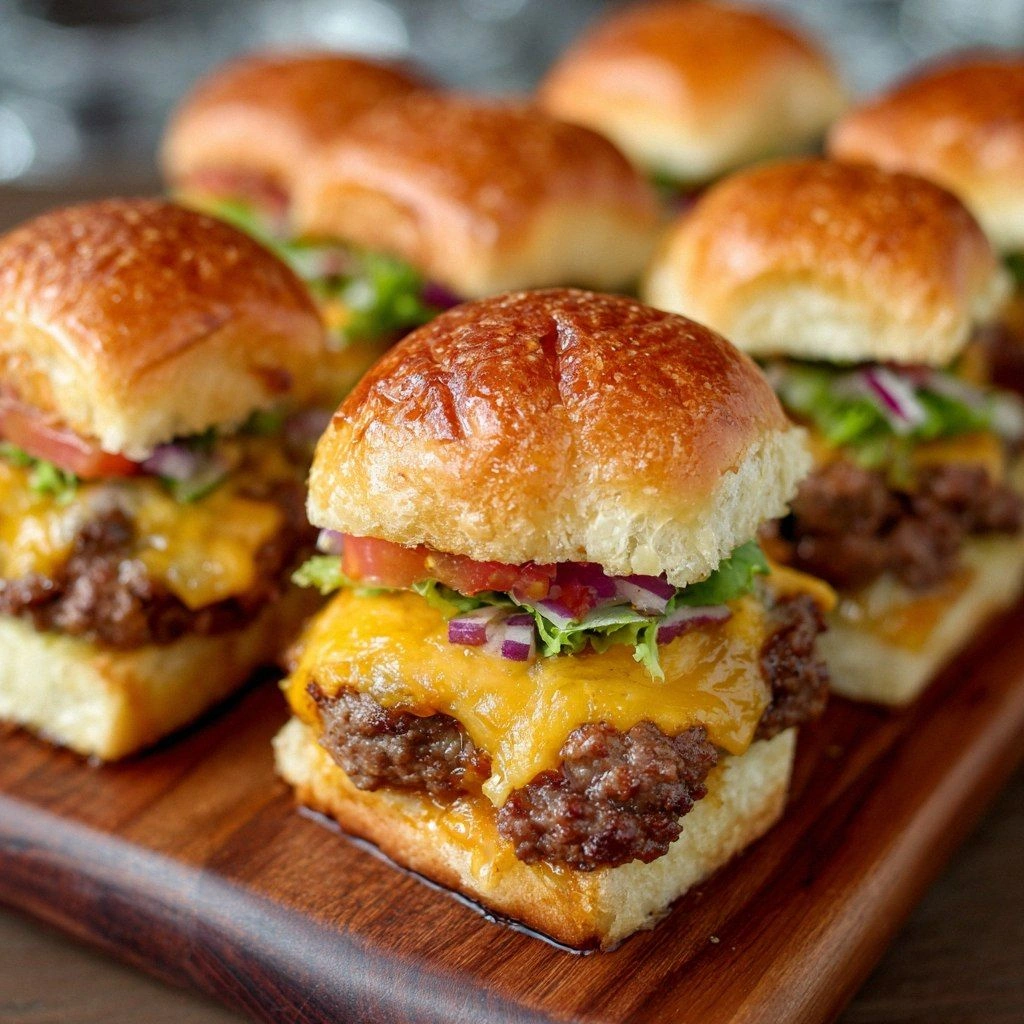
Picture yourself pulling these sliders from the pan, the whole kitchen smelling incredible, the steam curling like a soft cloud. The first bite is a burst of savory beef that melts in your mouth, followed by a sharp cheddar that lingers. I dare you to taste this and not go back for seconds, because the flavor will have you looping for more. The sauce coats the meat like velvet, and the bun is toasted to a golden crisp that snaps with every bite. If you've ever struggled with bland sliders, you're not alone — and I've got the fix.
What sets this version apart is that it doesn't rely on generic shortcuts. Instead, it balances the umami of beef with a tangy Worcestershire base, the crunch of fresh veggies, and a cheese that melts just right. The buns are toasted with a butter glaze that adds a buttery crunch, and the sauce is a mix of mayo, ketchup, mustard, and a splash of smoky BBQ. The result is a slider that feels like a gourmet burger in a bite-sized form. I promise, this is hands down the best version you'll ever make at home.
The first time I tried this, I almost set the kitchen on fire, but the secret to avoiding that was the right temperature. The skillet had to hit just the right heat, not too hot to char the meat, not too low to leave it soggy. That moment of truth is when the meat starts to sizzle and the aroma hits you like a wave. I learned to watch the edges pull away, signaling that the first side is ready. It’s a simple cue that turns a novice cook into a slider master.
And if you’re wondering what the trick is that most recipes get wrong, it’s the cheese placement. Placing the cheese on the meat just before flipping locks in the juices, giving that ooey‑gooey texture that’s impossible to resist. Most people add it too early, and it melts into the pan instead of the burger. I’ll confess, I ate half the batch before anyone else got a chance to try it because it was that good. Stay with me here — this is worth it.
The sauce is the unsung hero that ties everything together. It’s a blend of mayo, ketchup, mustard, and a touch of smoky BBQ, whisked until it’s silky and bright. This sauce coats the meat like velvet and adds a subtle tang that balances the richness of the beef and cheese. I’ve experimented with different sauces, but this one hits the sweet spot every time. The next part? The ingredients that make it all possible.
What Makes This Version Stand Out
- Flavor: The beef is seasoned with garlic, onion, and Worcestershire, creating a depth that feels like a full‑size burger. The sauce adds a sweet and smoky contrast, while the cheese delivers a creamy finish. The result is a flavor profile that’s both familiar and surprisingly elevated.
- Texture: The buns are butter‑toasted to a golden crisp, giving a satisfying crunch that contrasts with the juicy meat. The lettuce and tomato add a fresh, crisp bite, while the pickles bring a bright, briny snap. The cheese melts perfectly without becoming rubbery.
- Simplicity: No fancy gadgets or hard‑to‑find ingredients are required. The recipe uses pantry staples and a few fresh items you probably already have. It’s a quick, 45‑minute meal that still feels special.
- Uniqueness: The addition of a smoky BBQ splash in the sauce and the butter glaze on the buns set this recipe apart from standard sliders. The result is a complex, layered taste that’s hard to forget.
- Audience: These sliders are crowd‑pleasers for parties, game nights, or a casual dinner. They’re small enough to eat with one hand and large enough to satisfy.
- Ingredient Quality: Using fresh, high‑quality ground beef and real cheddar cheese makes a noticeable difference. The difference in flavor is like moving from a fast‑food burger to a gourmet experience.
- Cooking Method: The pan‑searing technique locks in juices, while the cheese‑on‑meat method ensures a melty, gooey center. The butter glaze on the buns adds a buttery crunch that’s almost addictive.
- Make‑ahead Potential: The meat mixture can be pre‑mixed and refrigerated for up to 24 hours, and the sauce can be made ahead and stored in the fridge. This makes it perfect for meal prep or last‑minute gatherings.
Inside the Ingredient List
The Flavor Base
The ground beef is the heart of the slider. A 1 lb portion of 80% lean meat gives you the right balance of fat and flavor without becoming greasy. If you prefer a leaner option, use 90% lean, but expect a slightly drier result. The garlic and onion powders infuse the meat with aromatic depth, while the Worcestershire sauce adds a savory umami boost.
The salt and pepper are simple yet essential. Salt enhances the meat’s natural flavors, and black pepper adds a subtle heat that cuts through the richness. A pinch of paprika could be added for a smoky undertone, but the Worcestershire sauce already provides that. The key is to season the meat before forming the patties, ensuring even distribution.
The Texture Crew
The slider buns are the vessel that holds everything together. Opt for fresh, pre‑baked buns that are slightly firm to the touch; they’ll hold the juicy meat without falling apart. Butter the buns lightly before toasting, which adds flavor and a crisp, golden finish. If you’re a fan of a buttery crunch, consider sprinkling a pinch of sea salt on the buns before toasting.
Cheddar cheese slices are the creamy, melty element that ties the burger together. Choose a sharp cheddar for a stronger flavor, or a milder cheddar for a subtler finish. The cheese should be placed on the patty just before flipping, allowing it to melt into the meat rather than slide off. A slice per burger keeps the sliders balanced and prevents the cheese from overpowering the other flavors.
The Unexpected Star
The sauce is where the sliders get their signature wow factor. Combining mayo, ketchup, mustard, and a splash of smoky BBQ creates a sauce that is silky, bright, and full of flavor. The mayo provides creaminess, the ketchup adds sweetness, the mustard brings tang, and the BBQ gives a subtle smoke. This sauce coats the meat like velvet, making each bite a silky experience.
If you’re looking to tweak the sauce, try adding a dash of hot sauce for heat or a touch of honey for extra sweetness. Some people like to whisk in a little lemon zest for brightness, but keep it subtle to avoid overpowering the other flavors. The sauce can be made a day ahead and stored in the fridge; it actually tastes better after the flavors meld.
The Final Flourish
Fresh lettuce, ripe tomato, and crunchy pickles provide the final layers of texture and flavor. Shredded lettuce adds a crisp, cool bite that contrasts with the warm meat. Sliced tomato brings juiciness and a subtle sweetness, while pickles add a tangy bite that cuts through the richness. Arrange them in that order for a balanced bite.
The butter used for toasting the buns also doubles as a finishing touch. A light brush of melted butter on the toasted side gives a glossy sheen and a buttery aroma that’s irresistible. If you prefer a savory butter, add a pinch of garlic powder or dried herbs before melting. This simple step elevates the sliders from good to unforgettable.
Everything’s prepped? Good. Let’s get into the real action and start cooking.
The Method — Step by Step
- Heat a large skillet over medium‑high heat until it shimmers. Add a splash of oil to prevent sticking. Once the oil is hot, add the ground beef in a single layer, avoiding overcrowding. This ensures a nice sear on the bottom. Let the meat sit for 2 minutes before stirring.
- Season the beef with salt, pepper, garlic powder, onion powder, and Worcestershire sauce. Mix gently with a spoon to coat all the meat evenly. The seasoning should be visible as a light brown crust forming on the surface. This step locks in flavor and prevents the meat from drying out. The aroma at this point will have you salivating.
- Divide the seasoned meat into 8 equal portions, forming small patties that are slightly larger than the buns. Flatten the patties gently with a spatula; avoid pressing too hard to keep them juicy. Place them in the skillet, leaving space between each. Let them cook for 2–3 minutes on the first side; the edges should start to brown.
- Flip the patties carefully, then immediately lay a slice of cheddar on each. Cover the skillet with a lid for 1 minute to melt the cheese. The cheese will start to ooze, creating a gooey bridge between the meat and the bun. This is the moment of truth—watch the cheese melt into the meat.
- While the cheese melts, prepare the buns. Butter the cut sides lightly and place them butter‑side down in a separate pan over medium heat. Toast until golden brown and slightly crisp. The butter will give the buns a glossy sheen and a buttery flavor that complements the meat.
- In a small bowl, whisk together mayo, ketchup, mustard, and a splash of smoky BBQ. Add a pinch of salt if needed. This sauce should be smooth and silky, with a balanced sweetness and tang. Spread a generous amount on the toasted side of each bun.
- Assemble the sliders: place a patty on the bottom bun, add lettuce, tomato, and pickles. The lettuce should be the first layer to keep the bun from getting soggy. Stack the top bun, pressed lightly to secure the ingredients. This ensures each bite is balanced and easy to hold.
- Serve immediately, or keep the assembled sliders warm in a low oven (200°F) for up to 10 minutes if you’re serving a crowd. The sliders will stay juicy and the cheese will remain melty. If you’re storing leftovers, wrap each slider individually to preserve freshness. Enjoy the burst of flavor with every bite.
That's it — you did it. But hold on, I've got a few more tricks that'll take this to another level.
Insider Tricks for Flawless Results
The Temperature Rule Nobody Follows
Many people cook at too low a temperature, resulting in dry sliders. The trick is to use a medium‑high heat that allows the meat to sear quickly. This creates a caramelized crust that locks in juices. If you’re using a non‑stick pan, add a splash of oil to keep the meat from sticking. Remember, the skillet should be hot before the meat hits the surface.
Why Your Nose Knows Best
The aroma of cooking meat is a reliable indicator of doneness. When you see a slight darkening of the edges and hear a faint sizzle, the meat is ready to flip. Don’t rely solely on time; let the scent guide you. This sensory checkpoint ensures the sliders are perfectly cooked every time. It’s a skill you’ll develop with practice.
The 5-Minute Rest That Changes Everything
Letting the patties rest for five minutes after cooking allows the juices to redistribute. This prevents the meat from drying out when you bite into it. The rest period also lets the cheese melt fully into the meat, creating a cohesive flavor. A quick rest is a simple step that elevates the sliders dramatically.
Cheese Placement Secrets
Place the cheese on the patty at the exact moment of flipping. This ensures the cheese melts into the meat instead of sliding off. The result is a gooey, melty center that’s impossible to resist. If you place the cheese too early, it will melt onto the pan and create a mess. Timing is everything.
Bun Buttering Technique
Butter the buns just before toasting. This creates a crisp, golden exterior that complements the juicy interior. A thin layer of butter also adds a subtle richness that balances the savory meat. If you’re in a hurry, keep the butter at room temperature for 10 minutes before toasting to prevent it from hardening. This small tweak makes a big difference.
Sauce Storage Tip
Store the sauce in an airtight container in the refrigerator for up to a week. The flavors will meld over time, creating an even richer taste. When you’re ready to serve, give it a quick whisk to restore its silky texture. This pre‑made sauce saves time and guarantees consistency.
Creative Twists and Variations
This recipe is a playground. Here are some of my favorite ways to switch things up:
BBQ Bacon Slider
Swap the cheddar for smoked gouda and add a crispy bacon strip on top. Drizzle extra BBQ sauce for a smoky flavor. The bacon adds a salty crunch that pairs well with the sweet sauce. This variation is perfect for a backyard cookout. Guests will love the extra protein.
Mediterranean Slider
Replace the cheddar with feta cheese and add sliced olives and a dollop of tzatziki. Swap the pickles for roasted red pepper strips. The tangy yogurt sauce complements the salty feta. This version brings a bright, Mediterranean vibe to the table. It’s a hit with health‑conscious diners.
Spicy Jalapeño Slider
Add sliced jalapeños to the meat mixture for a kick of heat. Use pepper jack cheese instead of cheddar for a subtle melt. Finish with a drizzle of chipotle mayo. The jalapeños add a crunchy, fiery bite that’s unforgettable. This is the go‑to for spice lovers.
Mushroom Swiss Slider
Sauté sliced mushrooms with garlic and thyme, then fold them into the meat. Replace the cheddar with Swiss cheese for a mild, nutty flavor. The mushrooms add umami and moisture, keeping the slider juicy. This variation feels like a gourmet burger in miniature form. It’s great for mushroom enthusiasts.
Breakfast Slider
Swap the meat for breakfast sausage patties and add a fried egg on top. Use a brioche bun for a sweet touch. Drizzle maple syrup over the top for a sweet‑savory combo. This breakfast slider is a fun twist that works for brunch. The egg adds richness and protein.
Vegan Slider
Use plant‑based burger patties and vegan cheese. Replace the mayo with a cashew‑based sauce. Add avocado slices for creaminess. The vegan version is just as satisfying and can be made ahead. It’s a crowd‑pleaser for all dietary preferences.
Storing and Bringing It Back to Life
Fridge Storage
Store assembled sliders in an airtight container for up to 2 days. Wrap each slider individually in parchment paper to prevent sticking. Keep the sauce separate until you’re ready to serve to avoid sogginess. When ready to eat, reheat in a toaster oven at 350°F for 5 minutes. The buns will stay crisp while the meat stays juicy.
Freezer Friendly
Wrap each slider tightly in foil and place in a freezer bag. They’ll keep for up to 3 months. Thaw overnight in the refrigerator before reheating. Use a low oven or microwave with a damp paper towel to keep the sliders from drying out. The flavor remains intact after freezing.
Best Reheating Method
Add a tiny splash of water or broth to the pan before reheating to create steam. This keeps the meat moist and the cheese gooey. Reheat over low heat, covering the pan to trap steam. If you’re in a hurry, microwave on medium for 30 seconds, then finish in a skillet. The sliders will taste fresh and hot.