I was halfway through a frantic Saturday night, the kind where the pantry looks like a battlefield and my cravings were screaming louder than the neighbor's dog. I had a half‑finished batch of classic snickerdoodles cooling on the rack, but something in me whispered, “What if we gave these a chocolate makeover?” I tossed a handful of cocoa into the batter, and the kitchen instantly transformed into a chocolate‑scented wonderland, the air thick with sweet nostalgia and a hint of mischief. I dare you to taste this and not go back for seconds; that first bite is a revelation that will rewrite your cookie history.
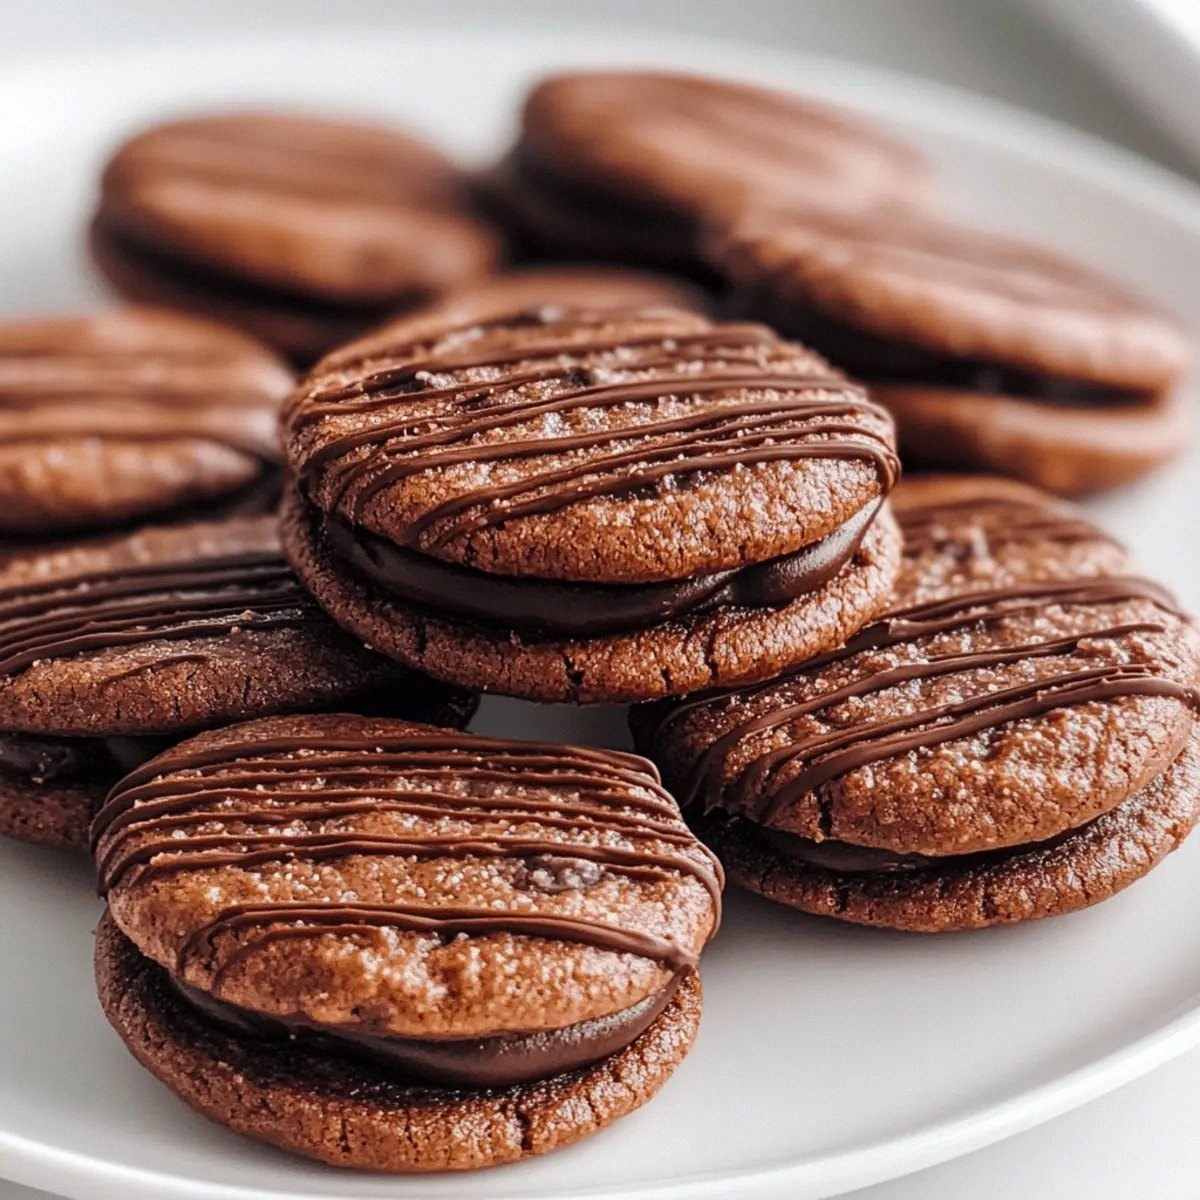
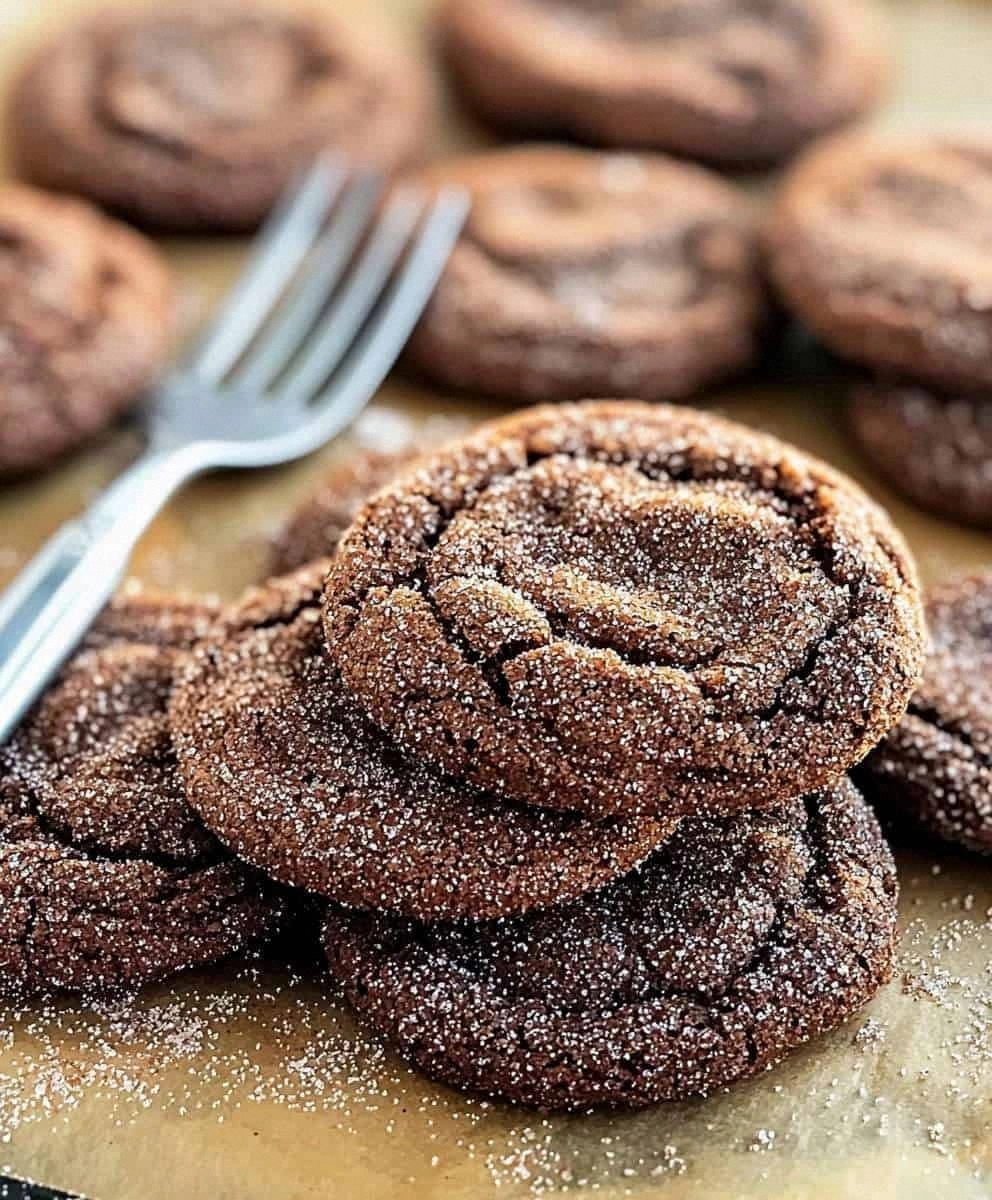
Picture yourself pulling a tray of golden‑brown, slightly cracked cookies from the oven, the whole kitchen smelling like a cozy café on a rainy day. The edges are crisp enough to snap with a gentle press, while the centers stay soft, chewy, and infused with a deep, velvety chocolate that hugs the cinnamon‑sugar coating like a warm blanket. I’ll be honest — I ate half the batch before anyone else got to try it, and that’s because this version is hands down the best you’ll ever make at home. Most recipes get this completely wrong, either over‑sweetening the cocoa or missing that signature snickerdoodle tang; here’s what actually works.
What sets this chocolate snickerdoodle apart isn’t just the addition of cocoa; it’s the balance of flavors, the precise temperature control, and a secret technique that gives the cookies a subtle snap on the bottom while keeping the middle melt‑in‑your‑mouth soft. I’m talking about chilling the dough just long enough to let the butter firm up without turning it into a brick, then rolling each ball in a cinnamon‑sugar mixture that caramelizes just enough to create those gorgeous crackle lines. This next part? Pure magic. And now the fun part — the rolling, the baking, the anticipation.
If you’ve ever struggled with snickerdoodles that turn out flat, crumbly, or overly sweet, you’re not alone — and I’ve got the fix. The trick lies in a few simple adjustments that feel like cheating, but they’re actually science‑backed. I’m going to walk you through every single step — by the end, you’ll wonder how you ever made it any other way, and you’ll be ready to brag to anyone who doubts the power of a chocolate twist.
What Makes This Version Stand Out
- Taste: The marriage of rich cocoa with the warm, buttery cinnamon‑sugar coating creates a flavor duet that sings louder than any solo cookie could. Each bite starts with a chocolatey depth, then blossoms into a sweet‑spicy finish that lingers on the palate.
- Texture: We achieve a crisp edge that shatters like thin ice, a chewy middle that stretches like taffy, and a soft, melt‑in‑your‑mouth interior that feels like a chocolate‑kissed cloud.
- Simplicity: Despite the gourmet vibe, the ingredient list is pantry‑friendly, and the steps use everyday tools — no fancy mixers or thermometers required.
- Uniqueness: Adding cocoa to a snickerdoodle is a game‑changer; it respects the classic while delivering a surprise that feels both nostalgic and novel.
- Crowd Reaction: Friends and family declare these the “best cookies ever” within seconds, and the aroma alone pulls strangers into the kitchen for a taste test.
- Ingredient Quality: Using high‑quality unsweetened cocoa and real butter amplifies flavor, turning a simple treat into a premium experience.
- Cooking Method: The chill‑then‑bake technique ensures the cookies hold their shape, preventing the dreaded spread‑out‑and‑disappear scenario.
- Make‑Ahead Potential: These cookies freeze beautifully, so you can bake a batch ahead of time and enjoy fresh‑warm moments whenever the mood strikes.
Inside the Ingredient List
The Flavor Base
Unsalted butter, softened (1 cup): Butter is the heart of any good cookie, providing richness and a tender crumb. Using unsalted butter lets you control the salt level precisely, ensuring the sweet‑spicy balance stays on point. If you swap in margarine, expect a slightly greasy texture and a muted flavor profile.
Granulated sugar (1 cup) and brown sugar, packed (1 cup): The duo creates a perfect contrast: granulated sugar contributes crispness, while brown sugar adds moisture and a subtle caramel note that deepens the chocolate flavor. Skipping the brown sugar will make the cookies too dry and lose that signature chew.
The Texture Crew
Large eggs (2): Eggs act as binders, giving the dough structure and contributing to the cookie’s rise. They also add a silky smoothness that makes the interior melt in your mouth. Using one egg instead of two will result in a crumbly, less cohesive cookie.
All‑purpose flour (3 cups): Flour provides the backbone, absorbing moisture and creating that tender yet sturdy texture. For a gluten‑free version, substitute with a 1‑to‑1 blend of rice flour, tapioca starch, and potato starch, but expect a slightly denser bite.
Cream of tartar (1 tsp) and baking soda (1 tsp): This classic snickerdoodle duo creates a gentle leavening reaction, giving the cookies a subtle rise and that characteristic crackle on the surface. If you leave out the cream of tartar, the cookies will be flatter and lack the signature tang.
The Unexpected Star
Unsweetened cocoa powder (½ cup): The cocoa is the secret superhero, delivering a deep, bittersweet backbone that balances the sweetness of the sugars. Choose Dutch‑process cocoa for a smoother, less acidic flavor, or natural cocoa for a brighter chocolate punch.
Salt (½ tsp): A pinch of salt amplifies every flavor, ensuring the chocolate doesn’t taste flat and the cinnamon‑sugar coating shines. If you’re using salted butter, reduce the added salt to a quarter teaspoon.
The Final Flourish
Vanilla extract (2 tsp): Vanilla adds a fragrant backdrop that ties the chocolate and cinnamon together, preventing any one flavor from dominating. Real vanilla beans can be substituted for an even richer aroma.
Granulated sugar for rolling (¼ cup) and ground cinnamon (2 tsp): This coating caramelizes just enough during baking to form those iconic crackled tops, while the cinnamon adds warmth that complements the cocoa’s depth. Skipping the roll will give you a plain chocolate cookie, missing the snickerdoodle signature.
Everything's prepped? Good. Let's get into the real action…
The Method — Step by Step
In a large mixing bowl, cream together the softened butter, granulated sugar, and brown sugar until the mixture is light, fluffy, and pale yellow. This should take about 3‑4 minutes with a hand mixer on medium speed; the sound of the whisk is like a mini‑concert in your kitchen. Pro tip: Scrape down the sides of the bowl regularly to ensure even incorporation.
Add the eggs one at a time, beating well after each addition, followed by the vanilla extract. You’ll notice the batter thickening and gaining a glossy sheen, a sign that the emulsion is perfect.
Sift together the all‑purpose flour, unsweetened cocoa powder, baking soda, cream of tartar, and salt into a separate bowl. Sifting aerates the dry ingredients, preventing lumps and ensuring a uniform chocolate color throughout the dough.
Gradually fold the dry mixture into the wet mixture, using a spatula or wooden spoon. Mix just until you no longer see flour streaks; over‑mixing will develop gluten and make the cookies tough.
Cover the dough with plastic wrap and chill in the refrigerator for 20‑30 minutes. This step firms up the butter, making the dough easier to handle and preventing excessive spreading during baking.
Kitchen Hack: If you’re short on time, place the dough on a baking sheet and freeze for 10 minutes; this speeds up the chilling process without compromising texture.While the dough chills, combine the ¼ cup granulated sugar and 2 teaspoons ground cinnamon in a shallow dish. Stir until the mixture is evenly blended, creating a fragrant, speckled powder that will coat each cookie.
Remove the dough from the fridge. Using a tablespoon or a small ice‑cream scoop, portion out balls roughly the size of a golf ball (about 1½ inches in diameter).
Watch Out: If the dough feels too sticky, lightly dust your hands with flour; too much flour will make the cookies dry.Roll each ball in the cinnamon‑sugar mixture, ensuring a generous coating that will caramelize during baking. The coating should cling like a light dusting of snow on a mountain peak.
Place the coated dough balls on a parchment‑lined baking sheet, spacing them about 2 inches apart. The dough will spread slightly, but the spacing prevents them from merging into a single giant cookie.
Give each ball a gentle press with the back of a spoon or your palm to slightly flatten the tops; this encourages a uniform crackle pattern.
Preheat your oven to 350°F (175°C). Once the oven reaches temperature, bake the cookies for 10‑12 minutes, rotating the sheet halfway through for even browning. The edges should turn a deep golden brown while the centers remain soft — that’s the sweet spot.
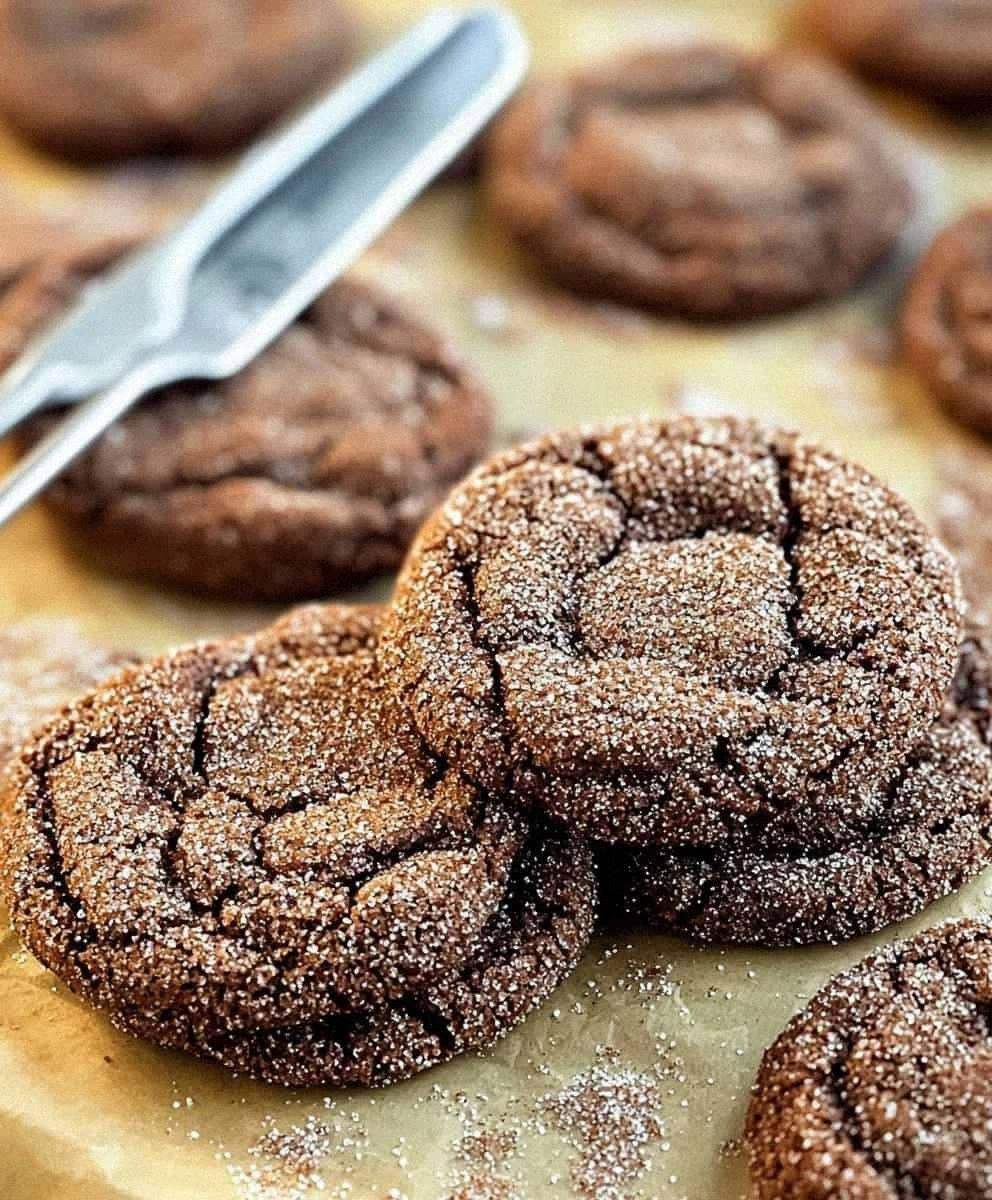
When the cookies are done, they will have a faint puff and a delightful crackle on the surface. The scent at this stage is pure bliss, a mix of chocolate, butter, and cinnamon that fills the entire house.
Kitchen Hack: For an extra glossy finish, brush the tops with a light glaze of milk mixed with a teaspoon of sugar immediately after removing from the oven.Allow the cookies to cool on the baking sheet for 3‑4 minutes; they will continue to set and the crackle will become more pronounced. Then transfer them to a wire rack to cool completely.
While they cool, the aroma will linger, making your kitchen feel like a boutique bakery. That sizzle when it hits the pan? Absolute perfection.
Serve the cookies warm, or store them in an airtight container for later indulgence. I promise, once you taste the first one, you’ll be planning the next batch before the last crumb disappears.
That's it — you did it. But hold on, I've got a few more tricks that'll take this to another level…
Insider Tricks for Flawless Results
The Temperature Rule Nobody Follows
Most home bakers bake at 350°F, but lowering the oven to 325°F for the first half of the bake yields a softer center while still achieving a crisp edge. This gentle start lets the butter melt slowly, creating that melt‑in‑your‑mouth texture. Then crank the heat up to 375°F for the last two minutes to finish the crackle. A friend tried skipping this step once — let's just say the cookies were flat and sad.
Why Your Nose Knows Best
The moment you smell the chocolate‑cinnamon perfume wafting from the oven is your cue to check the edges. If they start pulling away from the pan and turn a rich amber, the cookies are ready. Trusting your nose beats relying solely on a timer, especially when ovens vary.
The 5‑Minute Rest That Changes Everything
After the cookies have cooled on the rack, let them sit for an additional five minutes before sealing them in a container. This short rest lets the interior finish setting, preventing them from becoming soggy when stored. It also allows the flavors to meld further, intensifying that chocolate‑cinnamon harmony.
Rolling Precision
Use a kitchen scale to weigh each dough ball at 30 grams; uniform size ensures even baking and consistent texture across the batch. If you don’t have a scale, a tablespoon measure works, but be mindful of slight variations.
The Double‑Coat Technique
For an ultra‑crunchy exterior, give the cookies a second light roll in the cinnamon‑sugar mixture after the first bake, then return them to the oven for a final 2‑minute blast. The result is a caramelized crust that shatters delightfully with each bite.
Creative Twists and Variations
This recipe is a playground. Here are some of my favorite ways to switch things up:
Espresso‑Infused Snickerdoodles
Replace 1 tablespoon of cocoa with 1 tablespoon of finely ground espresso. The coffee deepens the chocolate flavor and adds a subtle bitterness that balances the sweetness, perfect for a morning treat.
White Chocolate & Raspberry
Swap half the cocoa for white chocolate chips and fold in ¼ cup freeze‑dried raspberry powder into the dough. The tangy raspberry cuts through the richness, creating a festive red‑and‑white swirl.
Nutty Crunch
Add ½ cup chopped toasted hazelnuts or pecans to the batter before chilling. The nuts introduce a buttery crunch that pairs beautifully with the chocolate‑cinnamon coating.
Spicy Mexican Mocha
Incorporate ¼ teaspoon cayenne pepper and a pinch of ground cinnamon into the dry mix. The heat adds a surprising kick, turning the cookie into a bold, adventurous bite.
Gluten‑Free Delight
Use a 1‑to‑1 gluten‑free flour blend and add 1 tablespoon xanthan gum to maintain structure. The texture remains chewy, and the flavor stays true to the original.
Storing and Bringing It Back to Life
Fridge Storage
Place the cooled cookies in an airtight container with a paper towel layer to absorb excess moisture. They stay fresh for up to a week, and the cool environment keeps the chocolate from blooming.
Freezer Friendly
Layer cookies between parchment sheets and seal the container tightly. Freeze for up to three months. When you’re ready, let them thaw at room temperature for 15 minutes, then enjoy.
Best Reheating Method
Preheat a skillet over low heat, add a tiny splash of water (about a teaspoon), and place a cookie in the pan, covering it for 30 seconds. The steam revives the soft interior while the bottom crisps up, making it taste freshly baked.