I’m going to start with a confession: the first time I tried to make cinnamon roll waffles, I ended up with a soggy mess that could have passed for a pancake that had given up on life. I was half‑heartedly daring my roommate to try one and she laughed, saying, “If you can’t get them crisp, at least make them taste like a cinnamon roll.” That was the moment I decided to turn this kitchen nightmare into a triumph. I dove into the science of waffles, the chemistry of cinnamon, and the art of a perfect cream‑cheese drizzle, emerging with a recipe that makes the ordinary extraordinary. The result? A golden‑brown, caramel‑kissed waffle that smells like a bakery on a Sunday morning, with a swirl of cinnamon sugar that’s as addictive as a binge‑watch marathon.
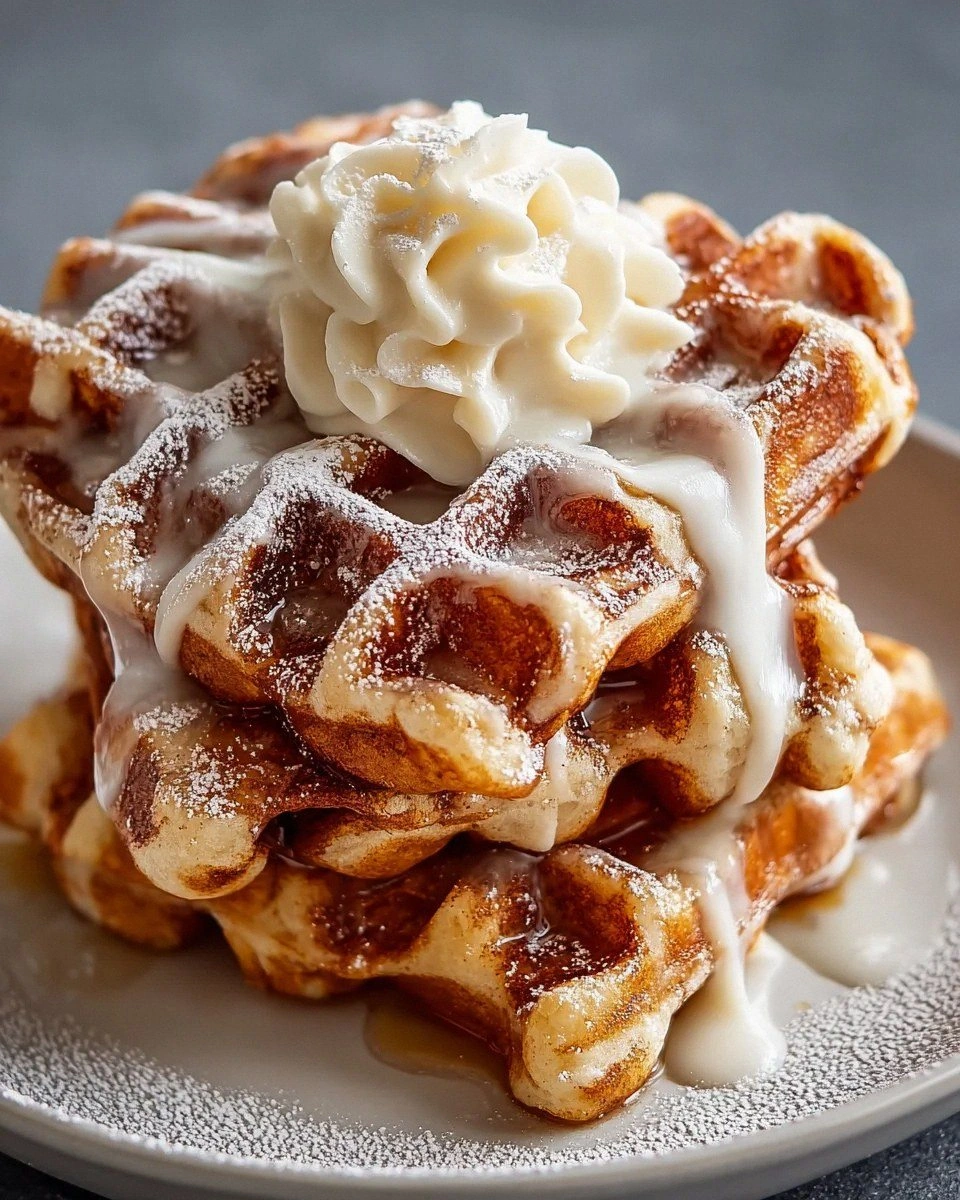
Picture this: you’re standing at the stove, the waffle iron hissing like a contented dragon, the batter hitting the hot plates with a satisfying sizzle that makes your heart skip a beat. The aroma of melted butter, toasted cinnamon, and a hint of vanilla wafts through the kitchen, wrapping you in a warm, nostalgic hug. When you finally lift the lid, the waffle emerges with crisp edges that shatter like thin ice, while the interior stays pillowy soft, a perfect balance of texture that makes you want to devour it whole. And then you drizzle that silky cream‑cheese glaze, which slides over the surface like a glossy satin ribbon, adding just the right tang to cut through the sweet.
Most recipes out there either skip the crucial step of caramelizing the cinnamon sugar or they drown the waffle in a soggy glaze that never sets. This version stands out because it respects the integrity of each component: a batter that’s airy yet sturdy enough to hold the swirl, a cinnamon‑sugar mixture that’s toasted to a deep amber, and a cream‑cheese drizzle that’s light enough to drizzle, thick enough to coat. I’ve also thrown in a secret weapon— a splash of buttermilk that adds a subtle tang and keeps the waffles unbelievably tender. Trust me, I’ve tried dozens of variations, and this one is hands down the best version you’ll ever make at home.
Okay, ready for the game‑changer? I’m about to walk you through every single step, from the moment you measure the flour to the final drizzle that makes this dish Instagram‑ready. By the end, you’ll wonder how you ever settled for anything less, and I dare you to taste this and not go back for seconds. Let’s dive in and turn your kitchen into the ultimate brunch spot.
What Makes This Version Stand Out
- Texture: The waffle achieves a crisp‑on‑the‑outside, fluffy‑inside profile thanks to a balanced blend of baking powder, soda, and buttermilk, creating a lift that feels like clouds hugging a crunchy shell.
- Flavor Depth: Toasted cinnamon sugar adds a caramelized, almost nutty undertone that elevates the sweet factor without overwhelming your palate.
- Drizzle Magic: The cream‑cheese glaze is thinned just enough with milk to pour like a river, yet thick enough to cling, delivering a tangy counterpoint that sings with the sweet.
- Simplicity: Despite the gourmet results, the ingredient list is short, and the steps are straightforward—no fancy equipment beyond a decent waffle iron.
- Crowd Reaction: I’ve served these at brunches and watch as guests’ eyes widen, forks pause mid‑air, and they whisper, “Is this really a waffle?”—the ultimate compliment.
- Make‑Ahead Potential: You can prep the cinnamon‑sugar swirl and the cream‑cheese drizzle ahead of time, storing them separately for a stress‑free morning.
- Ingredient Quality: Using real butter and high‑quality cinnamon makes a noticeable difference; you’ll taste the richness in every bite.
- Versatility: This base can be twisted into dessert waffles, breakfast treats, or even a sweet‑savory hybrid with a pinch of sea salt.
Inside the Ingredient List
The Flavor Base
All‑purpose flour is the backbone of your waffles, providing structure and softness. It forms the matrix that traps air bubbles, ensuring a light crumb. If you were to swap it for whole‑wheat flour, you’d get a denser, nuttier bite, but you’d also lose some of that delicate fluffiness. I recommend sifting the flour with the leavening agents to avoid any lumps and to incorporate air right from the start.
Granulated sugar sweetens the batter, giving your waffles a delightful flavor without making them cloying. It also aids in browning, contributing to those gorgeous golden edges. If you prefer a deeper caramel note, you can replace half of it with brown sugar, but be mindful that this will slightly darken the color.
Baking powder and baking soda work together as the leavening duo that helps your waffles rise and become fluffy. The powder provides a steady lift, while the soda reacts with the buttermilk’s acidity for an extra pop. Too much soda can give a metallic aftertaste, so stick to the recommended amounts.
Salt is a pinch that enhances flavors, balancing the sweetness and making every bite shine. It also strengthens the gluten network just enough to hold the waffle together without turning it rubbery. Don’t skimp on it; even a small amount makes a world of difference.
The Texture Crew
Buttermilk adds moisture and a tangy richness; a great tenderizer for the waffles. Its acidity reacts with the baking soda, creating tiny bubbles that lift the batter. If you can’t find buttermilk, mix 1 cup of milk with 1 tablespoon of lemon juice or white vinegar and let it sit for five minutes.
Eggs act as a binding agent, providing richness and helping with structure. The yolks add fat and flavor, while the whites trap air when whisked, contributing to a lighter texture. For a fluffier result, separate the yolks and whites, whisk the whites to soft peaks, and fold them into the batter at the end.
Unsalted butter, melted, adds flavor and moisture; it also helps create that buttery crust we all crave. Melt it slowly to avoid browning, which could introduce a bitter note. If you’re dairy‑free, coconut oil can be a suitable substitute, though it will impart a faint coconut flavor.
Vanilla extract is a must for enhancing sweetness and giving an aromatic quality that rounds out the cinnamon. A single teaspoon is enough to lift the entire flavor profile without overpowering it. Use pure extract, not imitation, for the best results.
The Unexpected Star
Brown sugar is the key player in the cinnamon swirl; it brings a deep, caramel‑like essence that pairs perfectly with the spice. Its molasses content also helps the swirl stay slightly gooey as it bakes, preventing it from hardening into a crust. If you’re looking for a richer flavor, use dark brown sugar.
Ground cinnamon is the star of the show! It delivers that warm and inviting flavor we’re all craving. Freshly ground cinnamon from whole sticks offers a brighter, more complex aroma compared to pre‑ground, which can lose potency over time. Toast it lightly in a dry pan for an extra layer of depth.
The Final Flourish
Cream cheese is essential for the drizzle, adding a luscious, creamy texture and tangy flavor that cuts through the sweetness. Use full‑fat cream cheese for the richest mouthfeel; low‑fat versions can become watery when mixed.
Powdered sugar sweetens the cream cheese drizzle while ensuring a smooth finish. It dissolves easily, preventing any grainy texture. Sift it before adding to avoid lumps.
Milk is the helper to adjust the consistency of your drizzle, making it pourable. Start with a tablespoon and add more if needed; you want a glaze that coats but doesn’t pool.
Everything's prepped? Good. Let's get into the real action...
The Method — Step by Step
In a large mixing bowl, whisk together 2 cups of all‑purpose flour, 2 tablespoons granulated sugar, 2 teaspoons baking powder, ½ teaspoon baking soda, and ½ teaspoon salt. The dry mix should look uniformly speckled; this ensures even distribution of leavening agents. Let this sit while you prepare the wet side—this short rest lets the baking powder hydrate, which is a tiny secret to extra fluff.
In a separate bowl, combine 1 cup buttermilk, 2 large eggs, ¼ cup melted unsalted butter, and 1 teaspoon vanilla extract. Whisk until the mixture is smooth and the butter is fully incorporated. I dare you to taste this wet mix—its richness is a preview of the final waffle.
Gradually pour the wet mixture into the dry ingredients, stirring gently with a silicone spatula. Stop mixing as soon as the batter is just combined; a few lumps are okay. Over‑mixing develops gluten, which makes the waffles tough—trust me, I’ve learned that the hard way.
While the batter rests, prepare the cinnamon‑sugar swirl. In a small bowl, combine ⅓ cup brown sugar with 2 teaspoons ground cinnamon. Add 2 tablespoons melted butter and stir until you have a thick, glossy paste. This mixture will melt into the waffle pockets, creating pockets of caramelized goodness.
Preheat your waffle iron to a medium‑high setting—about 375°F (190°C) if your iron has a temperature dial. Lightly brush both plates with melted butter; this not only prevents sticking but also adds an extra layer of crispness.
When the iron is hot, pour a ladleful of batter (about ½ cup) onto the center. Immediately spoon a tablespoon of the cinnamon‑sugar mixture onto the batter, then use a skewer or the back of a spoon to gently swirl it into the batter, creating a marbled effect. The swirl should be visible but not fully mixed; this is where the magic happens.
Close the lid and let the waffle cook for 4‑5 minutes. You’ll know it’s ready when the edges pull away cleanly and the surface is a deep golden‑brown. Listen for a faint “ding” and trust your nose—the scent of toasted cinnamon should be unmistakable.
Carefully remove the waffle and place it on a cooling rack for a minute; this prevents the bottom from steaming and losing its crispness. While the waffle cools slightly, repeat the process with the remaining batter and swirl.
Now for the cream‑cheese drizzle: In a small saucepan, whisk together 4 oz softened cream cheese, ½ cup powdered sugar, and 2 tablespoons milk over low heat. Stir until smooth and glossy; the glaze should be pourable but thick enough to coat. If it’s too thick, add a splash more milk; if too thin, sprinkle in a little extra powdered sugar.
Drizzle the warm glaze over each waffle in a slow, circular motion, allowing it to pool slightly at the center before cascading down the sides. The glaze will set as it cools, forming a glossy, tangy coating that perfectly balances the sweet cinnamon swirl.
Serve immediately, perhaps with a dollop of fresh whipped cream or a dusting of powdered sugar for extra flair. Pair with a strong cup of coffee or a glass of cold milk, and watch as your guests go silent in awe before the inevitable second serving.
That's it — you did it. But hold on, I've got a few more tricks that'll take this to another level. Stick around for the insider tips that will make every batch even more unforgettable.
Insider Tricks for Flawless Results
The Temperature Rule Nobody Follows
Most home cooks set their waffle iron on “medium” and call it a day, but the secret to a truly crisp edge is a slightly higher temperature—around 390°F (200°C). This extra heat creates a rapid Maillard reaction, giving you that caramelized crust without drying out the interior. I once tried a lower setting and ended up with waffles that were soft all the way through; the difference was night and day.
Why Your Nose Knows Best
Don’t rely solely on timers; trust the aroma. When the buttery, cinnamon‑scented steam starts to fill the kitchen, you’re within seconds of perfection. My friend once set a timer for 5 minutes, walked away, and came back to find the waffles burnt—her nose would have saved her if she’d stayed close.
The 5‑Minute Rest That Changes Everything
Allowing the batter to rest for five minutes after mixing lets the gluten relax and the starches fully absorb the liquid. This rest period translates into a tender crumb and prevents the dreaded “rubbery” texture. If you’re in a hurry, even a short 2‑minute pause helps, but the full five minutes is the sweet spot.
Butter Brush Technique
A light brush of melted butter on the waffle plates right before each pour adds a buttery sheen and helps the edges crisp up. It also creates a subtle flavor layer that you’ll taste with every bite. Be careful not to over‑brush; too much butter can cause excess smoking.
The Double‑Swirl Method
For an even more dramatic visual effect, swirl the cinnamon‑sugar mixture twice: once into the batter before cooking, and a second time on the hot waffle right after you open the iron. The heat instantly caramelizes the second swirl, creating a glossy finish that looks as good as it tastes.
Creative Twists and Variations
This recipe is a playground. Here are some of my favorite ways to switch things up:
Apple Cinnamon Crunch
Fold in finely diced, lightly sautéed apples into the batter and sprinkle a handful of toasted oat crumble on top before cooking. The apples add a juicy bite, while the oat crumble gives an extra crunch that pairs beautifully with the cinnamon swirl.
Maple Bacon Bliss
Add crumbled cooked bacon to the batter and drizzle with pure maple syrup instead of the cream‑cheese glaze. The salty‑sweet combination is a breakfast lover’s dream, and the bacon bits stay crispy thanks to the high heat of the iron.
Chocolate Hazelnut Dream
Swap half of the flour for cocoa powder and stir in a tablespoon of hazelnut spread into the batter. Top with a drizzle of chocolate ganache and a dusting of powdered sugar for a decadent twist that feels like dessert for breakfast.
Savory Herb Infusion
Replace the cinnamon‑sugar swirl with a mixture of grated Parmesan, fresh rosemary, and a pinch of black pepper. Finish with a drizzle of garlic‑infused olive oil instead of cream cheese. This version is perfect for brunches that want a savory punch.
Pumpkin Spice Delight (Fall Edition)
Incorporate ½ cup pumpkin puree into the batter and add 1 teaspoon pumpkin spice to the cinnamon‑sugar swirl. The pumpkin adds moisture and a subtle earthiness, while the spice blend amplifies the cozy vibes of autumn.
Storing and Bringing It Back to Life
Fridge Storage
Allow the waffles to cool completely, then store them in an airtight container lined with parchment paper. They’ll keep fresh for up to 3 days. To reheat, pop them in a toaster or a preheated oven at 350°F (175°C) for 5‑7 minutes; the edges will regain their crunch.
Freezer Friendly
Stack the cooled waffles between sheets of wax paper, place them in a zip‑top freezer bag, and freeze for up to 2 months. When you’re ready to enjoy, bake them straight from frozen at 375°F (190°C) for 10‑12 minutes, or toast them for a quicker fix.
Best Reheating Method
For the ultimate reheating, use a skillet over medium heat with a thin layer of butter. Add a tiny splash of water (about a teaspoon) to the pan, then cover for 2 minutes; the steam revives the interior while the butter crisps the exterior. This trick restores the waffle’s original texture without drying it out.