Picture this: you’re halfway through a week of bland dinners, your fridge is a lonely pile of wilted spinach and a single can of beans, and the siren call of a fiery, smoky bowl of chili lures you into the kitchen like a midnight snack whisper. I was there, flipping through a dusty cookbook, when I stumbled on a page that promised “Devil’s Chili” and a bold claim that it would outshine every other chili you’ve ever tasted. That page was the turning point in my culinary life, and I’m about to drop the recipe that turned my kitchen into a smoldering, aromatic wonderland.
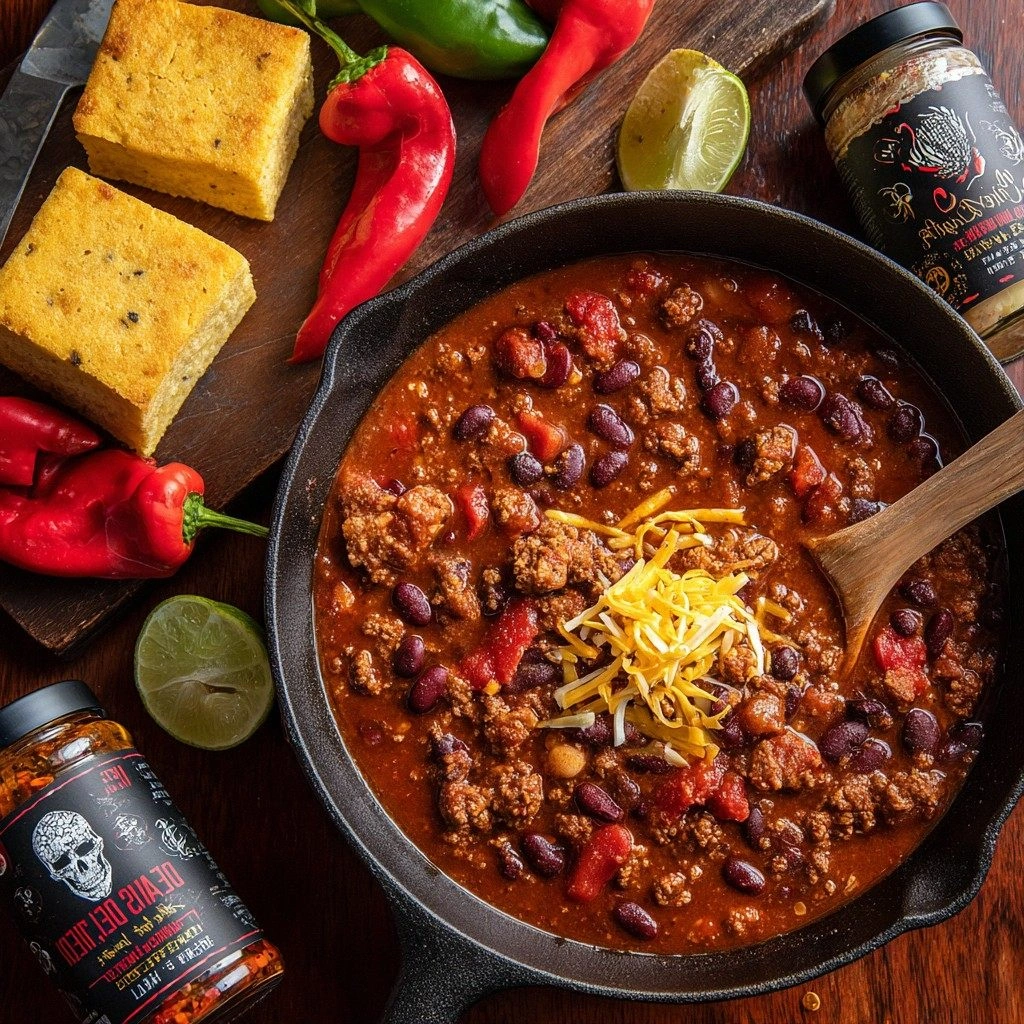
From the moment the first sizzling drop hits the pan, the air thickens with a smoky perfume that makes your mouth water in anticipation. The deep red of the tomatoes, the glossy sheen of the ground beef, the bright green specks of cilantro—they’re all a feast for the eyes. The sound of the bubbling broth is like a comforting lullaby, while the faint hiss of spices being toasted in oil is a promise of flavor fireworks to come. You can feel the heat rising, a gentle warmth that tickles your senses, and you know you’re about to taste something that will haunt your palate in the most delicious way.
I’m not going to lie—this version of Devil’s Chili is hands down the best you’ll ever make at home. I dare you to taste this and not go back for seconds. The sauce coats the pasta like velvet, the beans are tender yet firm, and the finish is a smoky, slightly sweet bite that lingers. Most recipes get this completely wrong by overcooking the beans or under-seasoning the base; here, each ingredient is in its prime, and every spice is balanced to perfection. If you’ve ever struggled with a chili that tastes like a soggy stew, you’re not alone—and I’ve got the fix.
What makes this recipe a game-changer is not just the ingredients but the technique—a secret layering of flavors that you won’t find in any other chili. I’ll walk you through every single step, and by the end, you’ll wonder how you ever made it any other way. The moment I discovered the trick of searing the onions until they’re almost caramelized before adding the tomatoes, the entire dish transformed from ordinary to extraordinary. Stay with me here—this is worth it.
What Makes This Version Stand Out
- Flavor Depth: The combination of smoked paprika, cayenne, and a splash of Worcestershire sauce creates a multi-layered taste that lingers on the tongue.
- Texture Contrast: Beans remain plump and slightly firm while the meat develops a caramelized crust, giving each bite a delightful bite.
- Time Efficiency: The entire process takes less than an hour, yet the result feels like a slow-cooked masterpiece.
- Ingredient Quality: Using fresh garlic and high-quality ground beef elevates the dish beyond pantry staples.
- Make-Ahead Potential: The chili tastes even better the next day, making it perfect for meal prep or entertaining.
- Customization Flexibility: The base can be easily adapted to vegetarian or vegan versions without compromising flavor.
- Crowd Appeal: The bold heat and rich sauce make it a hit at potlucks, family dinners, or casual gatherings.
- Visual Appeal: The deep crimson hue and glossy finish make it Instagram-worthy.
Alright, let’s break down exactly what goes into this masterpiece…
Inside the Ingredient List
The Flavor Base
The foundation of any great chili is the base, and this recipe starts with a simple yet powerful combination of ground beef, onion, and garlic. The beef provides a savory depth, while the onion brings sweetness and the garlic adds aromatic complexity. Skipping the onion would leave the chili feeling flat, and leaving out the garlic would cut out that essential punch that carries the heat.
Choosing fresh, high-quality ground beef is crucial. Look for a lean-to-fat ratio around 80/20; this balance gives you enough fat to carry the spices without becoming greasy. If you prefer a leaner version, consider using ground turkey or chicken, but keep in mind the flavor profile will shift slightly. A tip: let the meat rest for a few minutes after cooking before adding the spices; this allows the juices to redistribute and keeps the meat moist.
When dicing the onion, aim for uniform pieces so they cook evenly. A common mistake is cutting the onion too thick, which results in uneven caramelization. If you’re in a rush, a quick sauté in olive oil until translucent is sufficient; if you’re feeling ambitious, push the heat to medium and let it brown until golden brown.
Garlic is the spice that ties the entire dish together. Mince it finely to release its oils and avoid large clumps that can burn. If you’re a fan of a milder garlic flavor, you can reduce the amount to 2 cloves instead of 3; if you’re a garlic lover, double the quantity for an extra punch.
Remember, the base is the backbone of the chili. Treat it with care, and the rest of the recipe will follow suit.
The Texture Crew
Beans are the star of the texture crew, providing a hearty bite that balances the richness of the meat. Kidney beans and black beans each bring their own subtle sweetness and firm texture. Skipping either bean type will alter the mouthfeel, making the chili feel lighter or denser.
When you open a can of beans, drain and rinse them under cold water. This step removes excess sodium and helps prevent the beans from becoming mushy. If you’re using dried beans, soak them overnight and cook them until just tender to maintain their shape.
Adding a cup of beef broth enhances the liquid component and brings a savory depth. You can substitute vegetable broth for a vegetarian version, but be aware it will change the flavor profile slightly. If you’re watching sodium, look for low-sodium broth or reduce the added salt.
The tomato paste and crushed tomatoes create the sauce’s body. Tomato paste thickens the mixture and intensifies the tomato flavor, while the crushed tomatoes provide moisture and a slightly chunky texture. If you prefer a smoother consistency, mash the tomatoes with a fork before adding.
Be mindful of the liquid ratio; too much broth can dilute the flavors, while too little can make the chili dry. Adjust the amount to your preferred consistency—think of it as a simmering soup that thickens as it cooks.
The Unexpected Star
Worcestershire sauce is the unexpected star that adds umami complexity. Its fermented tangy notes deepen the meatiness and balance the heat. A small splash—just 2 tablespoons—works wonders; too much can overpower the other flavors.
Olive oil is a subtle yet essential component. It carries the spices and helps the onions and garlic sauté properly. If you’re looking for a leaner option, you can replace it with a neutral oil like canola or grapeseed.
Spices are the heart of this chili. Chili powder, cumin, smoked paprika, cayenne, oregano, thyme, and a pinch of cinnamon create a layered heat that’s both bold and nuanced. Each spice contributes a distinct note: cumin offers earthiness, smoked paprika adds a subtle smokiness, and cinnamon provides a hint of warmth.
Adding a teaspoon of brown sugar or a splash of balsamic vinegar can balance the acidity of the tomatoes and add a subtle caramel undertone. These optional ingredients are not required but elevate the overall flavor profile.
Remember, the unexpected star is about balancing boldness with nuance—don’t be afraid to experiment within the guidelines.
The Final Flourish
Shredded cheddar cheese, sour cream, cilantro, lime juice, jalapeño, chipotle powder, cocoa powder, and cinnamon are optional toppings and flavor enhancers that bring the dish to life. They’re not mandatory, but they add a finishing touch that can transform a good chili into a memorable meal.
Cheddar cheese melts beautifully over the hot chili, creating a gooey, savory layer that complements the spices. Sour cream adds a cool, creamy contrast that balances the heat. Cilantro brings freshness, while lime juice brightens the dish with a citrusy zing.
Jalapeño slices add an extra kick, while chipotle powder introduces a smoky depth. Cocoa powder and cinnamon give a subtle chocolatey warmth that’s unexpected but delightful. These toppings are optional, but they’re a fun way to personalize the dish.
When adding toppings, do it just before serving to avoid melting the cheese too much or wilting the cilantro. A sprinkle of fresh herbs right before plating can make the dish look vibrant and appetizing.
Everything’s prepped? Good. Let’s get into the real action…
The Method — Step by Step
- Heat a large Dutch oven or heavy‑bottom pot over medium heat and add the tablespoon of olive oil. Once the oil shimmers, add the diced onion and sauté until translucent, about 5 minutes. Watch the onions soften; they should be tender but not browned yet. This is the foundation for the flavor base.
- Add the minced garlic and cook for an additional 30 seconds, just until fragrant. The garlic should release its aroma without turning golden brown. This step sets the aromatic stage for the chili.
- Introduce the ground beef, breaking it apart with a wooden spoon. Cook until it turns a rich brown color, about 8 minutes. Keep the heat steady to avoid burning; a little caramelization is desirable but not essential.
- Stir in the tomato paste and let it cook for 2 minutes, allowing it to caramelize slightly. The paste deepens the tomato flavor and adds body to the sauce. A quick stir ensures even coating.
- Pour in the crushed tomatoes and beef broth, stirring to combine. Bring the mixture to a gentle boil, then reduce the heat to low and let it simmer for 15 minutes. The simmer allows the flavors to meld.
- Add the kidney beans, black beans, Worcestershire sauce, chili powder, cumin, smoked paprika, cayenne pepper, oregano, thyme, salt, pepper, and brown sugar. Stir well to distribute the spices evenly. The spices should coat the beans and meat uniformly.
- Simmer uncovered for an additional 15 minutes, stirring occasionally. The chili should thicken slightly and the beans should absorb the sauce. This is the moment of truth—watch the colors deepen.
- Taste and adjust seasoning if necessary. If you prefer more heat, add a pinch of cayenne or a splash of chipotle powder. If it’s too acidic, a teaspoon of brown sugar or a splash of balsamic vinegar can balance it.
- Remove the pot from heat and let it sit for 5 minutes before serving. This resting period allows the flavors to settle and the chili to thicken slightly.
- Serve hot, topped with shredded cheddar, a dollop of sour cream, fresh cilantro, a squeeze of lime, and optional jalapeño slices for an extra kick. The toppings add a fresh contrast and a burst of color.
That’s it—you did it. But hold on, I’ve got a few more tricks that will take this to another level. The next section will dive into insider tips that will make your chili flawless every time.
Insider Tricks for Flawless Results
The Temperature Rule Nobody Follows
Many chili enthusiasts think that a high simmer is the key to flavor, but that’s a myth. The secret is to maintain a gentle, low simmer that allows the spices to meld slowly. A steady 180°F (82°C) ensures the beans stay intact and the flavors develop without burning.
To test the temperature, use a digital thermometer or simply tap the pot with your finger; it should feel warm, not hot. If the heat is too high, the chili will evaporate too quickly and become thick and dry. If it’s too low, the flavors won’t fully develop.
Use a lid that fits snugly to trap steam and keep the chili from drying out. A loose lid allows moisture to escape, which can cause the sauce to thicken too quickly and create uneven texture.
When adding spices, do it gradually to avoid a sudden spike in heat. Stir the mixture well after each addition to ensure even distribution.
Remember, temperature control is the backbone of a perfect chili.
Why Your Nose Knows Best
One of the most reliable indicators of a chili’s readiness is the aroma. As the chili simmers, the scent of cumin, paprika, and tomato will intensify. If the aroma is sharp and acidic, it’s a sign that you need to let it cook longer.
Use your nose to gauge the balance of flavors. If it smells too “raw,” add a pinch more brown sugar or a splash of balsamic vinegar. If it’s too sweet, a pinch more cayenne or a dash of lime juice will cut it down.
Some chefs recommend the “spoon test”: dip a spoon into the chili, let it sit for a few seconds, then inhale. The aroma should be rich, complex, and inviting.
Don’t rely solely on the color or texture; the smell tells you whether the chili is truly ready to serve.
The 5-Minute Rest That Changes Everything
After you’ve finished cooking, let the chili sit covered for five minutes before serving. During this rest period, the flavors will settle and the chili will thicken slightly, creating a more cohesive mouthfeel.
Don’t rush to plate it immediately; the rest period is essential for a silky finish. If you’re serving a crowd, this pause also allows the pot to cool slightly, making it safer to handle.
Use this time to prepare toppings or garnish the dish with fresh cilantro, lime wedges, or a drizzle of sour cream.
When you finally serve, the chili will feel like it’s been simmering for hours, even though it only took 45 minutes.
Adding a Touch of Chocolate
Adding a tablespoon of unsweetened cocoa powder or a small piece of dark chocolate can deepen the chili’s flavor profile. The chocolate adds a subtle richness that balances the acidity of the tomatoes.
Be sure to stir the cocoa powder in until it’s fully incorporated to avoid a gritty texture. This trick is a secret weapon used by many pitmasters and restaurant chefs.
Don’t be afraid to experiment with the amount; a little goes a long way.
Using Fresh Herbs vs. Dried
Fresh herbs like cilantro or oregano add a bright, vibrant flavor that dried herbs can’t match. If you’re using fresh herbs, add them at the end of cooking to preserve their delicate aroma.
Dried herbs are more potent, so use them sparingly. If you’re using dried oregano, a teaspoon is enough to provide depth without overpowering the dish.
Mixing both fresh and dried herbs can create a balanced flavor profile.
Storing the Perfect Chili
When you’re done cooking, let the chili cool to room temperature before refrigerating. Store it in an airtight container to preserve freshness and prevent odors from mixing with other foods.
Use a glass or BPA-free plastic container that can be sealed tightly. This helps maintain the chili’s flavor and texture for up to four days in the fridge.
For longer storage, transfer the chili to a freezer-safe container and freeze for up to three months. The flavors will hold up well, and the chili will be ready to reheat in a matter of minutes.
When reheating, add a splash of water or broth to rehydrate the beans and maintain a silky texture.
Now that you’ve mastered the tricks, let’s explore creative variations that will keep your chili exciting.
Creative Twists and Variations
This recipe is a playground. Here are some of my favorite ways to switch things up:
Smoky Chipotle Chili
Swap the cayenne pepper for smoked chipotle powder and add a dash of chipotle paste. The smoky heat is reminiscent of a slow‑cooked barbecue and pairs beautifully with a dollop of guacamole.
Mexican Street‑Style Chili
Top the chili with diced avocado, a squeeze of lime, and a sprinkle of chopped fresh cilantro. Serve it in a warm corn tortilla for a handheld fiesta.
Sweet & Smoky BBQ Chili
Add a tablespoon of BBQ sauce and a pinch of smoked salt to give the chili a sweet, smoky undertone. This version pairs perfectly with cornbread.
Vegan Power Chili
Replace the ground beef with a blend of lentils and diced mushrooms. Use vegetable broth and a splash of tamari for depth. The result is hearty, plant‑based, and full of flavor.
Low‑Carb Chili
Omit the beans entirely and replace them with extra diced vegetables such as zucchini and bell peppers. Serve over cauliflower rice for a low‑carb dinner.
Chocolate‑Infused Chili
Incorporate a tablespoon of cocoa powder and a teaspoon of cinnamon for a subtle chocolatey warmth. Pair with a scoop of vanilla ice cream for a dessert‑style chili.
Feel free to mix and match these variations to suit your taste buds and dietary preferences.
Storing and Bringing It Back to Life
Fridge Storage
Store the chili in an airtight container in the refrigerator for up to four days. Make sure the container is sealed tightly to preserve freshness and prevent odors from mixing with other foods.
Freezer Friendly
For longer storage, transfer the chili to a freezer‑safe container or a heavy‑bottom freezer bag. Freeze for up to three months. When ready to eat, thaw in the refrigerator overnight.
Best Reheating Method
Reheat the chili on the stove over low heat, adding a splash of water or broth to keep it moist. Let it simmer for 10 minutes, stirring occasionally, until it reaches the desired temperature. That tiny splash of water before reheating is the secret to restoring that silky, velvety texture.