Love this? Pin it for later! 📌
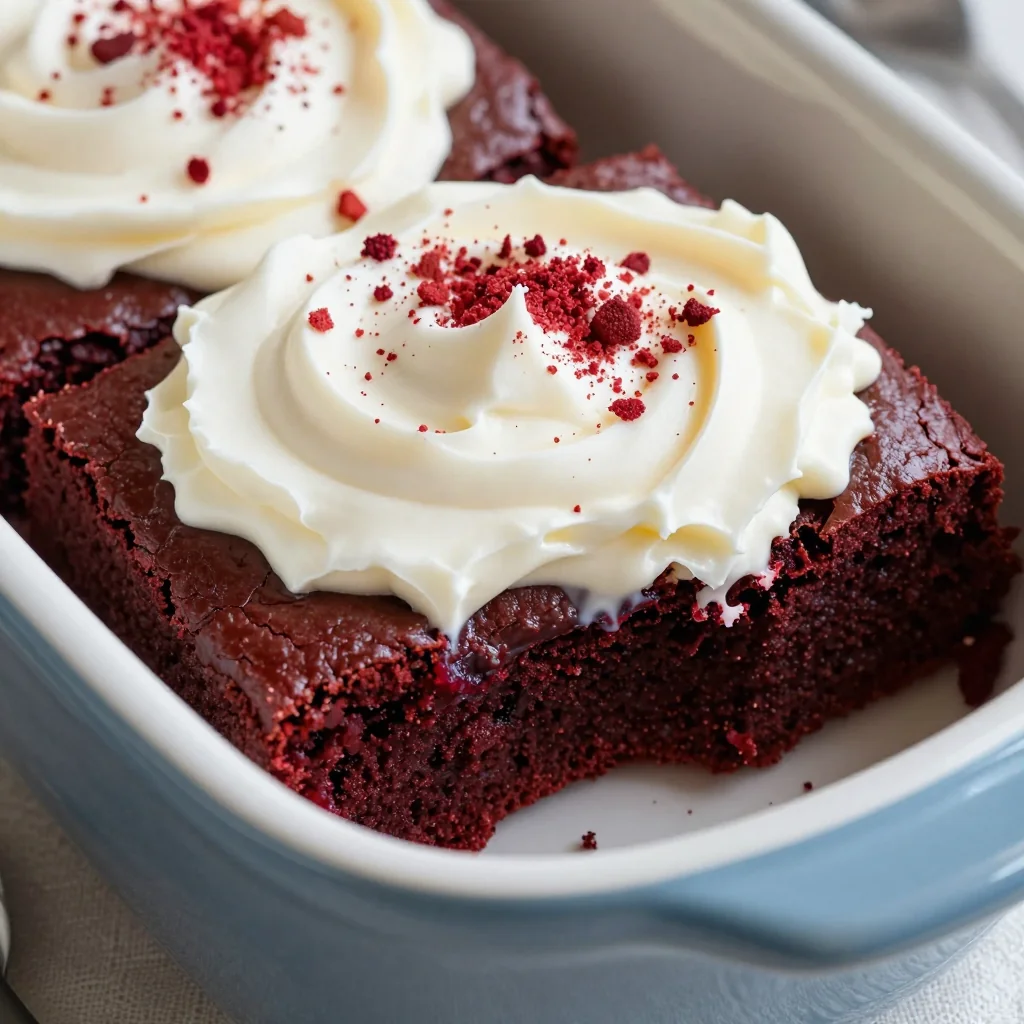
Imagine coming home to the aroma of rich, chocolatey red velvet brownies that have been slowly baking to perfection while you were out living your best life. That's exactly what happened to me last Valentine's Day when I accidentally created the most decadent dessert my slow cooker has ever produced. What started as a kitchen experiment—because honestly, who thinks "brownies" when they look at their Crock-Pot?—turned into a family tradition that now has my kids requesting these fudgy, cream cheese-frosted beauties for every special occasion.
The magic here lies in the slow, gentle heat that creates an incredibly moist, dense brownie that's somewhere between a cake and a fudge. The cream cheese frosting melts slightly from the residual warmth, creating this dreamy marbled effect that looks like it came from a boutique bakery. Plus, using the slow cooker means no worrying about over-baking or heating up your entire kitchen. Whether you're celebrating an anniversary, hosting a book club, or just need something spectacular for your holiday cookie exchange, these red velvet brownies deliver that "wow" factor with minimal effort.
Why This Recipe Works
- Hands-Off Cooking: Set it and forget it! The slow cooker does all the work while you tackle your to-do list.
- Perfectly Moist Texture: The enclosed slow cooker environment prevents drying out, giving you fudgy brownies every single time.
- Stress-Free Entertaining: Make these ahead for parties—they actually taste better the next day as flavors meld.
- Bakery-Quality Results: The slow cooking creates a professional-level dense, chewy texture you can't achieve in a regular oven.
- Customizable Flavors: Swap the cream cheese frosting for white chocolate, add nuts, or include white chocolate chips in the batter.
- Year-Round Appeal: While perfect for holidays, the rich chocolate flavor satisfies cravings any season.
Ingredients You'll Need
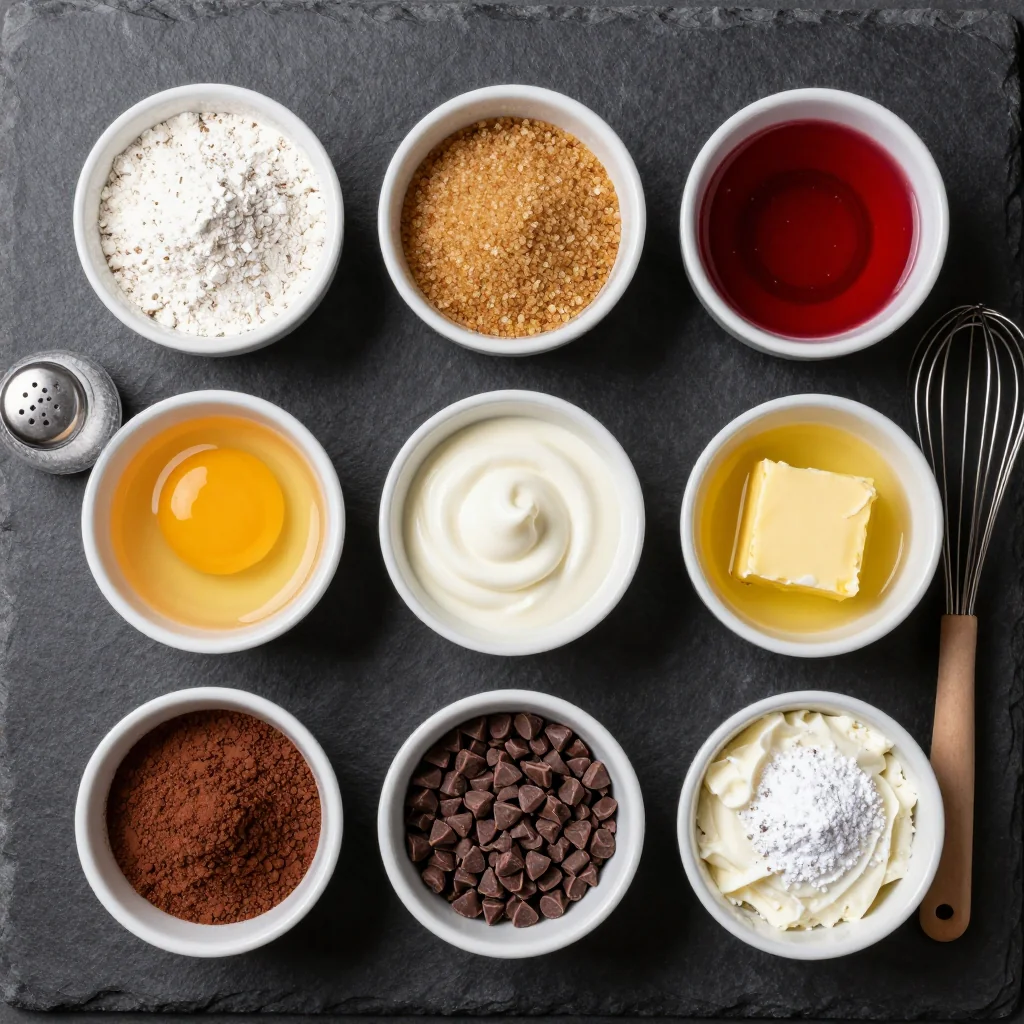
Quality ingredients make all the difference in these show-stopping brownies. Let's break down each component so you understand why each one matters:
All-Purpose Flour: I use King Arthur flour for its consistent protein content. Spoon and level your flour instead of scooping directly from the bag—this prevents dense, heavy brownies. For a gluten-free version, substitute with a 1:1 gluten-free baking blend that includes xanthan gum.
Unsweetened Cocoa Powder: Dutch-processed cocoa gives these brownies their deep, rich chocolate flavor. Hershey's Special Dark is my go-to for both availability and taste. Natural cocoa works too, but the flavor won't be as complex.
Granulated Sugar & Brown Sugar: The combination creates the perfect balance of sweetness and moisture. Dark brown sugar adds a subtle caramel note that complements the cocoa beautifully. If you're out of brown sugar, add 1 tablespoon of molasses to 1 cup of granulated sugar.
Red Food Coloring: Gel coloring gives the most vibrant results without adding excess liquid. Americolor's Red Red or Super Red are professional favorites. For a natural option, beet powder works but will give a more muted, earthy tone.
Buttermilk: The acid reacts with the cocoa to enhance the red color and creates tenderness. No buttermilk? Make your own by adding 1 tablespoon of white vinegar or lemon juice to regular milk and let it sit for 5 minutes.
Vegetable Oil: Oil keeps these brownies incredibly moist during the long cooking process. I prefer neutral oils like canola or grapeseed, but melted coconut oil adds a lovely subtle flavor if you enjoy that profile.
Cream Cheese: Full-fat Philadelphia cream cheese creates the silkiest frosting. Let it soften completely at room temperature for a lump-free result. Low-fat versions work but won't be as rich and creamy.
How to Make Indulgent Slow Cooker Red Velvet Brownies with Frosting
Prepare Your Slow Cooker
Line your 6-quart slow cooker with parchment paper, leaving an overhang on two opposite sides to create handles. This is crucial for easy removal later. Spray the parchment and exposed sides with non-stick cooking spray. If you don't have parchment, heavily butter the insert and dust with cocoa powder, tapping out the excess.
Mix Dry Ingredients
In a medium bowl, whisk together 1½ cups all-purpose flour, ¾ cup Dutch-processed cocoa powder, 1 teaspoon baking powder, and ½ teaspoon salt. This ensures even distribution of leavening agents and prevents bitter cocoa pockets in your brownies.
Cream Butter and Sugars
In a large bowl using an electric mixer, beat ½ cup softened unsalted butter, 1 cup granulated sugar, and ½ cup packed brown sugar until light and fluffy—about 3-4 minutes. This incorporates air for a lighter texture despite the dense cooking method. Scrape down the bowl as needed.
Add Wet Ingredients
Beat in 3 large eggs one at a time, then mix in 2 tablespoons red food coloring, 2 teaspoons vanilla extract, and 1 teaspoon white vinegar. The vinegar enhances the cocoa's natural red tones and reacts with the baking powder for lift. The batter should be a vibrant red—add more coloring if needed.
Alternate Dry and Wet
Reduce mixer speed to low. Add one-third of the dry ingredients, then half of ½ cup buttermilk. Repeat, ending with dry ingredients. Mix just until combined—overmixing develops gluten and creates tough brownies. The batter will be thick and luxurious.
Transfer and Smooth
Pour the thick batter into your prepared slow cooker. Use an offset spatula to spread it evenly to the edges. Tap the insert gently on the counter to release air bubbles. This prevents uneven cooking and gives you a level surface for frosting later.
Slow Cook to Perfection
Cover and cook on LOW for 2½ to 3 hours. Resist the urge to peek—each lift of the lid adds 15-20 minutes to cooking time. The edges should look set but the center should still jiggle slightly. It will continue cooking from residual heat. Every slow cooker varies, so start checking at 2 hours.
Cool Completely
Turn off the slow cooker and let the brownies cool inside for 1 hour with the lid slightly ajar. This prevents cracking and makes removal easier. Then lift out using the parchment handles and cool completely on a wire rack—about 2 more hours. Patience here prevents the frosting from melting into a puddle.
Make the Cream Cheese Frosting
Beat 8 ounces softened cream cheese and ¼ cup softened butter until fluffy. Add 2 cups powdered sugar, 1 teaspoon vanilla extract, and a pinch of salt. Beat until smooth and spreadable. If too thick, add 1 tablespoon milk. If too thin, add more powdered sugar. The frosting should hold peaks but still be spreadable.
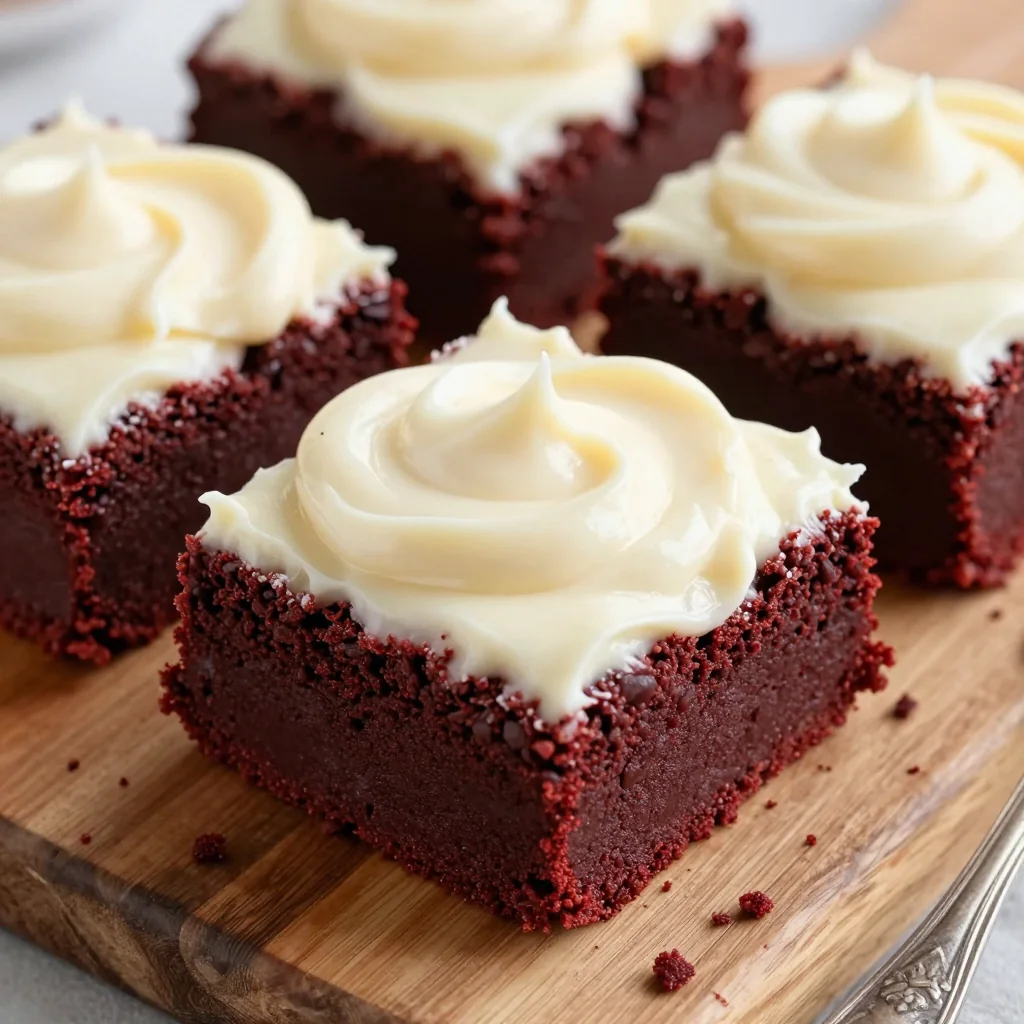
Frost and Decorate
Spread frosting over completely cooled brownies. For a bakery look, use a large star tip to pipe decorative borders. Sprinkle with red velvet cake crumbs, chocolate shavings, or edible glitter for special occasions. Chill for 30 minutes to set the frosting before cutting into squares.
Expert Tips
Temperature Matters
Every slow cooker heats differently. Older models run hotter, while newer ones are more accurate. If your brownies are browning too quickly around the edges, place a clean kitchen towel under the lid to absorb condensation and reduce heat.
Size Considerations
This recipe works best in a 6-quart oval slow cooker. For 4-quart models, reduce the recipe by one-third and check for doneness 30 minutes earlier. In an 8-quart, the brownies will be thinner and cook faster.
Moisture Control
If you live in a humid climate, your brownies might take longer to set. Place paper towels under the lid to absorb excess moisture. In dry climates, they may cook faster—start checking at 2 hours.
Clean Cuts
For picture-perfect squares, chill the frosted brownies for 2 hours, then cut with a hot, dry knife. Wipe the blade between cuts. Dip the knife in hot water, then dry with a towel for the cleanest slices.
Color Vibrancy
Natural cocoa powder gives better color than Dutch-processed, but Dutch-processed tastes better. I use mostly Dutch with 2 tablespoons natural cocoa for the best of both worlds.
Make-Ahead Magic
These brownies taste even better the next day as flavors meld. Bake, cool, and frost up to 3 days ahead. Store covered in the refrigerator, then bring to room temperature 1 hour before serving.
Variations to Try
White Chocolate Raspberry
Fold 1 cup white chocolate chips into the batter. Swirl ½ cup raspberry preserves through the top before cooking. The tart berries cut through the richness beautifully.
Pecan Praline
Add 1 cup chopped toasted pecans to the batter. Top with a praline frosting made by beating ½ cup brown butter with cream cheese and brown sugar instead of powdered sugar.
Espresso Mocha
Dissolve 2 tablespoons instant espresso powder in the buttermilk. Add ½ cup mini chocolate chips to the batter. The coffee intensifies the chocolate flavor without making them taste like coffee.
Holiday Peppermint
Replace vanilla with peppermint extract in both brownies and frosting. Top with crushed candy canes. Perfect for Christmas cookie platters and winter potlucks.
Storage Tips
Refrigerator Storage
Store frosted brownies in an airtight container in the refrigerator for up to 5 days. Place wax paper between layers to prevent sticking. The cream cheese frosting needs refrigeration, but the brownies themselves can stay at room temperature if unfrosted.
Freezer Instructions
These brownies freeze beautifully for up to 3 months. Cut into squares and wrap each piece tightly in plastic wrap, then foil. Thaw overnight in the refrigerator, then bring to room temperature 1 hour before serving. For best texture, freeze unfrosted and add frosting after thawing.
Make-Ahead Options
Bake the brownies up to 3 days ahead and store covered at room temperature. Make the frosting up to 1 week ahead and refrigerate. Let frosting soften at room temperature 30 minutes before spreading. Assembled brownies keep 3 days refrigerated, making them perfect for entertaining.
Frequently Asked Questions
Indulgent Slow Cooker Red Velvet Brownies with Frosting
Ingredients
Instructions
- Prepare slow cooker: Line 6-quart slow cooker with parchment paper, leaving overhang. Spray with non-stick spray.
- Mix dry ingredients: Whisk flour, cocoa powder, baking powder, and salt in medium bowl.
- Cream butter and sugars: Beat butter, granulated sugar, and brown sugar until fluffy, 3-4 minutes.
- Add eggs and flavorings: Beat in eggs one at a time, then food coloring, vanilla, and vinegar.
- Alternate dry and wet: Mix dry ingredients and buttermilk in three additions, beginning and ending with dry ingredients.
- Transfer and cook: Spread batter evenly in slow cooker. Cover and cook on LOW 2½-3 hours until edges are set but center jiggles slightly.
- Cool completely: Let cool in slow cooker 1 hour, then lift out and cool completely on wire rack.
- Make frosting: Beat cream cheese and butter until fluffy. Add powdered sugar, vanilla, and salt; beat until smooth.
- Frost and serve: Spread frosting over cooled brownies. Chill 30 minutes before cutting into squares.
Recipe Notes
Brownies will appear underdone but will set as they cool. For clean cuts, chill frosted brownies 2 hours, then cut with hot, dry knife. Store covered in refrigerator up to 5 days.