I was standing in my kitchen, staring at a ruined batch of cookies that had turned into a sticky, flat pancake, when my friend dared me to whip up something that would turn that disappointment into a sweet victory. The kitchen smelled of burnt sugar and the faint promise of something better. My eyes were drawn to the gleam of the peanut butter jar, the kind that clings to the spoon like a lover’s kiss. I imagined a ball of flavor that could melt on the tongue and leave a trail of joy. That moment sparked the idea for the ultimate peanut butter ball that would change how you think about dessert.
I reached for the creamy, no‑stir peanut butter, the kind that doesn’t need a whisk to become silky. I thought about the crunch of graham crackers and the rich, chocolatey coating that would give it that final flourish. I pictured the sound of the first bite, a satisfying snap followed by a velvety melt. I wanted each ball to feel like a hug from a childhood memory, yet with a modern twist. The goal was simple: a recipe that would be so good, you’d dare anyone to taste it and not want seconds.
I experimented with the ratios until the mixture was thick enough to hold its shape but still soft enough to roll like butter. I added powdered sugar to sweeten without making it clumpy, and a pinch of salt to balance the sweetness. I mixed in graham cracker crumbs to give a subtle crunch that contrasts with the creamy center. I melted butter to bind everything together, giving the mixture a glossy sheen. When the batter was ready, I knew I had hit the sweet spot.
I’ve never seen a recipe that takes such a humble combination of ingredients and turns it into a crowd‑pleaser. Most versions get it wrong by over‑mixing or using the wrong type of peanut butter. This version uses creamy no‑stir, a subtle salt, and a generous amount of graham cracker crumbs to create a texture that’s both chewy and crunchy. The chocolate coating isn’t just a wrapper; it’s a flavor enhancer that caramelizes slightly in the fridge. By the end of this post, you’ll be ready to make a batch that will have everyone asking for a second.
What Makes This Version Stand Out
- Flavor: The creamy peanut butter forms a rich base that sings with each bite. The addition of graham cracker crumbs introduces a subtle crunch that echoes a childhood snack. The final chocolate drizzle caramelizes just enough to add a buttery finish.
- Texture: Each ball holds a soft interior that melts in your mouth while the graham crackers provide a satisfying snap. The powdered sugar keeps the mixture from becoming overly sticky, allowing for smooth rolling. The chocolate coating adds a crisp shell that breaks cleanly.
- Simplicity: No baking, no complex measurements, just a handful of pantry staples. The method requires only a saucepan and a few mixing bowls. The result is a dessert that feels like a gourmet treat without the fuss.
- Uniqueness: The combination of no‑stir peanut butter and graham cracker crumbs is a twist on classic peanut butter cups. The subtle salt enhances the sweetness without overpowering. The chocolate coating is thick enough to hold its shape yet thin enough to melt pleasantly.
- Crowd Reaction: Friends who’ve tried other versions say this one is the most indulgent yet balanced. The texture keeps them from feeling guilty about a sweet treat. The chocolate shell is a crowd‑pleaser for both kids and adults.
- Make‑ahead: The balls can be prepared a day ahead and stored in the fridge. They keep well for up to 48 hours, making them perfect for parties or a quick dessert. The chocolate shell remains firm, so they’re ready to serve whenever you need.
Inside the Ingredient List
The Flavor Base
Creamy no‑stir peanut butter is the heart of this recipe. It delivers a smooth, nutty richness that coats the palate. The no‑stir variety means you’ll never have to fight a lumpy consistency. Choosing a high‑quality brand with natural oils can elevate the flavor profile.
The Texture Crew
Powdered sugar balances the sweetness without making the mixture clumpy. Graham cracker crumbs add a subtle crunch that echoes a childhood snack. Unsalted butter acts as a binder, giving the mixture a glossy sheen and a subtle buttery note. Together, they create a ball that feels both airy and dense.
The Unexpected Star
A pinch of salt might seem insignificant, but it lifts the overall flavor. Salt cuts through the sweetness and brings out the nuttiness of the peanut butter. It also helps the chocolate coating set with a slight sheen. Skip it at your own peril; you’ll end up with a flat, unbalanced flavor.
The Final Flourish
Semi‑sweet chocolate chips provide the glossy finish and a hint of bitterness that balances the sweetness. The chips melt smoothly when dipped, creating a thick shell that holds its shape. Choosing a chocolate with at least 30% cacao will give a richer taste. Melted chocolate should be cooled slightly before dipping to avoid a hard shell.
The Method — Step by Step
- Melt the unsalted butter in a small saucepan over low heat until it’s just liquid. Add the creamy peanut butter and stir until the mixture is a uniform, glossy paste. Keep the heat low to prevent the peanut butter from separating. The goal is a silky texture that’s easy to handle. This step is the foundation of all the flavor that follows.
- Gradually sprinkle in the powdered sugar, whisking continuously to avoid lumps. The sugar should dissolve completely, leaving the mixture smooth and slightly sweet. If you see any gritty patches, continue whisking until they’re gone. This step ensures a consistent mouthfeel. The mixture should feel like a thick, spreadable batter.
- Stir in the graham cracker crumbs until they’re fully incorporated. The crumbs should be evenly distributed, giving each ball a subtle crunch. Make sure the mixture isn’t too dry; add a splash of water if it feels crumbly. This will give the balls a cohesive structure. The crumbs also add a slight savory note that balances the sweetness.
- Add a pinch of salt and mix until the flavor is evenly distributed. The salt will lift the overall taste, making the peanut butter more pronounced. It also helps the chocolate coating set with a glossy finish. Stir gently to avoid over‑mixing, which can make the mixture tough. This is the moment when the flavor profile comes together.
- Let the mixture cool to room temperature, about 10–15 minutes. The mixture will thicken as it cools, making it easier to handle. If it’s still too runny, let it sit a bit longer or place it in the fridge for a few minutes. This step is crucial for achieving the right consistency. A properly cooled mixture will roll into neat balls without cracking.
- Using a melon baller or a teaspoon, scoop out portions of the mixture and roll them between your palms. The balls should be about the size of a walnut for the best balance of texture. If you prefer smaller bites, reduce the portion size accordingly. Roll the balls until they’re smooth and round. This is the moment when the dessert feels almost tangible.
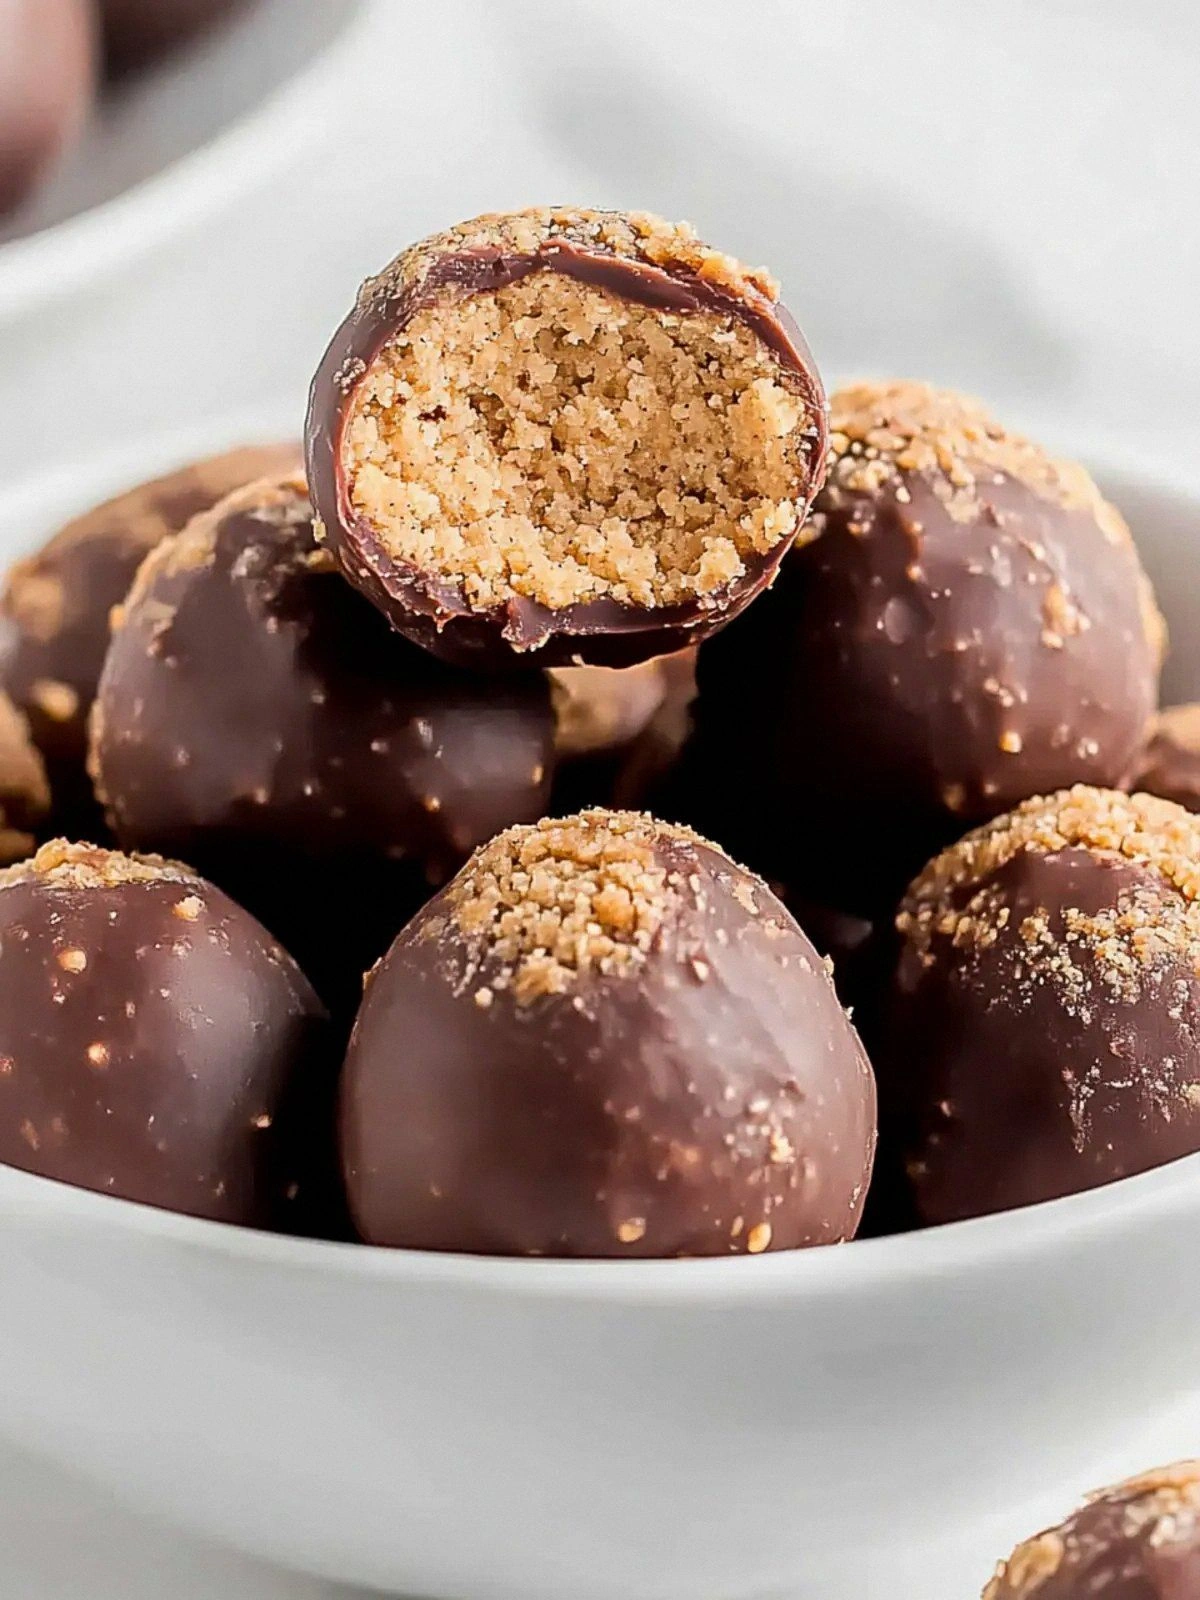
- Melt the semi‑sweet chocolate chips in a microwave-safe bowl, stirring every 20 seconds until smooth. Dip each ball into the melted chocolate, ensuring it’s fully coated. Let excess chocolate drip off before placing the ball on parchment paper. The chocolate will set quickly in the fridge, forming a glossy shell. This step is pure magic.
- Place the chocolate‑coated balls on a parchment-lined tray and refrigerate for 20 minutes to set the shell. The balls should feel firm to the touch once the chocolate has fully hardened. If you need a firmer shell, let them chill for an additional 10 minutes. Serve immediately or store in an airtight container. This final step guarantees a perfect bite every time.
That’s it — you did it. But hold on, I've got a few more tricks that'll take this to another level. These little nuances are what separate a good batch from a legendary one. Keep reading, because the next section will reveal the secrets that even seasoned bakers overlook. Trust me, once you master these, you’ll never look back at a plain peanut butter ball again. Let’s dive into the insider tricks that make every bite unforgettable.
Insider Tricks for Flawless Results
The Temperature Rule Nobody Follows
Peanut butter and chocolate are temperature‑sensitive; too hot and they separate, too cold and they’re hard to work with. Keep the butter just below the melting point, around 60°F, to maintain a silky consistency. When melting chocolate, use a double boiler or a microwave on low power to avoid scorching. If you notice the mixture turning oily, let it sit for a minute before resuming. This simple temperature control ensures a smooth, cohesive dough.
Why Your Nose Knows Best
Before you roll the first ball, pause and inhale the aroma of the mixture. A sweet, nutty scent signals that the sugar has dissolved properly. If you detect a raw or metallic smell, it’s a sign the mixture is over‑mixed or overheated. Smell the chocolate before dipping; it should smell fresh, not burnt. Your nose is an early warning system that guarantees a flawless result.
The 5‑Minute Rest That Changes Everything
After mixing, let the dough rest for 5 minutes. This pause allows the powdered sugar to fully hydrate and the crumbs to absorb moisture. The result is a dough that’s easier to handle and rolls into perfect spheres. Skipping this step often leads to uneven balls that break apart. A quick rest is the secret to a smooth, cohesive texture.
Keep It Cool, Keep It Creamy
If you’re working on a hot day, chill the bowl and your hands in the fridge for a few minutes before rolling the balls. Cold hands prevent the mixture from melting and sticking to your palms. This trick is especially useful if you’re making a large batch. The cooler environment also helps the chocolate set faster after dipping.
The Secret to a Perfect Chocolate Shell
After dipping, tap the ball gently on the counter to remove excess chocolate. This step ensures a thin, even coating that sets beautifully. If you prefer a thicker shell, let the chocolate cool slightly before the second dip. Avoid letting the chocolate sit too long on the ball, as it can become hard and brittle. A thin shell offers a delightful crunch with each bite.
Creative Twists and Variations
This recipe is a playground. Here are some of my favorite ways to switch things up:
Salted Caramel Swirl
Swirl a spoonful of salted caramel into the peanut butter mixture before rolling. The caramel adds a buttery sweetness that pairs beautifully with the nutty base. The result is a chewy, caramel‑laden ball that melts in your mouth. This variation is perfect for guests who love a touch of decadence.
Nutty Trail Mix
Add chopped almonds, dried cranberries, and a dash of cinnamon to the dough. The trail mix gives a rustic texture and a hint of spice. Each bite becomes a journey through nutty crunch and fruity sweetness. Ideal for a snack that feels both indulgent and wholesome.
Coconut Crunch
Replace graham cracker crumbs with shredded coconut for a tropical twist. The coconut adds a subtle sweetness and a chewy texture. Pair it with dark chocolate chips for a balanced flavor profile. This version feels like a vacation in every bite.
Espresso‑Infused Delight
Add a teaspoon of instant espresso powder to the mixture. The espresso deepens the chocolate flavor and adds a subtle bitterness that cuts through the sweetness. It’s a sophisticated twist that works well for adult gatherings. The coffee notes linger, giving a memorable finish.
Minty Chocolate Explosion
Incorporate a few drops of mint extract into the chocolate coating. The mint adds a refreshing aftertaste that balances the richness of the peanut butter. The green hue of the shell is a visual treat. This version is a refreshing change for hot summer days.
Storing and Bringing It Back to Life
Fridge Storage
Store the finished balls in an airtight container at room temperature for up to 48 hours. The chocolate shell will stay firm, while the interior remains soft and chewy. Keep the container in a cool, dry place to avoid condensation. This method preserves the flavor and texture for a short period.
Freezer Friendly
For longer storage, place the balls on a parchment‑lined tray and freeze for up to two weeks. Once frozen, transfer them to a zip‑top bag to prevent freezer burn. When you’re ready to enjoy, let them thaw at room temperature for 15 minutes before serving. The texture remains unchanged, making it a convenient grab‑and‑go snack.
Best Reheating Method
If the balls feel too firm, gently warm them in a 200°F oven for 5 minutes. Alternatively, microwave on a low setting for 10 seconds to soften the chocolate. Add a tiny splash of water before reheating to create steam, which helps the chocolate regain its glossy sheen. Reheating should be brief; over‑heating can melt the peanut butter core.