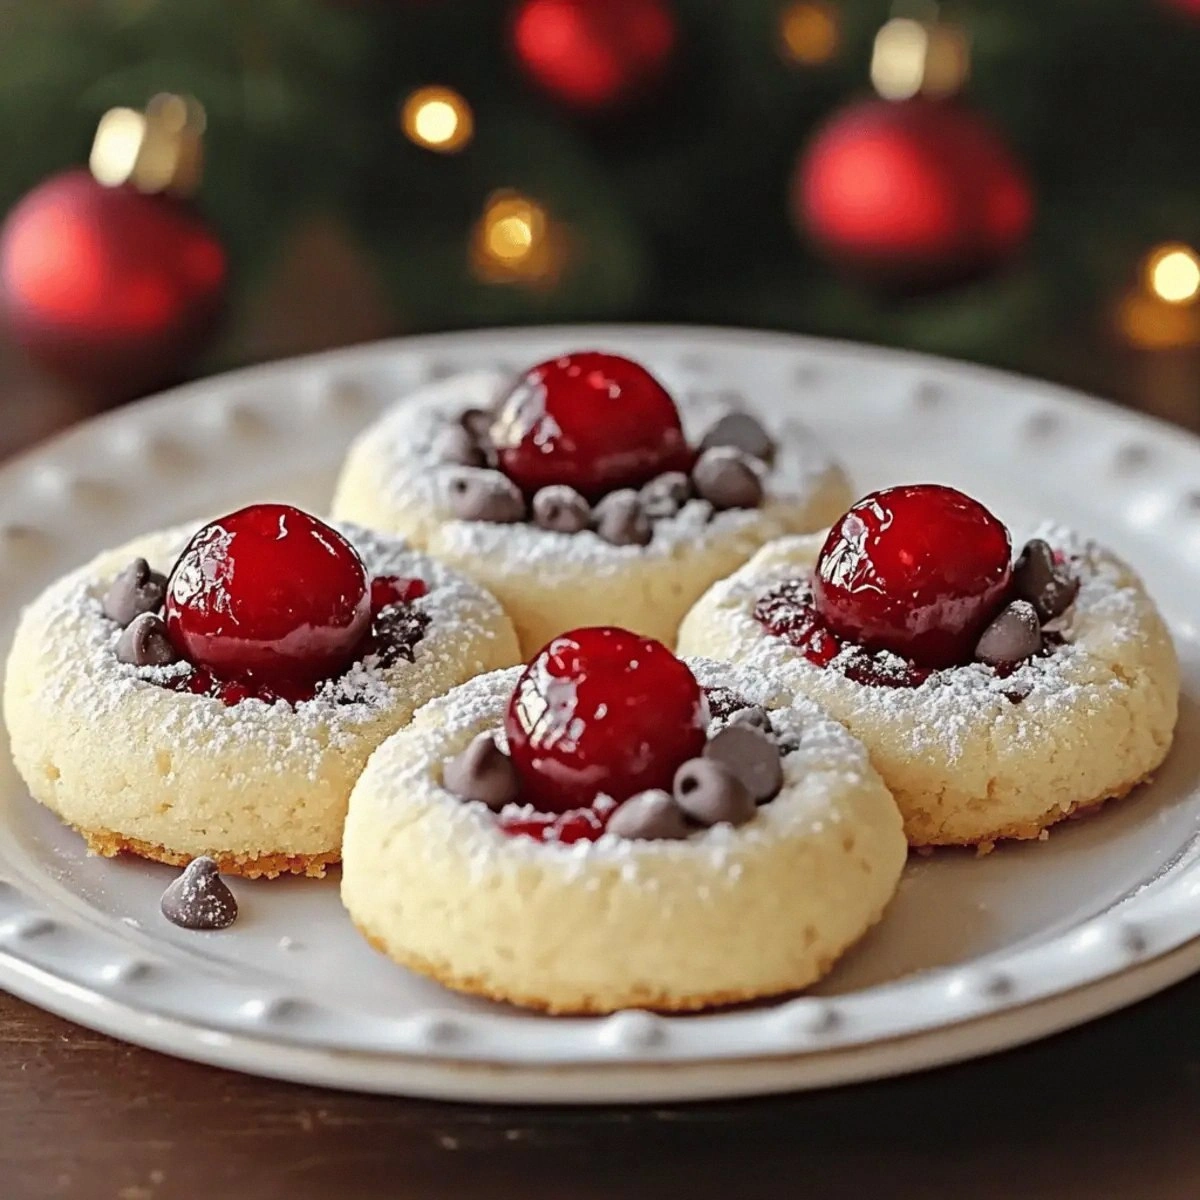
I was in the middle of a midnight snack frenzy when the kitchen turned into a disaster zone. The blender exploded, the cutting board slipped, and the fruit I had bought looked like a rainbow gone rogue. I stared at the chaos and realized I could turn that mess into the ultimate crowd‑pleaser. Picture a platter that looks like a sunrise, tastes like a summer breeze, and feels like a triumph. This isn’t just another fruit plate; it’s a statement that color and flavor can coexist in perfect harmony. I dare you to taste this and not go back for seconds because it’s that addictive. And if you’ve ever struggled to make a fruit platter that doesn’t look like a sad salad, you’re in the right place. Okay, ready for the game‑changer? Let me walk you through every single step — by the end, you’ll wonder how you ever made it any other way.
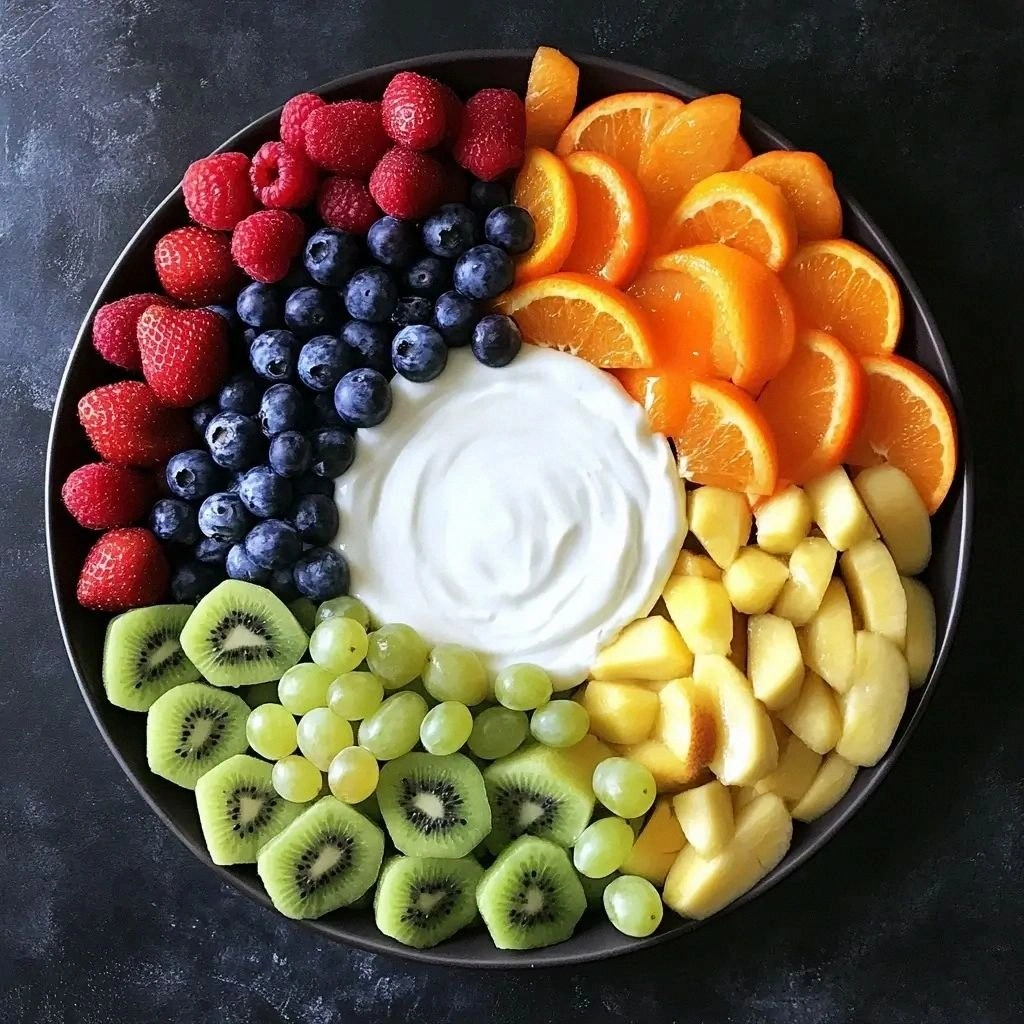
The first thing you notice is the kaleidoscope of colors—bright reds, sunny oranges, deep blues, and emerald greens. When you cut the fruit, the sweet aromas mingle, creating a fragrant bouquet that makes your mouth water before the first bite. The sound of crisp berries popping against the cutting board is like a tiny celebration in your kitchen. When you dip a strawberry, the yogurt sauce glides over it like velvet, leaving a silky trail that lingers. The texture is a playful contrast: juicy fruit, crunchy grapes, and the creamy dip that balances everything. I’ll be honest—I ate half the batch before anyone else got to try it because it was that irresistible. Most recipes get this completely wrong, chopping everything into uniform pieces, but here we honor each fruit’s natural shape. Picture yourself pulling this out of the fridge, the whole kitchen smelling incredible, and guests gathering around like it’s a holiday tradition.
What makes this version stand out is not just the colors, but the simplicity of the dip. With only Greek yogurt and honey, it’s a two‑ingredient marvel that delivers maximum flavor with minimal fuss. The yogurt provides a tangy base that cuts through the sweetness, while honey adds a natural, silky sweetness. I’ve experimented with coconut yogurt for a dairy‑free option, and it works like a charm. The dip coats the fruit like a protective glaze, keeping it fresh for hours while adding a silky finish. You’ll be surprised at how the humble ingredients can transform a simple platter into a show‑stopper. And if you’re worried about portion control, the dip is light enough that you can indulge without guilt. Stay with me here — this is worth it because the next step will reveal how to keep the fruit crisp.
I’m not going to give you a bland, textbook recipe; I’m going to share the exact techniques that make this platter unforgettable. First, you’ll need to prep your fruit with precision, keeping each type separate to avoid cross‑contamination of juices. Then, you’ll whisk the dip until it’s silky smooth, ensuring no lumps that could ruin the texture. You’ll arrange the fruit in a circular pattern, starting with the largest pieces and working your way inward. This visual symmetry not only looks stunning but also balances flavors so each bite is a perfect bite. I dare you to taste this and not go back for seconds, because the first bite will be unforgettable. If you’ve ever struggled with making a fruit platter that doesn’t look like a sad salad, you’re not alone—this is the fix. Alright, let’s break down exactly what goes into this masterpiece—trust me, you’ll thank me later.
What Makes This Version Stand Out
- Taste: The dip balances sweetness and tang, creating a harmonious flavor profile. The yogurt’s mild tang cuts through the fruit’s natural sugars. This harmony elevates each bite.
- Texture: The dip coats the fruit like a silky glaze, preserving freshness. The contrast between juicy berries and crisp grapes adds mouthfeel. The result is a delightful crunch followed by smoothness.
- Simplicity: Only two ingredients for the dip, no need for fancy sauces. The prep time is minimal, allowing you to focus on presentation. You can whip it up in under five minutes.
- Uniqueness: The circular arrangement of colors turns the platter into a living artwork. Each fruit’s shape is respected, adding visual intrigue. Guests will comment on the aesthetic as much as the taste.
- Crowd Reaction: At parties, this platter becomes the centerpiece, sparking conversation. People gravitate to the dip, sharing it with friends. It’s a social catalyst.
- Ingredient Quality: Fresh, ripe fruit is the backbone of this dish. Choose fruits that are firm yet fragrant. Quality fruit means better flavor and longer shelf life.
- Make‑Ahead Potential: The dip can be prepared up to 24 hours ahead. The fruit should be kept chilled and covered to maintain crispness. You can assemble the platter just before serving.
- Visual Impact: The rainbow spectrum captivates the eye, making it Instagram‑worthy. The contrast of colors draws the eye to each section. It’s a feast for both palate and eyes.
Alright, let's break down exactly what goes into this masterpiece...
Inside the Ingredient List
The Flavor Base
Greek yogurt is the backbone of the dip, providing a tangy, creamy foundation that balances the sweetness of the fruit. Its high protein content adds a subtle heft that prevents the dip from feeling watery. If you skip the yogurt, the dip loses its body and becomes a watery drizzle that clings poorly to the fruit. A great swap is coconut yogurt for a dairy‑free version; it delivers a tropical undertone that pairs well with kiwi and mango. When selecting yogurt, opt for a plain, full‑fat variety to maximize creaminess and avoid a sour edge. The honey, on the other hand, brings natural sweetness and a silky texture that glazes the fruit. If you’re vegan or prefer a lighter touch, maple syrup works as an excellent alternative, offering a slightly caramel flavor. Adding a pinch of sea salt can elevate the flavors, bringing out the fruit’s natural sweetness.
The Texture Crew
Strawberries bring bright color and a juicy bite that pairs well with the creamy dip. Their slightly tart flavor cuts through the sweetness of the honey. If you omit them, the platter loses that iconic red hue and a textural contrast. Oranges add a citrusy brightness that refreshes the palate; their segments should be pitted and diced to avoid excess juice. Bananas contribute a mellow, creamy texture that softens the platter’s overall bite. If you skip bananas, the platter becomes too crisp, lacking a mellow component. Kiwi offers a tropical zing and a unique green color that enhances visual appeal; keep the skin on for extra fiber. Blueberries add a burst of sweetness and a pop of blue that balances the overall color spectrum. Grapes provide a satisfying pop and a subtle sweet flavor that complements the dip; seedless varieties are best for easy handling.
The Unexpected Star
The way you arrange the fruit is the secret ingredient that turns a simple platter into a visual masterpiece. Start with the largest pieces at the outer ring, creating a natural gradient that guides the eye inward. This method not only looks stunning but also ensures that each bite has a balanced mix of flavors. If you skip this step, the platter can look disorganized and less appetizing. Using a small bowl or ring mold helps maintain the circular shape, especially when arranging delicate berries. The final touch is a light drizzle of honey over the entire platter; it adds shine and a sweet finish that ties everything together.
The Final Flourish
A sprinkle of toasted almonds or chopped pistachios adds a nutty crunch that contrasts the fruit’s softness. The nuts also introduce a savory note that balances the sweetness of the dip. If you’re gluten‑free, opt for sunflower seeds instead of nuts; they provide a similar crunch without allergens. A few fresh mint leaves garnish the platter, adding a refreshing aroma that elevates the dish’s presentation. If you prefer a more robust flavor, a pinch of crushed chili flakes can introduce a subtle heat that surprises the palate. The final flourish is a dusting of powdered sugar or cocoa powder, which can transform the platter into a dessert‑style treat.
Everything's prepped? Good. Let's get into the real action...
The Method — Step by Step
- Gather all ingredients and set out a clean cutting board. Wash each fruit thoroughly, then pat them dry with a paper towel. This step is critical to keep the fruit crisp and prevent excess moisture from diluting the dip. While you’re washing, think about the arrangement; imagine the colors you want to showcase. Once the fruit is clean, set them aside in separate bowls to keep the juices from mixing. The organization at this stage will make the plating process smoother and faster. A clean workspace also reduces the risk of accidental cuts or spills.
- Whisk the Greek yogurt in a medium bowl until it’s silky smooth. Add the honey and continue whisking until the mixture is fully incorporated. The consistency should be thick enough to coat the fruit without dripping. Taste the dip and adjust sweetness if needed; a touch more honey can mellow any tartness. If you’re using coconut yogurt, you might want to add a splash of vanilla extract for extra depth. This step ensures the dip is ready to go when you’re ready to plate.
- Slice the fruit according to size and shape. For strawberries, slice them in half or quarters; for oranges, segment and remove any membranes. Bananas should be sliced lengthwise into thin rounds. Kiwi can be sliced into half-moons, keeping the skin on for texture. Blueberries and grapes can stay whole or be halved for presentation. This step requires precision; use a sharp knife to avoid crushing the fruit. As you slice, keep the pieces uniform to maintain an even visual appeal. Remember to set each fruit type in separate bowls to keep flavors distinct.
- Arrange the fruit on a large platter in a circular pattern. Start with the largest pieces at the outer edge, creating a natural gradient that draws the eye inward. Place strawberries on one side, oranges on another, and so on, ensuring each color is represented. This arrangement turns the platter into a living piece of art that invites guests to explore each section. Keep the fruit separate to preserve their distinct flavors; don’t mix berries with citrus until the moment of serving. The visual symmetry also helps in balancing the flavors, so each bite has a mix of sweet, tangy, and creamy elements.
- Dip each fruit piece into the yogurt‑honey mixture, letting it coat the surface evenly. Use a small spoon or a squeeze bottle for precise application. The dip should cling to the fruit like a fine glaze, adding a silky finish. If you find the dip too thick, add a splash of water or milk to thin it slightly. Avoid over‑dipping; a light coating preserves the fruit’s natural flavor. This step is where the magic happens—each bite becomes a harmonious blend of fruit and creamy dip.
- Add a light drizzle of honey over the entire platter for a glossy finish. This final touch adds shine and a subtle sweetness that ties all the flavors together. Sprinkle a few chopped nuts or seeds for a crunchy contrast. If you’re vegan, use toasted sunflower seeds instead of nuts to keep the dish allergen‑friendly. The garnish also adds a textural element that keeps guests engaged. This step elevates the platter from simple to spectacular, turning it into a show‑stopping centerpiece.
- Keep the platter chilled until serving to preserve the fruit’s crispness. Store the dip separately in an airtight container to maintain its consistency. If you need to transport the platter, place it in a cooler with ice packs to keep it fresh. Serve immediately for maximum freshness, or let guests dip as they go for an interactive experience. The platter’s vibrant colors and creamy dip will keep guests coming back for more.
- Present the platter on a large, flat platter or a wooden cutting board for a rustic look. Add a sprig of fresh mint or a few edible flowers for a pop of green. Encourage guests to dip their favorite fruit into the yogurt‑honey mixture and enjoy the burst of flavors. This final presentation step ensures that the platter feels both elegant and approachable. Remember to keep the dip chilled and the fruit fresh for the best experience.
That's it — you did it. But hold on, I've got a few more tricks that'll take this to another level...
Insider Tricks for Flawless Results
The Temperature Rule Nobody Follows
Many people think that room temperature fruit is fine, but chilling the fruit in the fridge for at least an hour before plating preserves its firmness. Cold fruit resists wilting when dipped, keeping each bite crisp. If you skip this step, the fruit may become mushy and lose its visual appeal. I’ve tried plating room‑temperature fruit, and the dip soaked into the fruit, creating a soggy mess. Keep the fruit chilled and the dip cold for a crisp, refreshing experience.
Why Your Nose Knows Best
Smell is a powerful indicator of fruit ripeness. A slight sweet fragrance means the fruit is ripe but not overripe. If the fruit smells sour, it’s past its prime and may release too much juice. I’ve once used overripe bananas in a dip, and the result was a mushy, off‑taste. Trust your nose; a fresh, fragrant fruit will elevate the entire platter.
The 5‑Minute Rest That Changes Everything
After assembling the platter, let it rest for five minutes before serving. This brief pause allows the dip to settle and the fruit to firm up slightly. I’ve seen friends skip this step, and the result is a soggy, unappetizing platter. The five‑minute rest gives the flavors a chance to mingle without diluting the texture. It’s a small step that makes a huge difference.
Keep It Fresh with a Citrus Splash
A splash of lemon or lime juice on the fruit before dipping prevents oxidation and keeps the fruit bright. This trick is especially useful for apples and pears but works wonderfully on strawberries and grapes as well. If you skip it, the fruit may brown or lose its vibrant color. I’ve used this method in a summer picnic, and the fruit stayed fresh for hours.
The Secret of a Perfect Dip Consistency
If the dip is too thick, add a tablespoon of milk or water to thin it. If it’s too thin, let it sit in the fridge for a few minutes to thicken. I once had a dip that was too watery, and it clung to the fruit like glue. Adjusting the consistency ensures the dip coats the fruit evenly and enhances the overall experience.
The Right Plate for the Right Presentation
Using a wide, shallow platter allows guests to see all the colors at once. A wooden cutting board adds a rustic charm, while a glass platter offers a modern touch. If you’re hosting a formal event, a marble platter can elevate the dish. The choice of plate can change the entire vibe of the platter.
Creative Twists and Variations
This recipe is a playground. Here are some of my favorite ways to switch things up:
Tropical Twist
Swap out strawberries for mango slices and add a sprinkle of toasted coconut. The tropical flavors pair beautifully with the honey‑yogurt dip, creating a beach‑inspired snack. Guests will love the exotic taste and the vibrant orange hue.
Berry Burst
Add raspberries and blackberries to the mix for an intensified berry profile. The deep colors and slightly tart flavors provide a sophisticated twist. The dip remains the same, but the berry variety adds complexity.
Citrus Explosion
Incorporate grapefruit segments and a dash of orange zest for a bold citrus kick. The zesty aroma enhances the dip’s tang, while the grapefruit adds a subtle bitterness that balances the sweetness.
Sweet & Salty
Add a handful of salted caramel popcorn or candied pecans for a sweet and salty contrast. The crunch and buttery flavor add a new dimension to the platter. This variation is perfect for a movie‑night snack.
Vegan Delight
Use coconut yogurt and agave nectar instead of honey for a fully vegan option. The coconut flavor complements tropical fruits, while agave provides a clean sweetness. This version is dairy‑free and still incredibly creamy.
Autumn Harvest
Swap out strawberries for sliced apples and add a dash of cinnamon to the dip. The warm spice pairs beautifully with the crisp apple, creating a cozy fall flavor profile. This version is great for a harvest party.
Storing and Bringing It Back to Life
Fridge Storage
Keep the platter in the refrigerator for up to 24 hours. Cover the fruit with plastic wrap to prevent it from absorbing odors. Store the dip separately in an airtight container. When ready to serve, let the platter sit at room temperature for 10 minutes to enhance flavor.
Freezer Friendly
The dip can be frozen for up to two weeks. Thaw in the refrigerator overnight before serving. The fruit, however, should not be frozen; it will lose its crispness. If you must, freeze the fruit in a single layer and thaw quickly.
Best Reheating Method
The dip can be gently warmed in a saucepan over low heat, stirring constantly. Add a splash of water or milk to prevent it from drying out. Reheat the fruit only if necessary; it’s best served chilled. A tiny splash of water before reheating steams back to perfection.