I’ll never forget the night my kitchen turned into a war zone because I tried to “improve” a classic apple crumble with a splash of bourbon and a dash of cayenne. The smoke alarm screamed, the oven door slammed shut, and my friends were left staring at a charcoal‑black disaster while I muttered, “Okay, next time I’ll keep it simple.” Fast forward a week later, I was still dreaming of that sweet‑tart aroma that never quite made it out of the oven, and I dared myself to create the ultimate holiday comfort dessert that would actually work. I grabbed a sack of crisp apples, a bag of frozen cranberries, and a bottle of orange juice, and the rest is a story of trial, error, and a lot of tasting.
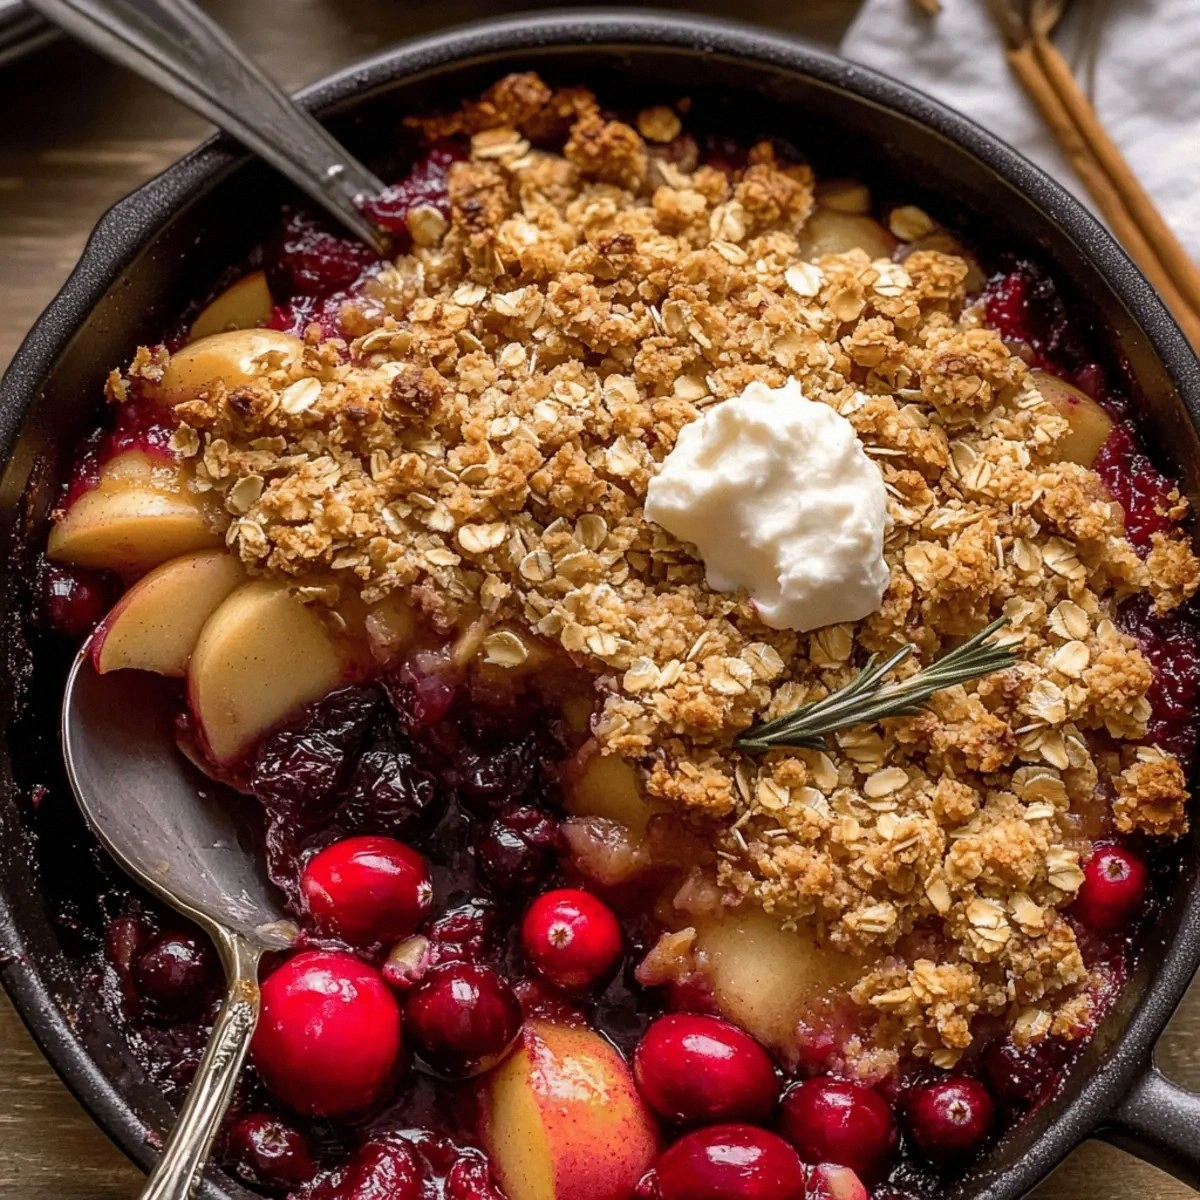
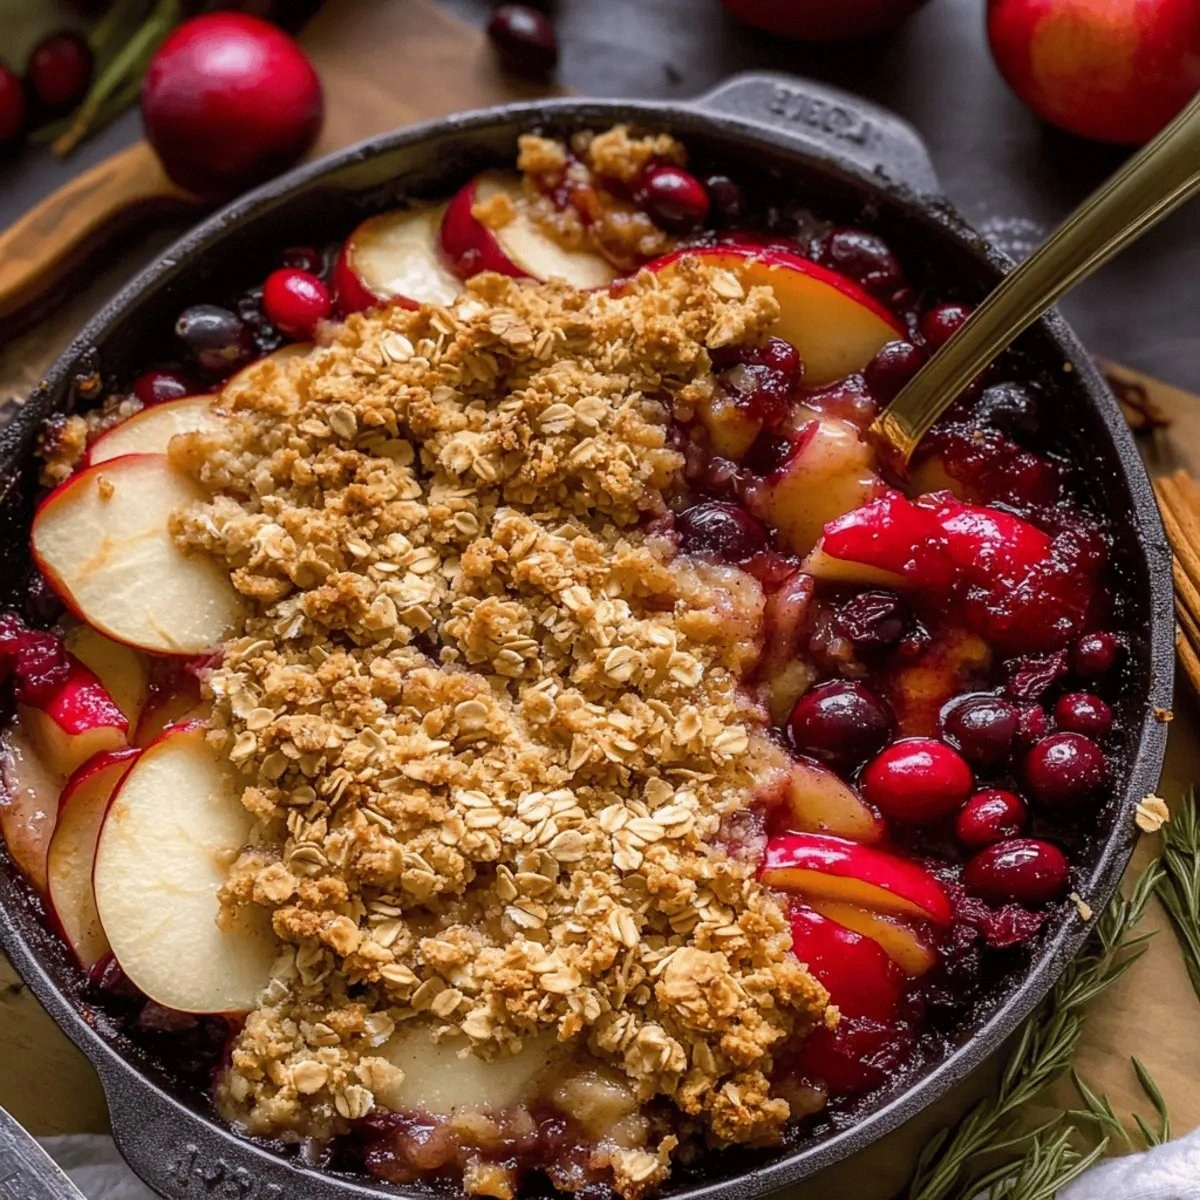
Picture this: a golden‑brown crust that crackles under your fork like fresh snow under a boot, giving way to a bubbling, ruby‑red filling that smells like a winter market in a small Alpine village. The apples are soft but still hold their shape, while the cranberries pop with a bright, slightly tart burst that makes your taste buds do a little jig. The orange zest adds a citrusy sparkle that cuts through the sweetness, and the spices—cinnamon, ginger, and a whisper of cardamom—wrap everything in a warm, spiced blanket you’d expect only from a grandmother’s kitchen. When you scoop a generous portion onto a bowl of vanilla ice cream, the contrast of hot and cold feels like a fireworks show in your mouth.
Most recipes out there either drown the fruit in a sugary glaze or give you a soggy bottom that looks like a wet blanket. I’ve tried them all, and I’ll be honest — I ate half the batch before anyone else got to try it, because the flavor was that addictive. This version, however, balances the sweet and tart, the soft and crunchy, and it does it with a handful of pantry staples you probably already have. The secret? A tiny splash of orange juice and zest that brightens the whole thing, plus a topping that’s buttery, oat‑y, and just crisp enough to make the edges shatter like thin ice under a skate.
Let me walk you through every single step — by the end, you’ll wonder how you ever made a crisp any other way. Okay, ready for the game‑changer? This next part? Pure magic. I dare you to taste this and not go back for seconds. If you’ve ever struggled with a soggy bottom or a topping that never gets that perfect crunch, you’re not alone — and I’ve got the fix.
What Makes This Version Stand Out
- Flavor Fusion: The combination of apples and cranberries creates a sweet‑tart duet that’s balanced by orange juice and zest, making each bite feel like a mini holiday celebration.
- Texture Symphony: A buttery oat topping that stays crisp on the edges while the fruit filling stays juicy, giving you that satisfying crunch‑soft contrast.
- Simplicity: Only eight ingredients for the filling and six for the topping, yet the flavor depth feels like a recipe that’s been simmering for days.
- Ingredient Quality: Using fresh, crisp apples and high‑quality unsalted butter ensures the final dish isn’t weighed down by excess grease or bland fruit.
- Crowd‑Pleaser: Even the pickiest eaters love the bright cranberry pop, and the subtle spice blend keeps it from being overly sweet.
- Make‑Ahead Friendly: Assemble the crisp a day ahead, refrigerate, and bake right before serving for a stress‑free holiday dinner.
- Seasonal Star: The orange zest and cranberries scream festive, making this the perfect centerpiece for any winter gathering.
- Versatile Base: Swap the apples for pears or the cranberries for cherries, and you’ve got a whole new dessert without re‑inventing the wheel.
Inside the Ingredient List
The Flavor Base
Apples are the backbone of any crisp, and for this recipe you want a firm variety like Honeycrisp or Granny Smith that holds up under heat. Their natural sweetness pairs perfectly with the tartness of cranberries, which also add a burst of antioxidant‑rich color. The orange juice and zest act like a culinary high‑lighter, cutting through the sugars and enhancing the overall brightness. If you can’t find fresh cranberries, frozen work just as well—just make sure they’re thawed and drained to avoid excess water.
The Texture Crew
The topping is where the magic truly happens. Unsalted butter, when cut into the flour and oats, creates tiny pockets of steam that puff up during baking, giving you that coveted crunch. Old‑fashioned oats add a hearty chew that contrasts with the soft fruit, while the blend of granulated and light brown sugar provides caramelized edges without turning gummy. The extra flour in the topping helps bind everything together, ensuring the crumble doesn’t crumble into the pan.
The Unexpected Star
Ground cardamom is the secret whisper that elevates this crisp from ordinary to unforgettable. It’s a spice you rarely see in fruit desserts, but its citrusy‑floral notes complement the orange and balance the sweetness. A little goes a long way, so don’t be tempted to double it unless you love bold flavors. If you’re allergic or simply don’t have cardamom, a pinch of nutmeg or allspice can stand in, though the profile will shift slightly.
The Final Flourish
Choosing the right butter matters. Use unsalted, high‑fat butter (at least 80% milkfat) for a richer taste and a more stable crumb. Cut the butter cold and use a pastry cutter or two forks to achieve pea‑size pieces; this ensures the topping stays flaky. For the flour, all‑purpose works fine, but if you want a lighter texture, you can substitute half with pastry flour. Finally, a generous dash of sea salt (even though not listed) can heighten the sweetness and bring out the spices.
Everything's prepped? Good. Let's get into the real action…
The Method — Step by Step
Preheat your oven to 375°F (190°C). While the oven warms, line a 9‑inch square baking dish with parchment paper; this makes cleanup a breeze and prevents the bottom from turning soggy. I always like to give the dish a light spray of non‑stick cooking spray so the crisp releases effortlessly.
Kitchen Hack: If you’re short on parchment, lightly dust the dish with flour after spraying; it creates a non‑stick barrier without affecting flavor.Core and slice the apples into ¼‑inch wedges; keep the skins on for extra texture and nutrients. Toss the apple wedges in a bowl with the orange juice, orange zest, 3 tablespoons of flour, ¾ cup granulated sugar, ¼ cup light brown sugar, 1 tsp cinnamon, ½ tsp ginger, and ¼ tsp cardamom. The mixture should look glossy and the apples should be lightly coated—this is your flavor base.
Spread the apple mixture evenly across the bottom of the prepared dish. Sprinkle the 2 cups of cranberries over the apples, allowing them to nestle into the sweet coating. The cranberries will release a little juice as they bake, creating pockets of tartness that burst when you bite.
Now for the topping: In a large mixing bowl, combine 1 ¼ cups all‑purpose flour, ¾ cup granulated sugar, ¾ cup light brown sugar, and ¾ tsp ground cinnamon. Add the cold butter, cut into ½‑inch cubes, and use a pastry cutter to blend until the mixture resembles coarse crumbs with some pea‑size butter pieces.
Watch Out: Over‑mixing the butter into the flour will melt it, resulting in a soggy topping. Stop as soon as you see distinct butter chunks.Stir in the 1 ½ cups old‑fashioned oats until they’re evenly distributed. The oats will absorb some of the butter’s fat, giving the topping its signature chewiness. At this point, you can taste a small spoonful; if you crave extra sweetness, sprinkle a pinch more brown sugar—just remember that the final bake will caramelize it.
Evenly sprinkle the topping over the fruit layer, making sure to cover the entire surface. Don’t press it down; let it sit loosely so the steam can escape and the crust can form a golden dome.
Place the dish in the preheated oven and bake for 30‑35 minutes. You’ll know it’s ready when the edges pull away from the sides of the pan, the topping is a deep amber, and the fruit bubbling through the crust releases a fragrant steam that fills the kitchen. That sizzle when it hits the pan? Absolute perfection.
Kitchen Hack: Rotate the pan halfway through baking for an even browning, especially if your oven has hot spots.Remove the crisp from the oven and let it rest for 10 minutes. This short rest lets the juices thicken slightly, preventing a runny bottom when you serve. While it rests, the kitchen will be saturated with a warm, spiced aroma that practically invites you to dig in.
Serve warm, optionally topped with a scoop of vanilla bean ice cream or a dollop of freshly whipped cream. The contrast of hot crisp and cold cream is the final fireworks show for your palate. And now the fun part—watching everyone reach for seconds.
That's it — you did it. But hold on, I've got a few more tricks that'll take this to another level…
Insider Tricks for Flawless Results
The Temperature Rule Nobody Follows
Never bake a crisp at a temperature lower than 350°F. Lower temps cause the fruit to release too much liquid before the topping can set, leading to a soggy base. By starting at 375°F, the heat instantly seals the fruit’s surface, locking in juices while the topping crisps up fast. I once tried a “low‑and‑slow” method for a “healthier” version, and the result was a mushy mess that no one wanted to eat.
Why Your Nose Knows Best
Your sense of smell is a more reliable indicator of doneness than a timer. When the topping starts to smell nutty and caramelized, you’re within a few minutes of perfection. If you notice a faint burnt sugar note, pull the crisp out immediately; the crust can go from perfect to over‑done in seconds. Trust that aromatic cue, and you’ll avoid the dreaded bitter edge.
The 5‑Minute Rest That Changes Everything
Letting the crisp sit for five minutes after baking allows the juices to redistribute and thicken. Skipping this step results in a runny sauce that pools at the bottom of the dish, making each bite uneven. This brief pause also gives the topping a chance to firm up, so when you cut a slice, the edges stay intact instead of crumbling into the plate.
Butter Temperature Trick
Cold butter is essential for a flaky topping, but if your kitchen is unusually warm, chill the bowl of flour and sugar for 10 minutes before adding the butter. This ensures the butter stays solid long enough to create those steam pockets. I once left the butter out on a summer afternoon and ended up with a dense, cookie‑like topping—lesson learned.
Oat Toasting Shortcut
For an extra layer of nuttiness, toast the oats in a dry skillet for 3‑4 minutes before mixing them into the topping. You’ll hear a gentle crackle, and the oats will develop a deeper flavor that pairs beautifully with the orange zest. Just be careful not to let them brown too much; they should be golden, not burnt.
Creative Twists and Variations
This recipe is a playground. Here are some of my favorite ways to switch things up:
Pear & Pomegranate Sparkle
Swap the apples for ripe Bartlett pears and replace cranberries with fresh pomegranate seeds. The seeds add a juicy pop and a ruby‑red garnish that looks stunning on a holiday table. The subtle floral notes of pears pair nicely with the existing orange zest.
Chocolate‑Swirl Delight
Add ¼ cup dark chocolate chips to the topping mixture before baking. As the crisp bakes, the chocolate melts into pockets of gooey richness, creating a decadent contrast to the tart fruit. This version is a hit with kids and adults alike.
Spiced Pumpkin Fusion
Incorporate ½ cup canned pumpkin puree into the fruit layer, and increase the ground cinnamon to 1½ teaspoons while adding a pinch of nutmeg. The pumpkin adds earthiness, turning the crisp into a full‑blown autumn centerpiece.
Gluten‑Free Goodness
Replace all‑purpose flour with a 1‑to‑1 gluten‑free flour blend and ensure your oats are certified gluten‑free. The texture remains delightfully crunchy, and the flavor is unchanged. Just be mindful that some gluten‑free flours absorb more liquid; you may need an extra tablespoon of butter.
Caramel‑Apple Drizzle
After baking, drizzle warm caramel sauce over the top and sprinkle a handful of toasted pecans. The caramel adds a buttery sweetness that deepens the overall flavor, while the pecans introduce a satisfying crunch. This version is perfect for a holiday brunch.
Storing and Bringing It Back to Life
Fridge Storage
Cover the crisp tightly with plastic wrap or transfer it to an airtight container. It will keep for up to 4 days in the refrigerator. When you’re ready to serve, reheat a single portion in the microwave for 45 seconds or the whole dish in a 350°F oven for 10‑12 minutes, covered with foil to prevent over‑browning.
Freezer Friendly
This dish freezes beautifully. Let the crisp cool completely, then slice it into individual portions and wrap each piece in parchment followed by a layer of foil. Store in a freezer‑safe bag for up to 3 months. To reheat, bake frozen portions at 375°F for 20‑25 minutes, adding a splash of water to the pan to create steam and revive the crispness.
Best Reheating Method
For the ultimate comeback, preheat your oven to 350°F, place the crisp (or portion) on a baking sheet, and sprinkle a teaspoon of water around the edges. Cover loosely with foil and bake for 8‑10 minutes, then remove the foil for the final 3 minutes to restore the golden crust. The tiny splash of water creates steam that revives the fruit’s juiciness while keeping the topping crisp.