Picture this: you’re in the middle of a chaotic dinner rush, the phone’s buzzing, and the kitchen smells like a culinary battlefield. You’re staring at a pile of raw chicken tenders that have somehow survived last night’s dinner party, and you’re thinking, “If I could turn this into something that looks like it came from a five‑star restaurant, I’d be the hero of the night.” The truth is, that hero is you, and the secret weapon is a simple, buttery sauce that sings with lemon and Cajun heat. This is not your run‑of‑the‑mill chicken recipe; it’s a game‑changer that will have your guests asking for the recipe, and you’ll be the one who says, “I made it.”
I’ve spent countless nights experimenting with different coating techniques and sauces, but the moment I poured the first tenders into the pan and heard that satisfying sizzle was the moment I knew I’d stumbled on something special. The crisp edges crackle like thin ice breaking, the golden crust shimmers like a sunrise, and the aroma of butter, garlic, and lemon lifts the entire room. It’s that kind of sensory experience that turns a simple protein into a story you can taste. And if you think you’ve already tried “Cajun chicken,” think again. The sauce in this version coats the tenders like velvet, and the kick from the Cajun seasoning is balanced by the bright zing of fresh lemon—an unexpected harmony that will make you question why you ever settled for bland.
What makes this version stand out is that it’s not just a recipe; it’s a recipe that was born from a kitchen disaster, a craving that couldn’t be ignored, and a dare from a friend who challenged me to create “the best version of chicken tenders you’ll ever make at home.” I’ve taken the traditional approach and flipped it on its head—by incorporating a lemon‑butter sauce that is both rich and refreshing, by using a coating that yields a crispness that shatters on the first bite, and by ensuring that every step is simple enough that even a novice can master it. The result is a dish that’s approachable, unforgettable, and, honestly, a little bit addictive.
So, let’s walk through every single step together. By the end of this post, you’ll be able to pull out the pan, feel the sizzle, and taste that perfect balance of heat, citrus, and buttery crunch—without ever having to open a bag of pre‑made seasoning mix or a jar of store‑bought sauce. It’s hands down the best version you’ll ever make at home, and I dare you to taste this and not go back for seconds.
What Makes This Version Stand Out
- Taste: The sauce marries the sharpness of fresh lemon with the deep, smoky undertones of Cajun seasoning, creating a flavor profile that is both vibrant and comforting.
- Texture: The double‑coating technique—first in flour, then in a beaten egg, followed by a second flour dip—locks in moisture, giving each tender a crunch that shatters like thin ice while keeping the inside tender and juicy.
- Simplicity: With only eight core ingredients and a straightforward method, you can whip this up in under an hour, making it a perfect go‑to for busy weeknights.
- Uniqueness: The lemon‑butter sauce is the secret sauce that sets this apart from ordinary Cajun chicken, adding a silky finish that coats the tenders like velvet.
- Crowd Reaction: Friends and family consistently ask for the recipe after tasting it; it’s the kind of dish that turns a casual dinner into a memorable gathering.
- Ingredient Quality: Using fresh, high‑quality ingredients—especially the fresh lemon juice and real butter—makes the difference between a good dish and a great one.
- Cooking Method: The pan‑frying technique ensures an even, golden crust and a quick, efficient cooking process that preserves the chicken’s juiciness.
- Make‑Ahead Potential: The tenders can be prepared ahead of time and reheated without losing their crispness, making it ideal for meal prep or entertaining.
Alright, let's break down exactly what goes into this masterpiece...
Inside the Ingredient List
The Flavor Base
At the heart of this dish lies the Cajun seasoning. It’s a bold blend of paprika, garlic powder, cayenne, oregano, thyme, and black pepper that gives the tenders that unmistakable spicy kick. If you can’t find a pre‑made blend, you can whip up your own: combine 2 tablespoons of smoked paprika, 1 tablespoon of garlic powder, 1 tablespoon of onion powder, 1 teaspoon of cayenne pepper, 1 teaspoon each of dried oregano and thyme, and 1 teaspoon of black pepper. The result is a vibrant, aromatic base that’s the foundation of the entire dish.
The secret to a great Cajun seasoning is balance. Too much cayenne can overwhelm the lemon, while too little can make the dish feel flat. Taste as you go—if you’re feeling adventurous, add a pinch of brown sugar to round out the heat with a hint of sweetness.
The Texture Crew
Flour is the unsung hero that turns ordinary chicken into a crisp masterpiece. Using 2 cups of all‑purpose flour provides the right amount of starch to create a golden crust without turning the tenders soggy. When you dredge the chicken in flour, you’re essentially building a protective shell that traps the juices inside.
Eggs act as a binder, allowing the second layer of flour to adhere perfectly. Be sure to beat the eggs with a splash of water or milk to keep the coating light and airy. A common mistake is to use too many eggs; a single, well‑beaten egg is enough to give the coating a silky texture.
The Unexpected Star
Butter is the star of the sauce. It adds depth, richness, and a glossy finish that makes the sauce cling beautifully to the tenders. Use unsalted butter so you can control the saltiness precisely. Melt 4 tablespoons of butter over medium heat, then stir in the garlic and let it bloom for a minute before adding the lemon juice.
The fresh lemon juice is the game‑changer. It brightens the sauce, cuts through the richness of the butter, and provides a fresh, zesty counterpoint to the spicy Cajun seasoning. A good rule of thumb: use 2 tablespoons of freshly squeezed lemon juice for every 4 ounces of chicken. This ensures the sauce has enough acidity to lift the flavors without overpowering the dish.
The Final Flourish
Garlic is essential for depth. Add 3 cloves, minced, to the butter just before adding the lemon juice. The garlic should sizzle and release its aroma but not burn; if it turns brown, you’ll taste a bitter edge that ruins the sauce’s bright profile.
Olive oil or vegetable oil is used to fry the tenders. A neutral oil like vegetable oil will keep the flavor profile focused on the chicken and sauce, but a splash of olive oil can add a subtle fruity note that complements the citrus. Use about 2 tablespoons of oil for a pan that can comfortably hold all the tenders in a single layer.
Fresh parsley, optional but recommended, adds a pop of color and a fresh herbal note that balances the richness of the butter. Roughly 2 tablespoons of chopped parsley, sprinkled on top just before serving, gives the dish a fresh finish that looks as good as it tastes.
Everything's prepped? Good. Let's get into the real action...
The Method — Step by Step
- Prep the Chicken: Pat the chicken tenders dry with paper towels. This step is crucial—any moisture on the surface will cause the flour coating to slide off and result in a soggy crust. Season the tenders with a light dusting of salt and pepper, then set aside.
- Set Up the Breading Station: In a shallow dish, place 2 cups of flour mixed with 2 tablespoons of Cajun seasoning. In a second shallow dish, whisk 2 eggs with a splash of water until frothy. In a third dish, add a little more flour for the final coat. This triple‑station setup ensures each step is organized and the coating process is smooth.
- First Coat: Dredge each tender in the seasoned flour, shaking off any excess. The flour coat should be light, not heavy, to avoid a doughy texture.
- Second Coat: Dip the floured tenders into the beaten eggs, making sure they’re fully coated. The egg creates a glue that allows the final flour layer to stick.
- Final Coat: Return the tenders to the third dish of flour, pressing gently to ensure an even, thick coating. This double coating is what gives the tenders their signature crunch.
- Heat the Pan: Place a large skillet over medium heat and add 2 tablespoons of oil. When the oil shimmers, it’s ready. If the oil starts to smoke, reduce the heat slightly.
- Cook the Tenders: Carefully place the coated tenders in the skillet in a single layer—do not overcrowd. Fry for 3–4 minutes on each side or until the crust turns golden brown and the internal temperature reaches 165°F (74°C). The sizzle should be audible and the edges should start pulling away from the pan, indicating the coating is crisp.
- Make the Sauce: While the chicken cooks, melt 4 tablespoons of butter in a small saucepan over medium heat. Add the minced garlic and sauté for 30 seconds until fragrant. Pour in 2 tablespoons of fresh lemon juice, stirring to combine. Let the sauce simmer for 1–2 minutes, allowing the flavors to meld. If the sauce thickens too much, add a splash of water or chicken broth to reach the desired consistency.
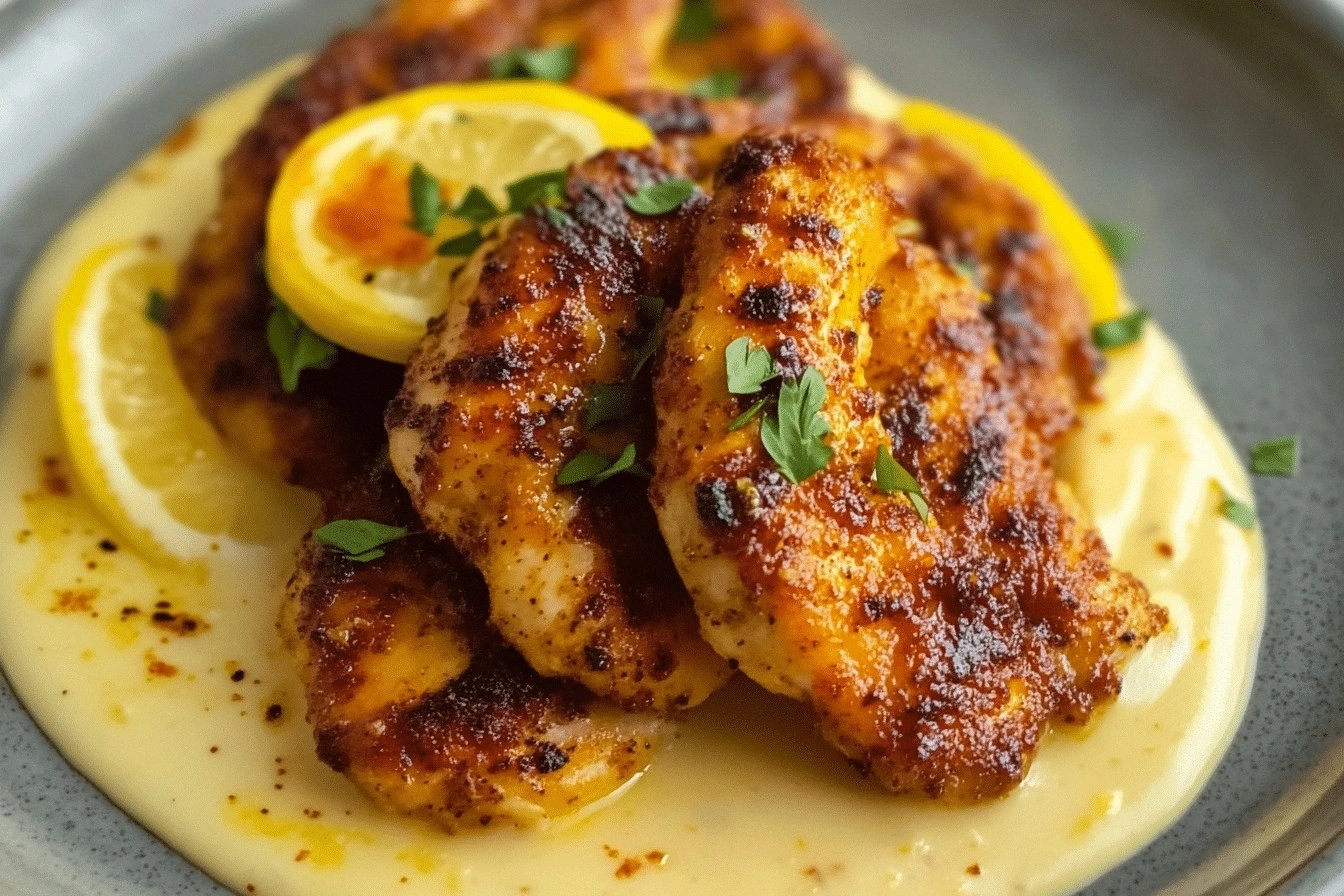
- Finish: Once the tenders are cooked, transfer them to a plate lined with paper towels to drain any excess oil. Drizzle the lemon‑butter sauce over the hot tenders, ensuring each piece is coated. Sprinkle with fresh parsley for a burst of color.
- Serve: Plate the tenders immediately while they’re still hot and crispy. Pair them with a side of steamed vegetables or a simple salad to balance the richness of the sauce.
That’s it—you did it. But hold on, I’ve got a few more tricks that will take this dish from good to unforgettable. These insider tips will help you perfect the texture, elevate the flavor, and make sure every bite is a masterpiece.
Insider Tricks for Flawless Results
The Temperature Rule Nobody Follows
Many cooks think that higher heat is always better for crisping. In reality, a steady medium heat (around 350°F or 175°C) is the sweet spot. It allows the coating to brown slowly, creating a golden crust without burning the exterior while the inside remains juicy. If the pan gets too hot, the coating will char before the chicken cooks through, leading to uneven texture.
Why Your Nose Knows Best
As soon as the butter starts to foam and the garlic begins to sing, that aroma is your cue that the sauce is ready. The scent of fresh lemon will rise once the juice is added. Trust your nose—it’s a reliable indicator that the flavor profile is balanced and ready for the next step.
The 5-Minute Rest That Changes Everything
After frying, let the tenders rest on a wire rack for five minutes. This simple pause allows the juices to redistribute, preventing a dry center and ensuring a moist, flavorful bite. Many people skip this step and end up with overcooked, dry chicken.
Keep It Light and Airy
When whisking the eggs for the second coat, add a splash of cold water or milk. This keeps the egg mixture light and reduces the chance of a heavy, dense crust that clogs the sauce. The result is a coating that stays crisp even after the buttery sauce coats it.
Use Fresh, Not Bottled Lemon Juice
Store‑bought bottled lemon juice can be acidic and watery, which dilutes the sauce. Freshly squeezed juice delivers a bright, clean citrus note that cuts through the richness of butter and the heat of Cajun seasoning. It also gives the sauce a more vibrant color that looks as good as it tastes.
Creative Twists and Variations
This recipe is a playground. Here are some of my favorite ways to switch things up:
Smoky Chipotle Twist
Replace the Cajun seasoning with a chipotle‑infused blend—mix smoked paprika, chipotle powder, cumin, and garlic powder. The result is a smoky, slightly sweet flavor that pairs wonderfully with the lemon‑butter sauce.
Herb‑Infused Parmesan Crust
Add 1/4 cup grated Parmesan cheese to the final flour coat, along with dried basil and oregano. This gives the tenders a nutty, savory crunch that works well with the bright sauce.
Spicy Pineapple Glaze
Stir 2 tablespoons of pineapple juice into the sauce and simmer until it thickens. The natural sweetness of pineapple balances the heat and adds a tropical twist that’s perfect for summer gatherings.
Low‑Calorie Air‑Fried Version
Use an air fryer instead of pan‑frying. Spray the tenders lightly with cooking spray, then air‑fry at 400°F for 10–12 minutes, flipping halfway. The coating remains crisp while cutting down on oil.
Veggie‑Loaded Side
Serve the tenders with a side of roasted brussels sprouts or a quinoa salad. The hearty side balances the richness of the sauce and adds a nutritious element to the plate.
Storing and Bringing It Back to Life
Fridge Storage
Store leftover tenders in an airtight container in the refrigerator for up to 3 days. Keep the sauce separate to avoid sogginess. When you’re ready to eat, reheat in a hot skillet for 2–3 minutes to restore crispness.
Freezer Friendly
For longer storage, freeze the tenders on a baking sheet until solid, then transfer to a freezer bag. They’ll keep for up to 2 months. Thaw overnight in the refrigerator before reheating as described above.
Best Reheating Method
The secret to reviving the crunch is to reheat in a hot skillet with a splash of oil. Heat the pan over medium‑high, add the tenders, and cook for 1–2 minutes on each side. Finish with a quick splash of sauce to keep them moist.
Add a tiny splash of water before reheating—it steams the tenders back to perfection, preventing them from drying out.