I was standing in the middle of a kitchen that looked like a disaster zone after a last‑minute attempt at making a dessert for a friend’s birthday. The countertop was a mosaic of melted chocolate, shredded coconut, and a can of sweetened condensed milk that had somehow escaped its container. I stared at the mess, and I thought, “If this looks like a catastrophe, then I’m about to create something spectacular.” The scent of toasted coconut and the faint, sweet aroma of condensed milk filled the air, making my mouth water even though I knew I was about to turn a mess into a masterpiece.
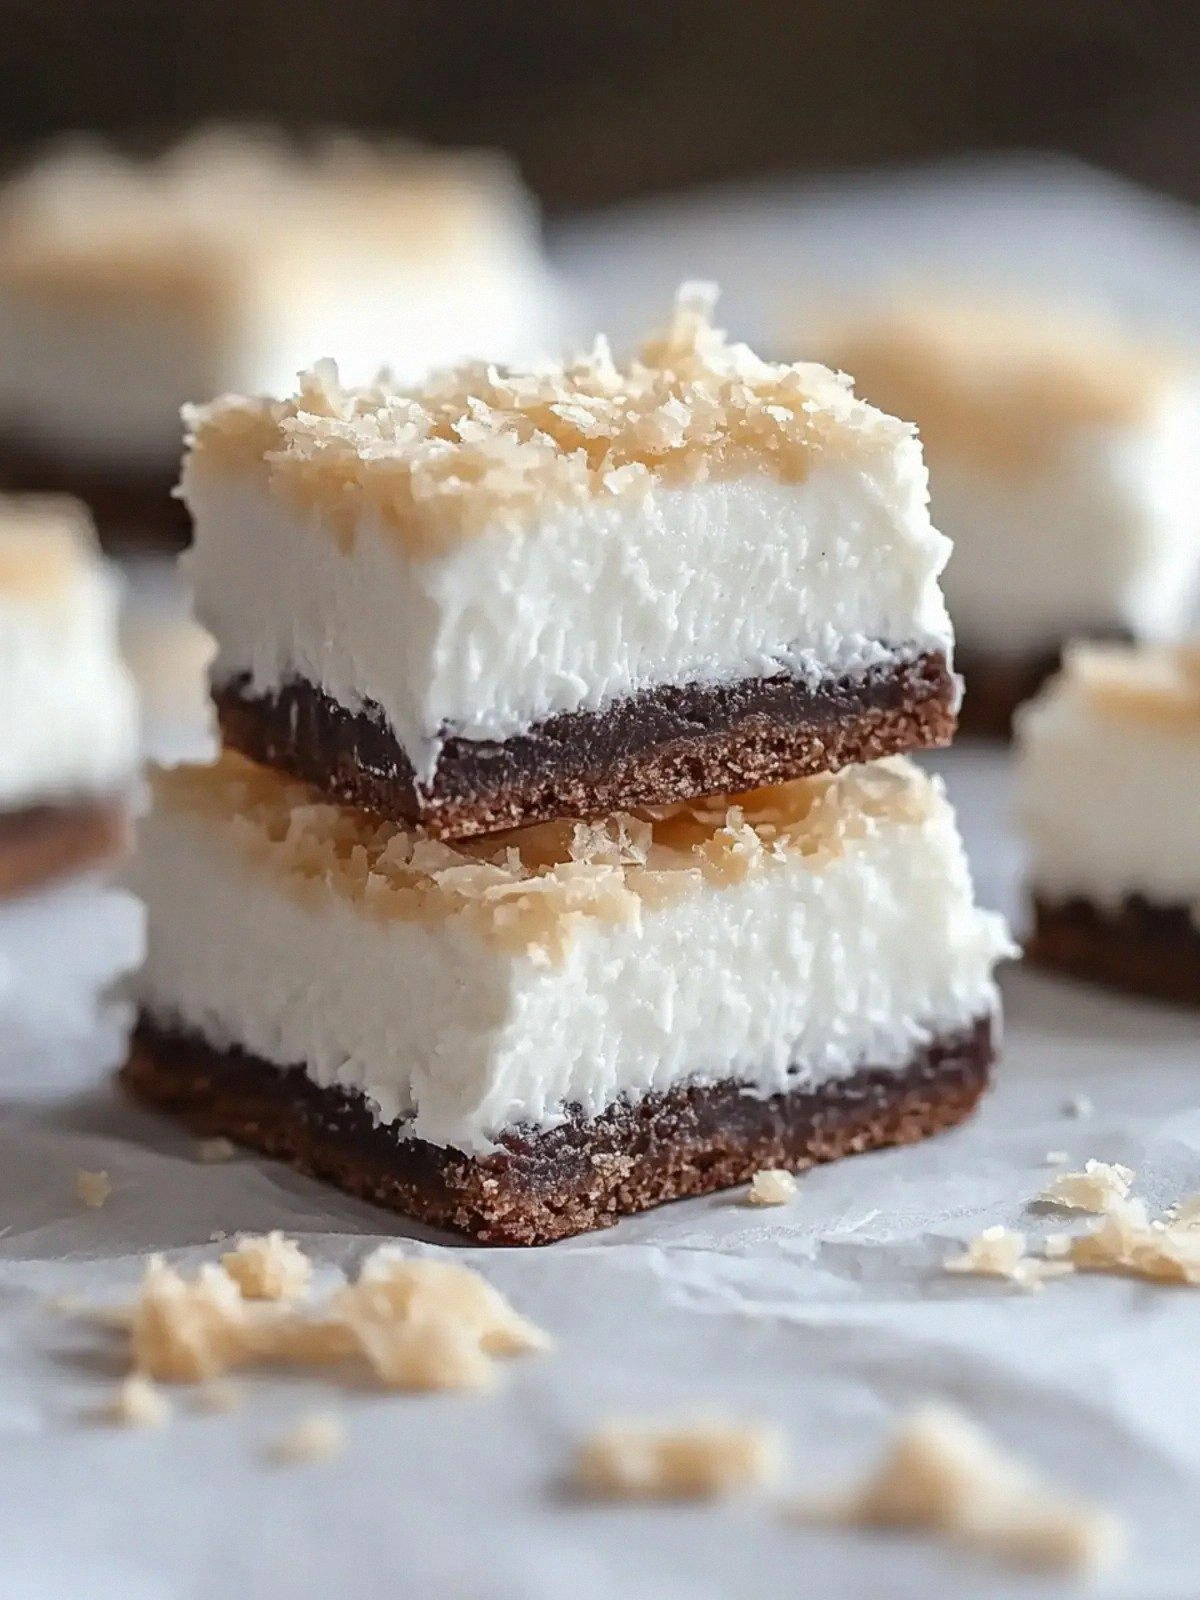
Picture this: a glossy, chocolate‑coated bar that, when you bite into it, releases a burst of coconut crunch that feels like a tropical vacation in your mouth. The sound is a satisfying snap, the texture a silky melt that clings to your teeth, and the aftertaste is a lingering sweetness that makes you reach for another bite. I dare you to taste this and not go back for seconds. The moment you break one, the whole kitchen smells incredible, and the joy is instant and unmistakable.
What sets this version apart from every other coconut chocolate bar recipe is the simplicity of the ingredients and the precision of the technique. I’ve trimmed the recipe to just three ingredients, yet the result feels luxurious enough for a special occasion. The method is straightforward but the flavor profile is rich: the coconut provides a nutty, slightly sweet backbone; the condensed milk offers a velvety body that binds everything together; the chocolate delivers a deep, bittersweet finish that balances the sweetness.
And there’s a secret twist that most recipes miss: the way the chocolate is melted in a double boiler creates a silky texture that doesn’t separate or seize. By carefully controlling the heat, you get a chocolate coating that’s almost glass‑like, yet still chewy. This is hands down the best version you'll ever make at home. Let me walk you through every single step — by the end, you'll wonder how you ever made it any other way.
What Makes This Version Stand Out
- Flavor: The coconut and condensed milk blend creates a sweet, tropical flavor that is perfectly balanced by the bittersweet chocolate.
- Texture: The bars are chewy and slightly crisp on the edges, with a melt‑in‑your‑mouth center that feels like a velvety dream.
- Simplicity: Only three ingredients are needed, so you can whip this up in under 45 minutes with minimal prep.
- Uniqueness: The double‑boiler technique gives the chocolate a silky finish that most microwave or stovetop methods can’t achieve.
- Crowd Reaction: At gatherings, guests ask for the recipe before the last bite is taken.
- Ingredient Quality: Using a high‑quality dark chocolate elevates the flavor, while shredded coconut adds natural sweetness and texture.
- Cooking Method: The gentle heat of the double boiler prevents chocolate from scorching and keeps the coconut from burning.
- Make‑ahead Potential: These bars keep well in the fridge for up to two weeks, making them a perfect make‑ahead treat.
Inside the Ingredient List
The Flavor Base
Shredded coconut is the heart of this dessert. It brings a natural sweetness and a chewy texture that contrasts beautifully with the smooth chocolate coating. If you skip it, you’ll lose the tropical flavor that makes these bars stand out. For the best results, choose a medium‑dry coconut; too wet, and the bars will be gummy.
The Sweetener
Sweetened condensed milk is the binder that holds the coconut and chocolate together. Its thick, syrupy consistency melts into the chocolate, creating a silky mouthfeel. If you can’t find canned condensed milk, you can make your own by simmering milk and sugar until it reduces by half, though the flavor will be slightly different.
The Unexpected Star
Dark or milk chocolate is the final flourish that gives these bars depth and richness. The choice between dark and milk chocolate will change the overall flavor profile: dark chocolate adds bitterness and complexity, while milk chocolate leans sweeter and creamier. If you’re feeling adventurous, try a 70% cacao dark chocolate for a more intense bite.
The Final Flourish
Although the recipe is minimal, the finishing touch is a quick dusting of extra shredded coconut on top before the bars set. This not only adds visual appeal but also enhances the coconut flavor in every bite. If you prefer a crunchy finish, lightly toast the coconut in a dry skillet for 2–3 minutes until golden.
Everything's prepped? Good. Let's get into the real action...
The Method — Step by Step
- Start by placing a heat‑proof bowl over a pot of simmering water, ensuring the bottom of the bowl doesn’t touch the water. This creates a gentle, indirect heat source that’s perfect for melting chocolate without scorching.
- Add the dark or milk chocolate to the bowl, breaking it into small chunks for even melting. Stir constantly with a silicone spatula until the chocolate is completely smooth and glossy. The sound of the chocolate melting is a subtle hiss that signals you’re on the right track.
- While the chocolate is melting, pour the can of sweetened condensed milk into a separate bowl. Whisk it until it’s silky and free of lumps. This step ensures the condensed milk will blend seamlessly into the chocolate.
- Once the chocolate is smooth, pour the condensed milk into the bowl, stirring continuously. The mixture will thicken and develop a creamy consistency. Watch the color change; it should turn from a bright chocolate hue to a rich, deep brown.
- Add the shredded coconut to the chocolate‑condensed milk mixture, stirring until every coconut piece is coated. The coconut should look like it’s been dusted with chocolate, and the mixture should be thick enough to hold its shape.
- Line a baking dish or silicone mold with parchment paper. Spoon the mixture into the dish, spreading it evenly with a spatula. Tap the dish gently on the counter to release any air bubbles.
- Place the dish in the refrigerator for at least 30 minutes, or until the bars are firm. The cold temperature helps the chocolate set and gives the bars a satisfying snap when you break them.
- Once set, remove the bars from the dish. Cut them into squares or bars using a sharp knife. If you prefer a cleaner cut, wipe the knife between each cut.
That's it — you did it. But hold on, I've got a few more tricks that'll take this to another level...
Insider Tricks for Flawless Results
The Temperature Rule Nobody Follows
Chocolate is temperamental; if it’s too hot or too cold, it can seize or be dull. The key is to keep it just below boiling, around 86°C (185°F). If you don’t have a thermometer, look for the first signs of steam and a glossy surface. This trick ensures a shiny finish and a firm snap.
Why Your Nose Knows Best
The aroma of chocolate is a powerful indicator of quality. A sweet, nutty scent signals that the chocolate has melted properly and hasn't broken down. If you notice a sharp, burnt smell, stop the heat immediately.
The 5-Minute Rest That Changes Everything
After the bars are out of the fridge, let them sit at room temperature for 5 minutes before cutting. This short rest softens the surface just enough to make cutting smoother, preventing the bars from cracking.
The Perfect Dusting
Before the bars set, lightly dust the top with extra shredded coconut. This not only adds a decorative touch but also enhances the coconut flavor in every bite. The coconut will also give the bars a slightly crunchy finish.
The Quick Chill Trick
If you’re in a hurry, place the bars in a shallow freezer tray for 10–15 minutes. This rapid chill sets the chocolate faster and reduces the time needed in the refrigerator.
Creative Twists and Variations
This recipe is a playground. Here are some of my favorite ways to switch things up:
Nutty Crunch Edition
Add chopped toasted almonds or walnuts to the coconut mixture for an extra crunch. The nuts provide a savory contrast to the sweetness, making each bite a delightful surprise.
Spiced Coconut Surprise
Stir in a pinch of ground cinnamon or nutmeg before adding the chocolate. The warm spices elevate the tropical flavor and add a subtle depth that pairs well with dark chocolate.
Sea Salt Finish
Sprinkle a light dusting of flaky sea salt over the bars before they set. The salt balances the sweetness and adds a luxurious finish that makes the bars feel indulgent.
Minty Twist
Replace a portion of the chocolate with mint chocolate chips or add a few drops of peppermint extract. The cool mint complements the coconut and gives the bars a refreshing bite.
Berry Infusion
Fold in a handful of dried cranberries or blueberries after the chocolate has melted. The berries add a tart pop of flavor that contrasts beautifully with the sweet coconut.
Almond Butter Swirl
Swirl in a spoonful of almond butter into the chocolate mixture before adding the coconut. The nutty butter adds richness and a silky texture that deepens the flavor profile.
Storing and Bringing It Back to Life
Fridge Storage
Store the bars in an airtight container in the refrigerator for up to two weeks. Keep them wrapped in parchment paper or foil to prevent them from absorbing odors from other foods.
Freezer Friendly
For longer storage, freeze the bars in a freezer bag. They’ll stay fresh for up to three months. When you’re ready to enjoy, let them thaw at room temperature for 15 minutes before cutting.
Best Reheating Method
If the bars have become too firm, gently warm them in a microwave at 20% power for 10–15 seconds. Add a tiny splash of water before reheating to steam back to perfection, ensuring a smooth texture without melting the chocolate.