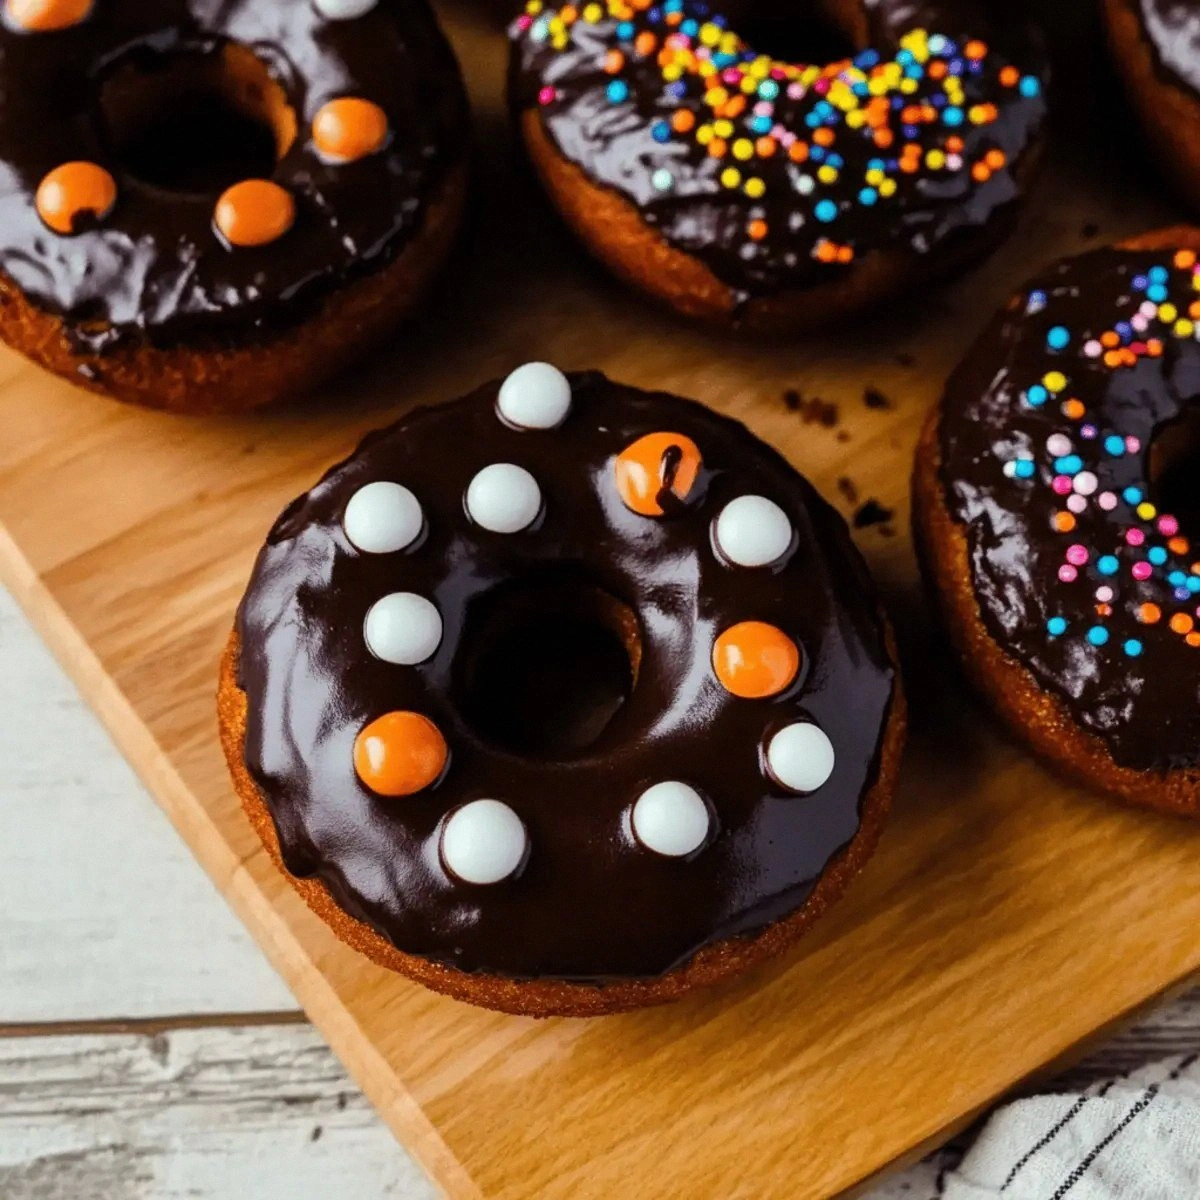
Picture this: you’re in the middle of a frantic weekday, the kids are bouncing off the walls, and the only thing that can possibly calm the chaos is the promise of something sweet, something that feels like a cheat‑day indulgence but doesn’t require a marathon in the kitchen. I was there last Tuesday, staring at an empty pantry, a half‑finished box of cake mix, and a sudden, reckless urge to turn a boring snack into a crowd‑pleasing masterpiece. I tossed the mix into a bowl, added a few pantry staples, and the result? Donuts so fluffy they practically float, coated in chocolate frosting that clings like a glossy veil of midnight, and sprinkles that pop like confetti at a celebration. I dare you to taste this and not go back for seconds.
From the moment the batter hits the pan, you’re hit with a symphony of senses: the buttery aroma swirling with a hint of vanilla, the gentle sizzle as the edges start to caramelize, the visual cue of golden‑brown crowns peeking over the donut holes, and the tactile anticipation of that first bite—soft, pillowy, and surprisingly light for a fried‑style treat. The moment you bite through the crisp exterior, the frosting spreads across your tongue like velvet, while the sprinkles add a satisfying crunch that makes you want to close your eyes and savor the contrast. Most recipes get this completely wrong, either ending up dense like a brick or soggy enough to drown a paper towel. This version? Hands down the best version you’ll ever make at home, and it’s ready in minutes.
What makes these donuts truly irresistible is the secret weapon: a humble box of cake mix. Most people think cake mix is only good for a quick loaf, but when you combine it with a few strategic ingredients, it transforms into a dough that rises beautifully, bakes evenly, and holds its shape like a pro‑level pastry chef. I’ll be honest — I ate half the batch before anyone else got to try it, and that’s a testament to how addictive these little rings of joy are. The technique I’m about to share is a game‑changer, and the ingredient twist—using melted butter instead of oil—adds a richness that ordinary donut mixes can’t match.
Okay, ready for the game‑changer? Let me walk you through every single step — by the end, you’ll wonder how you ever made donuts any other way. Picture yourself pulling these out of the oven, the whole kitchen smelling incredible, and the anticipation building as you drizzle chocolate frosting that shimmers like a sunrise. Stay with me here — this is worth it.
What Makes This Version Stand Out
- Flavor Explosion: The combination of chocolate frosting and colorful sprinkles creates a taste that’s both nostalgic and modern, hitting sweet, creamy, and crunchy notes all at once.
- Texture Harmony: A light, airy crumb inside contrasts with a slightly crisp exterior, delivering that perfect bite‑balance you crave in a donut.
- Simplicity at Its Core: Only seven pantry staples are needed, meaning you can whip up a batch in under an hour without hunting for obscure ingredients.
- Unique Ingredient Twist: Using melted butter instead of oil infuses the dough with a buttery depth that most cake‑mix donuts lack.
- Crowd‑Pleaser Factor: The bright sprinkles and glossy frosting turn these donuts into instant Instagram stars, guaranteeing compliments at any gathering.
- Ingredient Quality: A quality cake mix provides the perfect balance of leavening and sweetness, eliminating the need for extra baking powder.
- Versatile Cooking Method: Whether you bake in a donut pan or fry in oil, the batter behaves predictably, giving you flexibility based on your kitchen setup.
- Make‑Ahead Magic: These donuts freeze beautifully, and a quick reheat restores that fresh‑out‑the‑oven feel.
Inside the Ingredient List
The Flavor Base
The star of this recipe is the 1 box Cake Mix. It’s the foundation that provides the right amount of sweetness, leavening, and structure. Skipping it means you’ll lose the tender crumb that makes these donuts feel like a cloud. If you’re gluten‑free, look for a blend that mimics all‑purpose flour and includes xanthan gum for elasticity.
The Texture Crew
1 large Egg acts as the binder, creating a cohesive dough that holds together during baking. Without the egg, the batter would spread too thin and the donuts would become flat pancakes. For vegans, a flax‑egg (1 tbsp ground flaxseed + 3 tbsp water) works just as well, though the texture will be slightly denser.
1/4 cup Unsalted Butter (melted) brings a richness that oil simply can’t deliver. The butter melts into the batter, coating gluten strands and preventing a tough crumb. If you’re out of butter, substitute with an equal amount of coconut oil for a subtle tropical note.
The Moisture Makers
1 cup Milk hydrates the dry ingredients, creating a silky batter that spreads evenly in the pan. Whole milk yields the most tender result, but 2% works fine and cuts a few calories. If you’re dairy‑free, almond or oat milk will keep the flavor light and the texture airy.
1 cup Chocolate Frosting is the finishing touch, providing that glossy, indulgent coat. Use a high‑quality frosting that’s not too stiff; otherwise, it will crack when you spread it. For a healthier spin, try a dark chocolate ganache made with a splash of heavy cream.
The Final Flourish
1/2 cup Confectioners Sugar is dusted onto the frosting, adding a subtle sparkle and a melt‑in‑your‑mouth sweetness that complements the chocolate. Skipping this step makes the donuts feel a bit flat; the sugar adds that final layer of decadence. If you prefer a less sweet finish, reduce to a third cup.
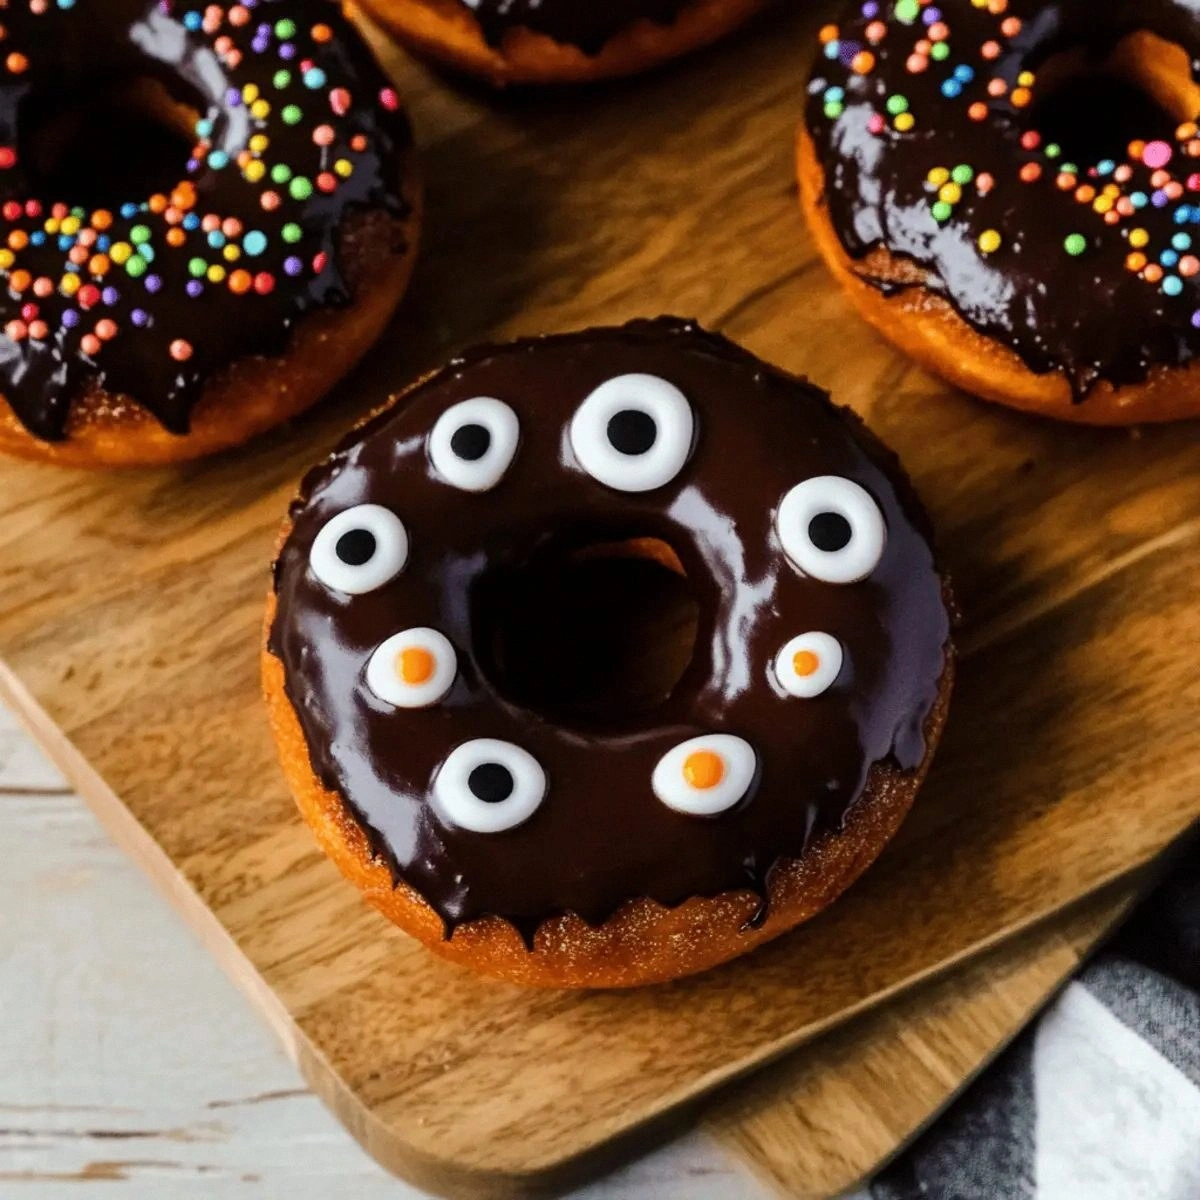
1 cup Assorted Fun Sprinkles bring visual excitement and a playful crunch. They’re the party‑starter that makes every bite feel celebratory. For a more sophisticated look, use pastel non‑pareve sprinkles or toasted coconut flakes.
Everything's prepped? Good. Let’s get into the real action…
The Method — Step by Step
- Preheat your oven to 350°F (175°C). While the oven warms up, grease a standard 12‑cup donut pan with a light coating of butter or non‑stick spray. This step ensures the donuts release cleanly, and the butter adds a subtle flavor to the crust. Pro tip: if you hear a faint sizzle as the batter hits the pan, you know the pan is at the perfect temperature.
- In a large mixing bowl, whisk together the 1 box Cake Mix and 1 cup Milk until smooth. The mixture will look thick but not overly stiff; think of a pancake batter that’s a touch denser. Kitchen Hack: Use a hand‑held electric mixer on low speed to avoid over‑mixing, which can make the donuts tough.
- Add the 1 large Egg, 1/4 cup melted butter, and 1 cup Chocolate Frosting to the bowl. Beat until the batter is glossy and slightly airy—this should take about 30 seconds. The frosting not only adds chocolate flavor but also contributes to a tender crumb thanks to its fat content.
- Give the batter a quick visual check: it should be thick enough to hold its shape when spooned into the pan but still pourable. This is the moment of truth—if the consistency is off, the donuts may either collapse or bake into dense cakes.Watch Out: If the batter is too runny, add an extra 2‑3 tablespoons of cake mix; if it’s too stiff, splash in a tablespoon of milk.
- Spoon the batter into the donut pan, filling each cavity about three‑quarters full. The batter will rise as it bakes, so don’t overfill. Tap the pan lightly on the counter to release any air bubbles that might cause uneven holes.
- Bake for 12‑15 minutes, or until the tops are golden and a toothpick inserted into the side (not the hole) comes out clean. You’ll know they’re done when the edges start pulling away from the pan, a subtle sign that the structure has set.
- While the donuts are cooling on a wire rack, prepare the glaze: melt an extra 2‑3 tablespoons of chocolate frosting in a microwave‑safe bowl, stirring every 15 seconds until smooth. Then, gently dip the top of each donut into the glaze, letting excess drip back into the bowl.
- Immediately sprinkle the 1 cup Assorted Fun Sprinkles over the wet glaze, ensuring an even coat before the chocolate sets. For a professional finish, rotate the donut as you sprinkle so the sprinkles land uniformly. Let the glaze set for about 5 minutes, then serve while still slightly warm for maximum melt‑in‑your‑mouth goodness.
That's it — you did it. But hold on, I've got a few more tricks that'll take this to another level…
Insider Tricks for Flawless Results
The Temperature Rule Nobody Follows
Never underestimate the power of a fully preheated oven. A cold oven will cause the batter to spread unevenly, leading to flat donuts. I once tried to bake these at a lower temperature to “save energy,” and the result was a soggy mess that clung to the pan. Always set the oven to the exact temperature and give it at least 10 minutes to stabilize before sliding the pan in.
Why Your Nose Knows Best
When the donuts are about halfway through baking, you’ll notice a sweet, buttery aroma drifting from the oven. That scent is your cue that the interior is cooking perfectly while the exterior is just beginning to caramelize. If the smell turns overly nutty or burnt, pull them out immediately; over‑baking destroys that delicate crumb.
The 5‑Minute Rest That Changes Everything
After removing the donuts from the oven, let them rest in the pan for exactly five minutes before transferring to a wire rack. This short pause allows the steam to finish the cooking process from the inside, preventing a gummy center. Skipping this step results in a slightly doughy texture that feels out of place next to the crisp glaze.
Sprinkle Strategy
For an even distribution, toss the sprinkles in a shallow bowl and roll each donut gently over the surface. This technique ensures every bite gets a burst of color and crunch, rather than a sprinkle‑heavy top and a barren bottom. I once tried sprinkling directly from the bag and ended up with a lopsided look—don’t let that happen to you.
Frosting Flexibility
If you love a richer chocolate flavor, replace the store‑bought frosting with a homemade ganache made from equal parts dark chocolate and heavy cream. The ganache sets with a glossy sheen and adds a depth that standard frosting can’t match. Just remember to let it cool slightly before dipping, or else it will slide off the donuts.
Creative Twists and Variations
This recipe is a playground. Here are some of my favorite ways to switch things up:
Berry Burst
Swap the chocolate frosting for a vanilla glaze and fold in ¼ cup fresh raspberries into the batter. The berries burst during baking, leaving pink speckles that add a subtle tartness, perfect for spring brunches.
Matcha Madness
Replace 1 cup of milk with matcha‑infused milk (mix 1 tsp matcha powder into the milk). Top with white chocolate frosting and sprinkle toasted coconut for an elegant, green‑hued treat that’s as Instagram‑ready as it is tasty.
Cinnamon Sugar Classic
Omit the chocolate frosting entirely. After baking, brush each donut with melted butter and toss in a mixture of cinnamon and granulated sugar. This nod to the classic fried donut brings a warm, comforting flavor profile.
Nutty Crunch
Stir ¼ cup finely chopped toasted almonds into the batter before filling the pan. Finish with a drizzle of caramel sauce and a sprinkle of sea salt for a sweet‑and‑salty experience that feels indulgent.
Vegan Velvet
Use a vegan cake mix, replace the egg with a flax‑egg, swap butter for coconut oil, and choose a dairy‑free chocolate frosting. The result is a plant‑based donut that still delivers that melt‑in‑your‑mouth texture.
Gluten‑Free Glory
Combine a gluten‑free all‑purpose flour blend with a teaspoon of xanthan gum, then follow the same method. The texture stays light, and the donuts hold together beautifully, proving you don’t need wheat to enjoy a perfect treat.
Storing and Bringing It Back to Life
Fridge Storage
Place cooled donuts in an airtight container lined with parchment paper. They’ll stay fresh for up to three days. If the frosting has hardened, let the container sit at room temperature for 10 minutes before serving.
Freezer Friendly
Wrap each donut individually in plastic wrap, then seal them in a zip‑top freezer bag. They’ll keep for up to two months. When you’re ready to enjoy, pop them straight into the microwave for 20‑30 seconds, or reheat in a 300°F oven for 5 minutes.
Best Reheating Method
Before reheating, add a tiny splash (about a teaspoon) of water to the bottom of the container. This creates a gentle steam that revives the interior softness while keeping the glaze glossy. The result is almost as good as fresh‑out‑of‑the‑oven.