I was standing in my kitchen on a blustery December night, staring at a half‑melted block of white chocolate that had decided to cling to the bottom of my pan like a stubborn snowdrift. My roommate had dared me to create a festive treat that could survive a midnight snack raid, and I thought, “Why not turn this sticky mess into something that looks like it belongs on a Christmas tree?” The air was thick with the sweet perfume of butter melting, the faint crackle of the oven fan, and the distant jingle of a neighbour’s holiday lights. I could hear the faint pop of the puffed rice as it hit the hot pan, and my fingertips tingled from the heat, promising a crunchy, buttery bite that would melt in the mouth like a snowflake on a warm tongue. By the time the first batch cooled, I was already dreaming of a version that would out‑shine every store‑bought version I’d ever tried.
Fast forward to today: this muffin pan version of White Christmas Crackles is the result of a dozen trial runs, a handful of kitchen disasters, and a whole lot of tasting (I’ll be honest — I ate half the batch before anyone else got a chance). The secret? A silky blend of sweetened condensed milk and white chocolate that coats each puffed rice piece like a winter coat, while the pistachios add a pop of green that looks like tiny evergreen trees. The raspberry lollies explode with a burst of tartness that cuts through the richness, making every bite feel like a fireworks show on New Year’s Eve. Most recipes get this completely wrong by over‑sweetening or using cheap chocolate that turns grainy; this one uses quality white chocolate and a precise melt technique that guarantees a smooth, glossy finish every single time.
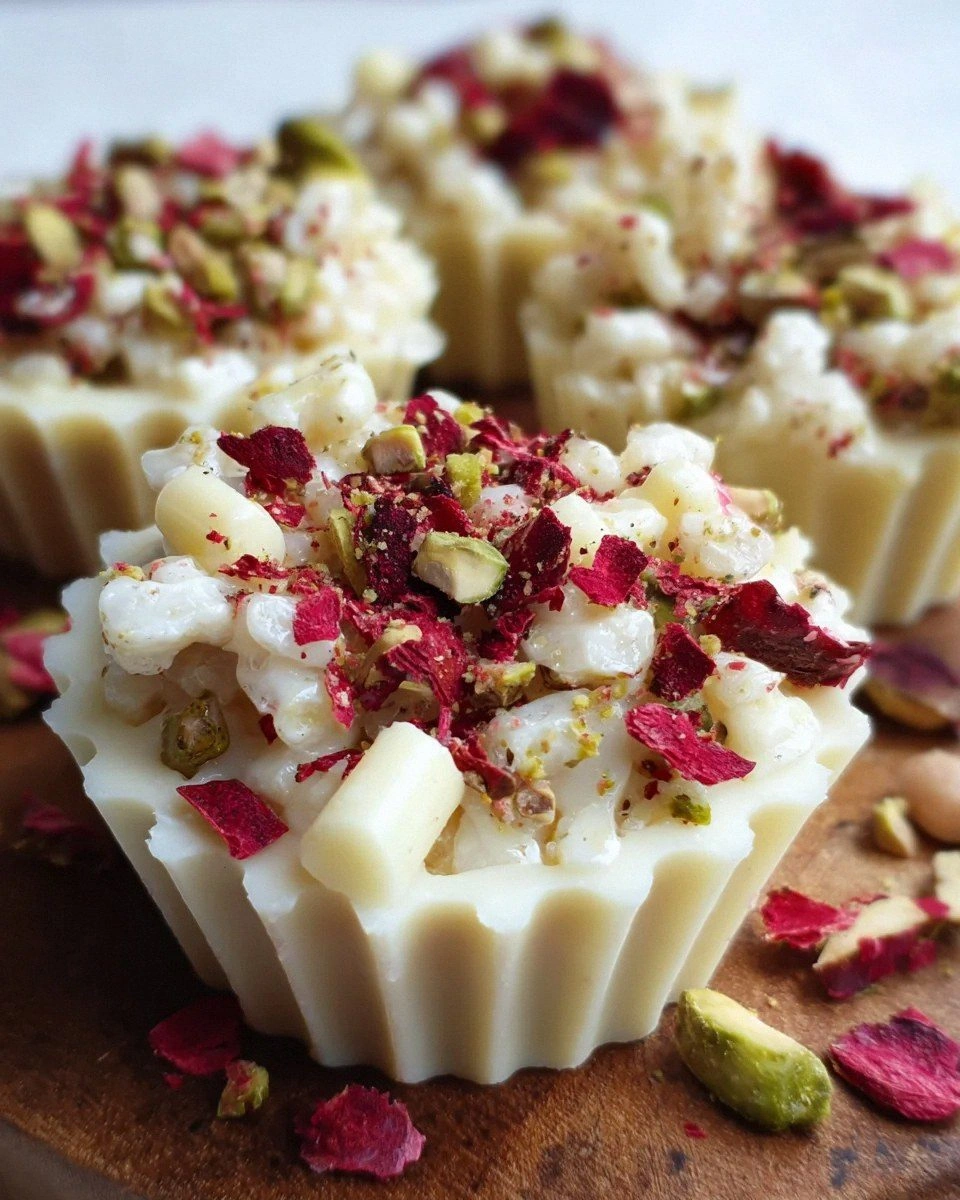
What really sets this version apart is the way the ingredients work together in perfect harmony. The combination of condensed milk and butter creates a glossy, caramel‑kissed base that binds the cereal, coconut, and nuts without turning gummy. The addition of a splash of vegetable oil keeps the mixture pliable, so it spreads easily into the muffin pan and sets with a satisfying snap. And let’s not forget the visual drama — the red raspberry lollies peek through the white snow, while the pistachio speckles add a festive contrast that makes these crackles look like miniature holiday ornaments. I dare you to taste this and not go back for seconds; the texture, the flavor, the sheer joy of eating them will have you reaching for the pan again and again.
Okay, ready for the game‑changer? I’m about to walk you through every single step — from selecting the perfect white chocolate to mastering the art of the perfect pop‑and‑crackle texture. By the end, you’ll wonder how you ever made any other version of Christmas crackles, and you’ll have a batch that looks as good as it tastes, ready to impress anyone from picky kids to sophisticated dessert lovers. Let’s dive in and turn your kitchen into a winter wonderland of sweet, crunchy delight.
What Makes This Version Stand Out
- Flavor Explosion: The sweetened condensed milk and white chocolate create a buttery, caramel‑like richness that coats every bite, while the raspberry lollies add a bright, tangy pop that cuts through the sweetness.
- Texture Symphony: Puffed rice delivers an airy crunch, pistachios add a buttery nutty snap, and desiccated coconut contributes a chewy chew that keeps the mouth busy.
- Simplicity Meets Elegance: With just a handful of pantry staples and a muffin pan, you can achieve a professional‑grade festive treat without any fancy equipment.
- Visual Wow Factor: The contrast of white chocolate, red lollies, and green pistachios makes these crackles look like tiny, edible Christmas ornaments.
- Crowd‑Pleaser: Even the most discerning sweet tooth will be wowed; they’re perfect for parties, cookie swaps, or a cozy night in front of the fire.
- Ingredient Quality: Using premium white chocolate and real butter ensures a silky texture that cheap substitutes simply can’t match.
- Make‑Ahead Magic: Store them in an airtight container and they stay crisp for up to a week, making them ideal for last‑minute holiday gatherings.
- Customizable Base: Swap the puffed rice for cornflakes, or the pistachios for almonds — the recipe adapts without losing its core charm.
Inside the Ingredient List
The Flavor Base
Sweetened condensed milk is the hidden hero here, providing a luscious creaminess that binds everything together while adding a subtle caramel note. If you skip it, the mixture will be dry and crumbly, lacking that velvety mouthfeel. You can substitute with evaporated milk plus a touch of sugar, but the texture won’t be as indulgent. When shopping, look for a can that’s thick and glossy — that’s a sign of high quality.
Butter, unsalted and chopped, brings richness and depth, amplifying the chocolate’s flavor without overwhelming it. Using salted butter can throw off the balance, making the crackles taste oddly salty. If you’re dairy‑free, try a plant‑based butter, but expect a slight change in flavor profile.
The Texture Crew
White chocolate is the star of the show; its smooth melt is what gives the crackles their glossy finish. Opt for a brand with at least 30% cocoa butter for a melt that’s truly buttery and not waxy. Skipping quality chocolate will result in a grainy texture that feels like chewing on sugar crystals.
Puffed rice cereal offers a light, airy crunch that shatters like fresh snow underfoot. If you prefer a heartier bite, try puffed quinoa or cornflakes, but keep the volume the same to maintain the delicate structure.
Desiccated coconut adds a chewy, tropical whisper that brightens the overall flavor. Coconut can be swapped for toasted almond slivers if you want a nuttier profile, but remember it will change the visual contrast.
The Unexpected Star
Red raspberry lollies bring a burst of fruity acidity that cuts through the richness, preventing the crackles from feeling cloying. If you can’t find raspberry lollies, any fruit‑flavored hard candy will do, though the color won’t be as festive. These little gems also melt slightly, creating pockets of bright pink that look stunning against the white backdrop.
Pistachios, chopped finely, provide a nutty crunch and a splash of green that evokes holiday foliage. They also add a subtle buttery note that complements the white chocolate. If you have a nut allergy, try toasted pumpkin seeds for a similar crunch and color.
The Final Flourish
Vegetable oil is blended with the melted white chocolate to keep the mixture fluid enough to coat every piece evenly. Coconut oil works as a fun twist, adding a faint coconut aroma that pairs nicely with the desiccated coconut. Finally, the decoration — extra finely chopped raspberry lollies and pistachios — is sprinkled on top for that extra festive sparkle that makes these crackles look like they belong on a holiday platter.
Everything's prepped? Good. Let's get into the real action…
The Method — Step by Step
Preheat your oven to 350°F (175°C) and line a standard 12‑cup muffin pan with parchment circles or lightly grease each cup. As the oven warms, the scent of butter will begin to fill the kitchen, a reminder that something delicious is about to happen. While you wait, gather all your ingredients within arm’s reach — this is a fast‑paced process, so you don’t want to be scrambling mid‑mix.
In a medium saucepan, melt the butter over low heat until it turns a golden, nutty brown, releasing a toasty aroma that signals it’s ready. Add the sweetened condensed milk, stirring constantly to combine into a smooth, glossy mixture. Once blended, remove the pan from heat and set aside while you melt the white chocolate.
Kitchen Hack: Use a heat‑proof silicone spatula to stir; its flexibility prevents air bubbles and keeps the mixture silky.Place the white chocolate in a heat‑proof bowl over a pot of simmering water (double boiler) and melt it gently, stirring until completely smooth. Once melted, drizzle in the vegetable oil, which will give the chocolate a glossy sheen and a slightly softer set. Pour the melted chocolate into the butter‑condensed milk blend, whisking vigorously until the two merge into a uniform, glossy sauce.
Transfer the warm chocolate‑butter mixture into a large mixing bowl. Quickly fold in the puffed rice cereal, desiccated coconut, and chopped pistachios, ensuring every puff is coated. The mixture should look like a snow‑covered landscape, with each piece glistening as if dusted with frost.
Now for the fun part: gently fold in the red raspberry lollies, breaking them into bite‑size shards that will create bright pink pockets throughout the white base. Watch Out: If the mixture starts to cool too quickly, the chocolate can seize, turning grainy. Keep the bowl over a warm water bath for a minute or two if you notice it thickening too fast.
Watch Out: Over‑mixing after adding the lollies can cause them to melt completely, losing the visual pop. Fold just until they’re evenly distributed.Spoon the mixture into the prepared muffin pan, pressing each cup down lightly with the back of a spoon to create a compact, even layer. The tops should be smooth, with a slight dome that will crisp up nicely in the oven. Sprinkle the extra finely chopped raspberry lollies and pistachios on top for that final festive sparkle.
Kitchen Hack: Use the back of a metal spoon to level the tops; this creates a uniform surface that browns evenly.Slide the pan into the preheated oven and bake for 12‑15 minutes, or until the edges turn a light golden brown and the tops start to set with a faint crackle sound. The aroma at this stage is intoxicating — a blend of toasted butter, sweet chocolate, and faint fruit notes that will have your whole house humming with anticipation.
Remove the pan from the oven and let the crackles cool in the pan for 5 minutes; this allows them to firm up without becoming too hard. Then, carefully run a butter‑flavored knife around each cup to release the crackles onto a cooling rack. As they cool, you’ll hear a gentle snap that tells you they’re perfectly set.
Once completely cooled, arrange the crackles on a serving platter. The contrast of white, pink, and green makes them look like a miniature holiday forest, ready to be devoured. Serve immediately or store in an airtight container; they’ll stay crisp for days, but I dare you to wait — they’re that addictive.
That's it — you did it. But hold on, I've got a few more tricks that'll take this to another level, ensuring every bite is as unforgettable as the first.
Insider Tricks for Flawless Results
The Temperature Rule Nobody Follows
Never melt white chocolate directly over high heat; even a brief flash of too‑hot steam can cause the cocoa butter to separate, resulting in a grainy texture. Keep the water just barely simmering and stir constantly. If you notice any specks of unmelted chocolate, remove the bowl from the heat for a few seconds and keep stirring — the residual heat will finish the job without scorching.
Why Your Nose Knows Best
Your sense of smell is the most reliable indicator of when the butter‑condensed milk mixture is ready. When it starts to smell nutty and caramel‑like, you’re at the perfect point to add the chocolate. If you rely solely on a timer, you might end up with a mixture that’s too thick or too runny, both of which affect the final crunch.
The 5‑Minute Rest That Changes Everything
After you combine the chocolate mixture with the dry ingredients, let the bowl sit for five minutes before spooning into the pan. This short rest allows the puffed rice to absorb a tiny amount of moisture, creating a slightly softer interior that contrasts beautifully with the crisp exterior. Skipping this step can lead to a uniformly crunchy bite that feels a bit one‑dimensional.
The “Cool‑Then‑Reheat” Trick
If you’ve made these ahead of time and they’ve lost a bit of their snap, pop them in a 300°F (150°C) oven for three minutes. The gentle heat revives the outer crust without melting the chocolate, restoring that satisfying snap. Add a splash of water to the pan’s bottom to create steam, which helps the interior stay moist.
The Secret of the Perfect Pan
A silicone muffin pan yields the most uniform release and prevents sticking, but if you only have a metal pan, line each cup with a small circle of parchment. This ensures the crackles lift cleanly and retain their perfect dome shape.
Creative Twists and Variations
This recipe is a playground. Here are some of my favorite ways to switch things up:
Chocolate‑Mint Snowballs
Swap the raspberry lollies for crushed peppermint candies and add a few drops of mint extract to the chocolate melt. The result is a refreshing, mint‑kissed crackle that feels like a winter breeze.
Coconut‑Caramel Dream
Replace the white chocolate with caramel‑flavored white chocolate and double the desiccated coconut. This creates a tropical twist that still feels festive, with a deep caramel undertone.
Nutty Berry Burst
Add a handful of dried cranberries and substitute pistachios with toasted hazelnuts. The tart cranberries complement the sweet base, while hazelnuts add a richer nutty flavor.
Vegan Velvet
Use coconut oil instead of vegetable oil, dairy‑free butter, and a plant‑based sweetened condensed milk (available in most health food stores). The texture remains luscious, and the flavor gets a subtle coconut hint.
Spiced Holiday Crunch
Stir in a pinch of ground cinnamon, nutmeg, and a dash of clove into the chocolate melt. The warm spices add depth, turning these crackles into a cozy, aromatic treat perfect for cold evenings.
Storing and Bringing It Back to Life
Fridge Storage
Place the cooled crackles in an airtight container lined with a paper towel to absorb excess moisture. They’ll stay crisp for up to five days in the refrigerator. If you notice any soft spots, give them a quick 2‑minute blast in a 300°F oven to restore the snap.
Freezer Friendly
Stack the crackles between layers of parchment and seal them in a zip‑top freezer bag. They freeze beautifully for up to three months. When you’re ready to enjoy them, let them thaw at room temperature for 15 minutes, then pop them in a low‑heat oven for a minute to regain their crunch.
Best Reheating Method
Preheat your oven to 300°F (150°C). Arrange the crackles on a baking sheet and add a tiny splash of water (about a teaspoon) to the pan’s bottom — the steam revives the interior without melting the chocolate. Heat for 3‑4 minutes, then let cool on a wire rack. The result is a crackle that tastes fresh‑out‑of‑the‑oven, even if it’s been stored for days.