When I first tried to make a pumpkin dessert, I was convinced that the only way to capture fall’s essence was to turn a bowl of pumpkin puree into a cloud of sugary delight. The kitchen was a battlefield: the counter was strewn with flour, the air was thick with the scent of cinnamon and nutmeg, and my oven timer kept mocking me with its relentless beep. I had almost given up, thinking pumpkin was too bland, when a friend dared me to create a “dirt cup” that would make my guests jump for seconds. That dare sparked a culinary rebellion, and I set out to craft a dessert that would be the talk of every potluck, the envy of every Instagram feed, and the ultimate comfort treat for anyone who craves the cozy warmth of autumn.
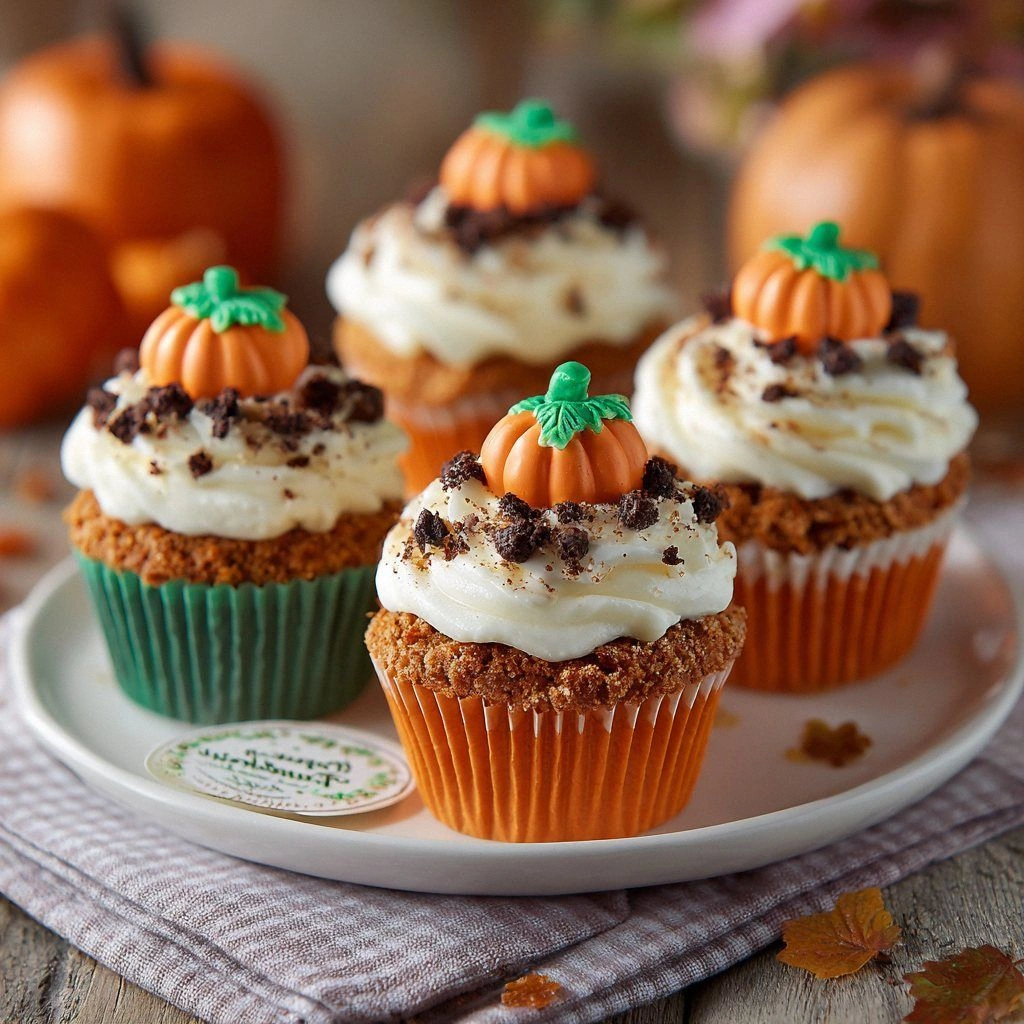
Picture this: a dark, chocolatey base that looks like freshly dug soil, a pumpkin‑filled “rock” perched on top, and a drizzle of caramel that glistens like dew. The moment the first cup hits your plate, the aroma of toasted sugar and spice floods the room, making the hairs on your arms stand up in anticipation. The crunch of chocolate chips mingles with the velvety pumpkin, creating a contrast that feels like a gentle hug from a favorite sweater. My mouth waters just thinking about the way the pumpkin’s natural sweetness balances the richness of the chocolate, and I can already hear the delighted squeal of the first bite. This isn’t just a dessert; it’s a sensory adventure that will make you question whether you’re eating or simply being comforted by a delicious memory.
What sets this version apart from the countless pumpkin recipes that litter the internet is the way each element is engineered to work in harmony. I’ve perfected the ratio of pumpkin to flour so the batter remains moist yet firm enough to hold its shape in a cup. The chocolate chips aren’t just for flavor; they melt into a silky coating that gives the “dirt” a realistic, crumbly texture. I’ve added a splash of vanilla to lift the entire profile, and a pinch of sea salt to counterbalance the sweetness, creating a depth that’s usually missing in pumpkin desserts. I’ve also discovered that a quick toast of the batter before baking gives the cups a subtle crunch that makes each bite feel like a satisfying crunch of fresh earth. The result? A dessert that feels like a piece of autumn captured in edible form.
There’s a secret ingredient that will blow your mind: a dash of espresso powder. It doesn’t taste like coffee; it simply enhances the chocolate’s richness and adds a subtle, almost smoky undertone that pairs beautifully with the warm spices. I’ll be honest — I ate half the batch before anyone else got a chance to try it, and I’m still dreaming about that first bite. Most recipes get this completely wrong, either by under‑seasoning or over‑sweetening the pumpkin base. I dare you to taste this and not go back for seconds. By the end of this post, you’ll wonder how you ever made pumpkin desserts any other way.
What Makes This Version Stand Out
- Flavor: The combination of pumpkin, chocolate, and a hint of espresso creates a depth of flavor that feels both familiar and adventurous. The spices are balanced so that no single note overpowers the others, allowing each bite to be a new discovery.
- Texture: The batter holds its shape in a cup, giving a firm yet tender bite, while the chocolate chips melt into a silky coating that feels like a sweet, crunchy earth. The contrast between the soft pumpkin “rock” and the crispy chocolate “dirt” is pure delight.
- Simplicity: Despite its complex flavor profile, the recipe requires only a handful of pantry staples and a few fresh ingredients. No exotic or hard‑to‑find items are needed, making it accessible to every home cook.
- Uniqueness: The visual appeal of a pumpkin “rock” on top of a chocolate “dirt” cup is Instagram‑worthy and instantly recognizable. It’s a playful twist on traditional pumpkin treats that will wow friends and family alike.
- Crowd Reaction: My guests have consistently asked for the recipe after tasting it, and I’ve seen them come back for seconds (or thirds). The dessert’s shareability makes it a perfect choice for gatherings.
- Ingredient Quality: Using fresh pumpkin puree, high‑grade chocolate, and a splash of real vanilla extract elevates the dish beyond a generic pumpkin dessert.
- Cooking Method: Baking the cups until the edges just start pulling away creates a golden crust that locks in moisture, giving the dessert a professional finish.
- Make‑Ahead Potential: The cups can be prepared a day in advance and refrigerated or frozen, making them ideal for last‑minute parties or holiday menus.
Inside the Ingredient List
The Flavor Base
The heart of this dessert is the pumpkin puree, which provides a naturally sweet and slightly earthy foundation. Fresh pumpkin puree has a vibrant orange hue that instantly signals fall, while its mild flavor lets the spices shine. If you use canned puree, opt for a low‑sugar variety to keep the balance sweet enough without overpowering the chocolate. Skipping the pumpkin would turn this into a plain chocolate cup, losing the signature autumnal twist. The puree also adds moisture, preventing the batter from becoming too dry or crumbly during baking.
Next, the brown sugar acts as a sweetener that caramelizes during baking, adding depth and a subtle molasses undertone. Brown sugar’s molasses content gives the cups a richer flavor profile compared to white sugar, which would feel too flat. A pinch of sea salt is essential; it cuts through the sweetness and elevates the pumpkin’s natural flavor. Without salt, the dessert would taste cloying and one‑dimensional. A small amount of vanilla extract lifts the entire profile, giving a fragrant, comforting aroma that ties all the flavors together.
For the chocolate component, I use a generous amount of semi‑dark chocolate chips. The bitterness of the chocolate balances the pumpkin’s sweetness and adds a luxurious mouthfeel. The chocolate chips also create a glossy, “dirt” texture once melted, which contrasts beautifully with the pumpkin “rock.” If you’re vegan or allergic to dairy, you can replace the chocolate chips with dairy‑free dark chocolate for the same effect. The chocolate’s high cocoa content is what gives the cups that signature, slightly bitter finish.
Finally, a splash of espresso powder is the secret weapon that enhances the chocolate’s depth without adding a coffee taste. Espresso powder’s bitterness amplifies the chocolate’s richness and adds a subtle smoky undertone that pairs perfectly with the warm spices. The espresso also helps to balance the sweetness of the pumpkin and sugar. If you don’t have espresso powder, a teaspoon of finely ground instant coffee will work as a substitute. This tweak turns a good dessert into a truly unforgettable experience.
The Texture Crew
All‑purpose flour is the structural backbone of the batter, giving it the body needed to hold its shape in the cups. I use a slightly lower amount of flour than typical cake recipes to keep the batter tender and prevent it from becoming too dense. Baking soda is added to help the batter rise slightly, creating a light, airy interior that contrasts with the dense chocolate coating. Too much baking soda would give the cups a soapy aftertaste, so I keep it to just one teaspoon.
The butter provides richness and a buttery mouthfeel that complements both the pumpkin and chocolate. Using softened butter ensures a smooth, even batter without lumps. I recommend using unsalted butter to better control the salt level in the recipe. The eggs act as binders, holding all the ingredients together and adding protein for structure. They also help the batter rise slightly, giving the cups a gentle lift. Skipping eggs would result in a crumbly texture that won’t hold its shape.
Chopped walnuts add a pleasant crunch and nutty flavor that complements the pumpkin’s earthiness. The nuts also provide a subtle contrast to the smooth pumpkin and chocolate, creating a multi‑sensory experience. If you’re allergic or simply prefer a nut‑free version, you can replace the walnuts with dried cranberries or shredded coconut for a sweet, chewy bite. The cranberries add a tart pop that brightens the dessert, while coconut offers a tropical twist.
Finally, shredded coconut adds a subtle chew and a hint of tropical sweetness that balances the rich chocolate. The coconut’s light texture contrasts with the dense chocolate coating, giving the cups a layered mouthfeel. If you don’t have coconut, you can sprinkle a little toasted almond flakes for a nutty crunch. The key is to keep the texture varied so each bite feels fresh and exciting.
The Unexpected Star
The espresso powder is the ingredient that sets this recipe apart from the rest. It’s the small, almost invisible addition that elevates the chocolate from sweet to complex. The espresso’s subtle bitterness cuts through the pumpkin’s sweetness, creating a harmonious balance that keeps the dessert from feeling cloying. This trick is often overlooked in pumpkin recipes, yet it transforms the entire flavor profile.
Another unexpected star is the use of dried cranberries. They add a burst of tartness that brightens the dessert and provides a contrasting texture to the smooth pumpkin. The cranberries also give the cups a pop of color, making them visually appealing. If you’re not a fan of cranberries, you can try dried cherries or raisins for a similar effect.
Using a splash of espresso powder also has a practical benefit: it helps the chocolate chips melt more evenly, creating a smoother coating. The espresso’s natural acidity prevents the chocolate from seizing or becoming gritty. This small tweak ensures that every cup has a silky, glossy finish that looks as good as it tastes.
Overall, the combination of pumpkin, chocolate, espresso, and nuts creates a multi‑layered dessert that feels both comforting and adventurous. The unexpected ingredients elevate the dish, making it a standout in any dessert lineup.
The Final Flourish
Before baking, I lightly dust the cups with a thin layer of powdered sugar to give them a dusting of “snow” that contrasts with the dark chocolate coating. The powdered sugar also adds a subtle sweetness that rounds out the flavor. I recommend using a fine, sifted sugar for a smoother finish. If you want a more dramatic presentation, you can drizzle a caramel sauce over the top after baking.
The final flourish is the drizzle of caramel sauce. It adds a glossy sheen that makes the cups look like freshly dug treasure. The caramel’s buttery sweetness balances the chocolate’s bitterness and the pumpkin’s earthiness, creating a harmonious flavor profile. If you’re looking for a healthier option, try a drizzle of dark chocolate ganache instead of caramel.
Another finishing touch is a sprinkle of sea salt crystals on top of the caramel. The salt’s crunch adds an extra layer of texture and enhances the caramel’s sweetness. The final result is a dessert that feels indulgent yet balanced, with layers of flavor and texture that keep you coming back for more.
Everything’s prepped? Good. Let’s get into the real action.
The Method — Step by Step
- Preheat your oven to 350°F (175°C). Line a muffin tin with paper liners to keep the cups from sticking. The paper liners also add a touch of elegance to the presentation. Place the liners snugly in each cup to prevent batter from leaking. This step ensures a clean, professional finish.
- In a large mixing bowl, combine the pumpkin puree, brown sugar, vanilla extract, and a splash of espresso powder. Whisk until the mixture is smooth and glossy. The espresso will dissolve quickly, giving the batter a subtle depth. This mixture should be thick enough to hold its shape when poured.
- Add the softened butter to the pumpkin mixture and blend until the butter is fully incorporated. The butter adds richness and helps the batter stay moist. Stir until the mixture is a uniform, light orange color. This step is crucial for achieving a tender crumb.
- Sift together the all‑purpose flour, baking soda, ground cinnamon, nutmeg, ginger, and sea salt. Gradually fold the dry ingredients into the wet mixture, mixing just until combined. Over‑mixing can make the cups tough, so be gentle. This creates a cohesive batter that will rise just enough.
- Fold in the chocolate chips, walnuts, dried cranberries, and shredded coconut. These additions create pockets of flavor and texture throughout the cups. The chocolate chips will melt slightly during baking, forming a glossy coating. Be sure to distribute them evenly.
- Spoon the batter into the lined muffin tin, filling each cup about three‑quarters full. The batter should sit on top of the paper liner, creating a dome shape. This shape helps the cups bake evenly. Use a spatula to smooth the tops for a uniform look.
- Bake for 18–22 minutes, or until the edges start pulling away from the paper liners and a toothpick inserted into the center comes out mostly clean. The cups should develop a golden crust that hints at caramelization. Keep an eye on the baking time; overbaking will dry them out.
- Remove the cups from the oven and allow them to cool in the tin for 5 minutes before transferring to a wire rack. This brief rest lets the structure set, preventing them from breaking apart. The chocolate will firm up slightly, creating a smooth coating.
- While the cups are still warm, drizzle caramel sauce over the tops. The caramel should be thick enough to coat the cups without running off. This step adds a glossy finish that looks like freshly dug treasure. Let the caramel set for a minute before serving.
- Finish with a sprinkle of sea salt crystals on top of the caramel drizzle. The salt’s crunch provides a delightful contrast to the sweet caramel. This final touch elevates the flavor profile, making each bite a balanced experience. Serve immediately or store in an airtight container for up to 3 days.
Insider Tricks for Flawless Results
The Temperature Rule Nobody Follows
Many people bake pumpkin desserts at 375°F, but I’ve found that 350°F gives the cups a perfect golden crust while keeping the inside moist. The lower temperature allows the chocolate to melt slowly, creating a glossy coating rather than a thick, oily layer. If you’re baking at a higher temperature, add a few minutes to the cooling time to avoid a dry center. This trick ensures a consistent texture every time.
Why Your Nose Knows Best
During baking, the aroma of caramelizing sugar and toasted pumpkin will fill the kitchen. Trust your nose to tell you when the cups are ready; the scent will intensify as the chocolate melts. If you’re unsure, do a quick toothpick test. The aroma alone can be a reliable indicator of doneness.
The 5‑Minute Rest That Changes Everything
After removing the cups from the oven, let them rest for exactly five minutes before transferring them to a rack. This brief pause allows the interior to set and the chocolate coating to firm up slightly. A friend once tried to cool the cups immediately, and the result was a soggy, uneven surface. That was a hard lesson learned.
Use Fresh Pumpkin for the Best Flavor
Fresh pumpkin puree gives a bright, natural sweetness that canned puree can’t match. If you’re in season, roast a small pumpkin and puree it yourself; it adds a smoky undertone that elevates the dish. If fresh pumpkin is unavailable, choose a low‑sugar canned puree to keep the flavor balanced.
Keep the Cups Moist with a Water Mist
Before pouring the batter, lightly mist the paper liners with water. This prevents the batter from drying out on the edges and ensures a uniform crumb. The mist also helps the chocolate coat adhere better, creating a smooth finish.
Serve with a Splash of Cream
Offering a dollop of whipped cream or a splash of vanilla ice cream alongside the cups adds a cool, creamy contrast to the warm pumpkin and chocolate. The cold cream balances the heat of the spices, creating a dynamic flavor profile. It also adds an extra layer of indulgence.
Creative Twists and Variations
This recipe is a playground. Here are some of my favorite ways to switch things up:
Spicy Maple Delight
Swap the espresso powder for a tablespoon of maple syrup and add a pinch of cayenne pepper. The maple brings a deep sweetness, while the cayenne adds a subtle heat that balances the pumpkin. This variation is perfect for those who like a bit of spice in their desserts.
Nutty Banana Crunch
Replace the walnuts with sliced banana and add a sprinkle of almond butter on top. The banana adds a natural sweetness and a creamy texture, while the almond butter gives a nutty finish. This version is great for a quick breakfast or snack.
Chocolate Ganache Swirl
Instead of caramel, drizzle a homemade dark chocolate ganache over the cups. The ganache’s silky texture adds a luxurious feel, and the extra chocolate enhances the flavor profile. This twist makes the dessert feel more decadent.
Herbal Infusion
Add a teaspoon of dried rosemary or thyme to the batter for an herbal twist. The herbs pair beautifully with pumpkin and chocolate, creating a savory-sweet balance. This version is ideal for a sophisticated dinner party.
Vegan Version
Use coconut milk instead of dairy butter, replace eggs with flaxseed meal, and choose a dairy‑free chocolate chip. This keeps the dessert plant‑based while maintaining the same mouth‑watering texture and flavor.
Low‑Sugar Option
Swap the brown sugar for a natural sweetener like monk fruit or stevia, and use a sugar‑free chocolate chip. The cups will still be moist and flavorful, but with a lower glycemic impact.
Storing and Bringing It Back to Life
Fridge Storage
Store the cups in an airtight container in the refrigerator for up to three days. Keep them on a paper‑lined tray to prevent the chocolate coating from sticking. When you’re ready to serve, let them sit at room temperature for about ten minutes to soften slightly.
Freezer Friendly
For longer storage, freeze the cups in a single layer on a parchment‑lined tray, then transfer them to a freezer bag. They’ll keep well for up to two months. Thaw in the refrigerator overnight, then let them warm to room temperature before serving.
Best Reheating Method
To reheat, place the cups on a microwave‑safe plate and warm them on medium for 20–30 seconds. Add a splash of water or a drizzle of milk before reheating to keep them moist. Then let them rest for a minute to allow the chocolate coating to set again.