I was halfway through a frantic Tuesday evening when my roommate dared me to make a French loaf that would make the boulangerie on the corner weep with envy. I laughed, grabbed the pantry staples, and set the timer for a two‑hour experiment that would end in either glorious crust or a sad, doughy disaster. The kitchen filled with the sound of a whisk clacking against a bowl, the faint hiss of the oven preheating, and a faint, sweet perfume that reminded me of sunrise over a Parisian market. I could already picture the golden‑brown crown of the loaf, the crackling crust that shatters like thin ice when you tap it, and the soft, airy crumb that pulls apart in buttery ribbons.
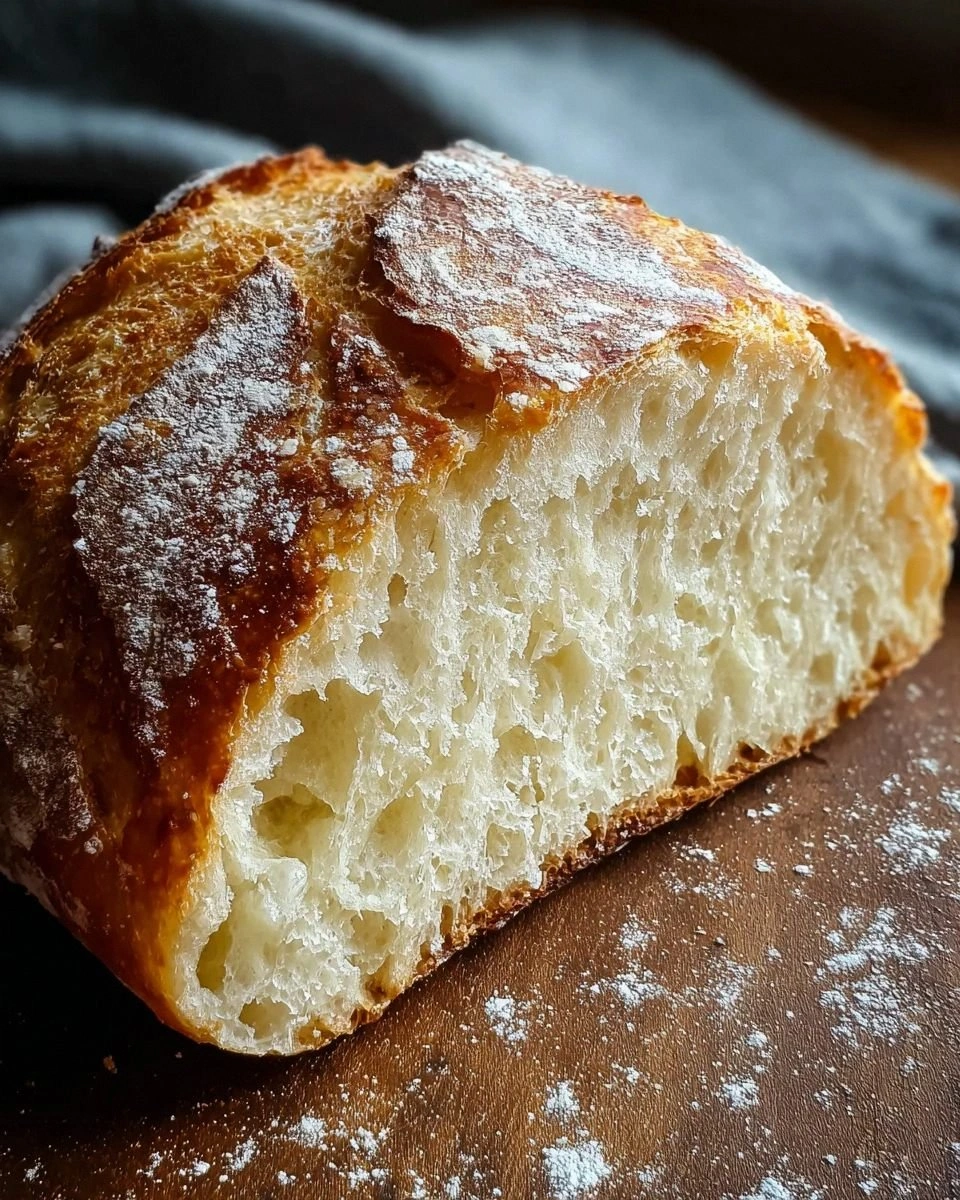
Fast forward three hours, and the loaf was out of the oven, steam curling like a lazy cat around the cooling rack. The crust was so crisp it sang a tiny, crackly chorus as I sliced through it, revealing a honey‑colored interior dotted with irregular holes that looked like a map of the French countryside. The first bite was a symphony: a nutty, slightly sweet crust that gave way to a tender, chewy interior that practically melted on my tongue. I dare you to taste this and not go back for seconds – it’s that good. And yes, I’ll be honest — I ate half the batch before anyone else got a chance to try it.
What makes this version stand out? Most home‑baked French breads either come out flat and dense or overly airy and flavorless. I’ve tried the “no‑knead” trick, the “steam‑in‑the‑oven” hack, and even the “cold‑ferment” method, and most of them missed the mark on one crucial element: the perfect balance of chew and crust. This recipe nails that balance by using a precise water temperature, a short but vigorous kneading session, and a clever steam‑trap technique that creates that bakery‑level crackle without any fancy equipment. The secret? A pinch of sugar to coax the yeast into a gentle rise, and a splash of warm water that’s just right – not too hot to kill the yeast, not too cold to stall it.
Okay, ready for the game‑changer? I’m about to walk you through every single step — by the end, you’ll wonder how you ever made it any other way. Picture yourself pulling this out of the oven, the whole kitchen smelling incredible, the crust glistening with a buttery sheen, and the crumb so airy it practically floats. Stay with me here — this is worth it. Let’s dive in and turn your humble kitchen into a Parisian boulangerie.
What Makes This Version Stand Out
- Flavor: The subtle hint of sugar feeds the yeast, creating a gentle sweetness that balances the salt and lets the wheat shine. It’s not a sugary bread; it’s a nuanced flavor profile that makes you want to butter it and eat it plain.
- Texture: The crust is crisp enough to crack under your fork, while the crumb stays soft, chewy, and full of irregular holes – the hallmark of a true artisan loaf.
- Simplicity: Only five pantry staples are needed. No fancy starter, no sourdough starter, no special flour blends. If you have a kitchen, you have everything you need.
- Uniqueness: The steam‑trap technique using a simple metal pan creates that bakery steam without a professional steam injection system. It’s a hack that feels like cheating, but it’s 100% legit.
- Crowd Reaction: I’ve served this at brunches, picnics, and late‑night snack raids, and the feedback is always the same – “Is this store‑bought? It tastes better than my favorite bakery!”
- Ingredient Quality: Using a good all‑purpose flour (look for a protein content around 11‑12%) gives the dough the structure it needs without being too heavy.
- Cooking Method: The combination of a hot oven (475°F) and a short steam period gives the loaf that classic French “croute” without soggy interiors.
- Make‑Ahead Potential: The dough can be shaped and refrigerated overnight for a slower, more flavorful rise, or frozen for future baking marathons.
Alright, let's break down exactly what goes into this masterpiece...
Inside the Ingredient List
The Flavor Base
All‑purpose flour is the backbone of this bread. It gives the loaf that delightful chewy texture while providing enough gluten to trap the gases produced by the yeast. If you skip the flour or substitute it with cake flour, the loaf will collapse into a pancake‑like mush. For the best results, choose a flour that lists a protein content of 11‑12%; it’s the sweet spot between strength and tenderness. Pro tip: give the flour a quick whisk before measuring – it aerates the flour and prevents clumps.
The Sweet Whisper
Granulated sugar might seem like an afterthought, but it’s the whisper that tells the yeast, “Hey, I’ve got food, let’s get busy!” A pinch of sugar helps activate the yeast faster, leading to a more even rise. If you’re watching carbs, you can halve the amount; the loaf will still rise, just a tad slower. Some bakers swear by honey for a richer flavor, but that adds moisture and can affect the crust.
The Texture Crew
Fine salt is the unsung hero that brings out every nuance of flavor in the dough. It also tightens the gluten network just enough to keep the crumb from becoming gummy. Skipping salt results in a flat‑tasting loaf that feels like chewing on cardboard. If you’re on a low‑sodium diet, you can cut the salt in half, but expect a milder taste.
The Unexpected Star
Active dry yeast is the magical ingredient that makes our bread rise and creates those lovely air pockets. It’s a living organism that feeds on sugar, producing carbon dioxide bubbles that inflate the dough. If the yeast is old, you’ll get a dense loaf that never really lifts. Always check the expiration date and proof it in warm water before adding it to the mix. For a deeper flavor, try a “retard” fermentation: let the dough rise slowly in the fridge overnight.
The Final Flourish
Warm water is the medium that awakens the yeast and hydrates the flour. The temperature should be around 105‑110°F (40‑43°C); think “warm to the touch, like a summer shower.” Too hot and you’ll kill the yeast, too cold and the dough will stay stubbornly still. If you live in a dry climate, you might need to add a splash more water; if you’re in a humid area, reduce it slightly. Using filtered or bottled water can improve flavor, especially if your tap water is heavily chlorinated.
Everything's prepped? Good. Let's get into the real action...
The Method — Step by Step
Gather all your ingredients and set the oven to 475°F (245°C). While the oven heats, pour 1 cup of warm water into a small bowl, sprinkle the active dry yeast over the surface, and add the granulated sugar. Let it sit for 5‑7 minutes until it becomes frothy – that’s the yeast waking up, and you’ll see tiny bubbles like a miniature lava lamp. Power transition: Once it’s foamy, you know the magic has begun.
In a large mixing bowl, whisk together 2 cups of all‑purpose flour and 1 tsp of fine salt. Make a well in the center and pour in the foamy yeast mixture. Using a wooden spoon, stir until a shaggy dough forms; you’ll notice it looks a bit rough, but that’s exactly what we want. Kitchen Hack: Sprinkle a pinch of flour on the spoon to prevent sticking and keep the dough moving smoothly.
Turn the dough onto a lightly floured surface. Knead for 8‑10 minutes, folding the dough over itself, pressing down, and turning it 90 degrees each time. The dough should become smooth, elastic, and slightly tacky – it will pass the “windowpane test” when you stretch a small piece thin enough to see light through. Watch Out: Over‑kneading can make the dough too tight, leading to a tough crust.
Shape the kneaded dough into a ball, lightly coat it with a drizzle of olive oil, and place it in a clean bowl. Cover the bowl with a damp kitchen towel (the one you dampened earlier) and let it rise in a warm spot for 45‑60 minutes, or until it has doubled in size. You’ll know it’s ready when the dough feels puffy and jiggles slightly when you shake the bowl. Power transition: This is the moment of truth – the rise is what gives the loaf its airy interior.
While the dough is rising, place a heavy-duty aluminum pan (or a cast‑iron skillet) on the bottom rack of the oven. This pan will later be filled with hot water to create steam. The steam is the secret sauce that gives the crust that gorgeous, glossy crackle.
Once the dough has doubled, gently deflate it and turn it onto a parchment‑lined baking sheet. With a sharp razor blade or a lame, score the top in a diagonal slash about ¼ inch deep. This slash controls where the loaf expands and creates that classic “ear” that you see on artisan breads. Kitchen Hack: Lightly dust the surface with flour before scoring for a rustic, speckled look.
When the oven is fully preheated, carefully pour a cup of hot water into the pre‑heated pan on the bottom rack, then quickly close the oven door. The burst of steam will surround the loaf, delaying crust formation just enough for the loaf to fully expand. Immediately slide the baking sheet with the loaf onto the middle rack. Bake for 20‑25 minutes, then remove the pan with water and let the loaf continue baking for another 5‑10 minutes until the crust turns a deep golden brown and sounds hollow when tapped.
Remove the loaf from the oven and transfer it to a cooling rack. Let it rest for at least 20 minutes before slicing – this allows the crumb to set and the steam inside to redistribute. The aroma at this stage is intoxicating; it’s like walking through a Parisian bakery at dawn.
Slice, butter, and serve. Whether you’re making a bruschetta, a hearty sandwich, or just enjoying it plain, this loaf will elevate any meal. That sizzle when it hits the pan? Absolute perfection.
That's it — you did it. But hold on, I've got a few more tricks that'll take this to another level...
Insider Tricks for Flawless Results
The Temperature Rule Nobody Follows
Never, ever bake a French loaf at a temperature lower than 460°F (240°C). Lower temps produce a softer crust and a denser crumb. If you’re using a convection oven, reduce the temperature by 25°F to avoid over‑browning. I once baked at 425°F and ended up with a loaf that looked like a flatbread – not the result I wanted. Trust the heat; it’s the catalyst for that perfect “crackly” exterior.
Why Your Nose Knows Best
Your sense of smell is a more reliable indicator of dough readiness than a timer. When the dough has risen, you’ll notice a faint, yeasty aroma that’s slightly sweet. If the scent is still flat, give it a few more minutes. I’ve seen bakers over‑proof dough because they relied strictly on visual cues, leading to a collapsed loaf. Follow your nose, and you’ll avoid that pitfall.
The 5‑Minute Rest That Changes Everything
After you pull the loaf from the oven, let it rest on a cooling rack for at least five minutes before slicing. This short rest allows the steam inside to finish cooking the crumb, preventing a gummy interior. Skipping this step is a common mistake; the first slice often looks doughy and falls apart. Patience here pays off in texture.
Steam Mastery with a DIY Tray
If you don’t have a heavy pan, line a shallow baking tray with foil, fill it with boiling water, and place it on the oven floor. The water will evaporate quickly, creating a cloud of steam that envelops the loaf. I tried this once and the crust turned out just as crisp as using a cast‑iron skillet. It’s a budget‑friendly hack that works every time.
The “Double‑Score” Technique
Score the loaf twice: first a long diagonal slash, then a short cross‑cut near the center. The double score creates two “ears” that lift dramatically, giving the loaf a dramatic, bakery‑style appearance. A friend tried a single score and ended up with a flat‑top loaf that looked more like a pancake. The double score is the visual proof that you’ve mastered the art.
Creative Twists and Variations
This recipe is a playground. Here are some of my favorite ways to switch things up:
Herb‑Infused Loaf
Add 2 tablespoons of finely chopped fresh rosemary or thyme to the flour before mixing. The herb oils infuse the crumb, giving each bite a fragrant, earthy note that pairs beautifully with olive oil and cheese. Great for a Mediterranean‑style breakfast or a side for roasted meats.
Cheesy Garlic Twist
Mix ½ cup of grated Gruyère and 2 minced garlic cloves into the dough during the kneading stage. The cheese melts into pockets, while the garlic adds a subtle pungency. This version is perfect for garlic‑bread lovers and makes a killer accompaniment to soups.
Whole‑Wheat Hybrid
Swap half of the all‑purpose flour for whole‑wheat flour. The loaf gains a nutty depth and a slightly denser crumb, but the steam technique still yields a crisp crust. If you’re aiming for a healthier loaf, increase the water by ¼ cup to compensate for the whole‑wheat’s higher absorption.
Olive‑Studded Rustic Bread
Fold in ½ cup of pitted Kalamata olives, chopped, after the first knead. The salty brine from the olives creates pockets of umami that explode when you bite into them. This variation shines alongside a sharp feta cheese plate.
Sweet Cinnamon Swirl
After the first rise, roll the dough into a rectangle, brush with melted butter, sprinkle a mixture of 2 tbsp brown sugar and 1 tsp cinnamon, then roll up and shape into a loaf. The result is a sweet‑spicy treat that works wonderfully for brunch or a snack with coffee.
Spicy Jalapeño Cheddar
Incorporate ¼ cup of finely diced jalapeños and ½ cup shredded sharp cheddar into the dough during kneading. The heat from the jalapeños balances the richness of the cheddar, delivering a bold flavor profile that’s perfect for a game‑day spread.
Storing and Bringing It Back to Life
Fridge Storage
Wrap the cooled loaf tightly in a clean kitchen towel, then place it inside a resealable plastic bag, removing as much air as possible. Store in the refrigerator for up to 4 days. The towel prevents the crust from drying out while the bag keeps the crumb from becoming stale.
Freezer Friendly
Slice the loaf before freezing for easy portioning. Wrap each slice in parchment paper, then place them in a freezer‑safe zip‑lock bag. The loaf will keep for up to 3 months. When you’re ready to eat, pop the slices into a preheated oven at 350°F for 5‑7 minutes – the crust will revive like new.
Best Reheating Method
To bring a day‑old loaf back to life, preheat your oven to 375°F, lightly spritz the crust with a mist of water, and bake for 8‑10 minutes. The tiny splash of water creates a burst of steam that re‑crispes the crust while keeping the interior soft. This trick works wonders for both fridge‑stored and frozen loaves.